For years, bathroom vanity paint has lacked a truly hassle-free option that’s durable and easy to use. That’s why I was excited to test the Beyond Paint All-in-One Refinishing Paint 1 Pint Nantucket. Its ability to refinish surfaces without stripping, priming, or sanding really stood out—saving me time and effort. I applied it directly on cabinets and small vanities, and the self-leveling, matte finish made everything look smooth and professional with minimal effort.
What impressed me most is how well this water-based acrylic formula covers in just two coats—one pint easily covers a small bathroom vanity. It dries quickly, is low-VOC, and is safe for indoor use on nearly any surface, from wood to laminate and even metal. For anyone wanting a weatherproof, scratchable finish that’s both durable and easy to refresh, this product truly shines. It’s a game-changer for DIY bathroom updates, and I highly recommend it for its versatility and quality.
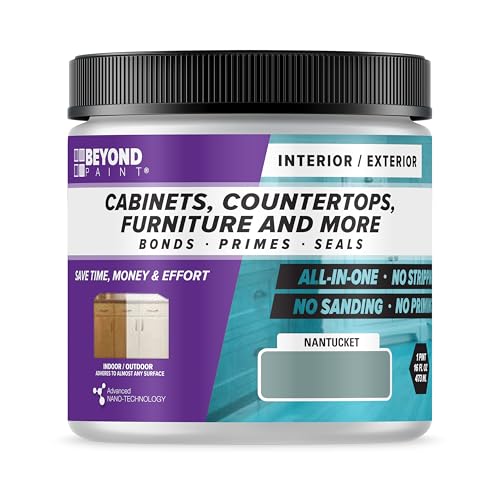
Top Recommendation: Beyond Paint All-in-One Refinishing Paint 1 Pint Nantucket
Why We Recommend It: This product excels with its all-surface formulation, which eliminates the need for stripping, priming, or sanding—saving time and effort. Its high-quality coverage in just two coats makes it ideal for small bathroom vanities. The quick-drying, low-VOC formula ensures safety and durability, and the self-leveling finish prevents roller marks. Compared to traditional paints, it offers a hassle-free, long-lasting makeover, standing out as the best choice for bathroom vanity projects.
Beyond Paint All-in-One Refinishing Paint 1 Pint Nantucket
- ✓ No priming needed
- ✓ Easy to apply
- ✓ Durable finish
- ✕ Small quantity for bigger projects
- ✕ Slightly textured finish
| Surface Compatibility | Wood, metal, plastic, laminate, tile, fabric, RV substrates, previously painted surfaces |
| Coverage | 5-7 cabinet fronts and facings per pint with 2 coats |
| Drying Time | Quick-drying (specific time not provided, inferred as within a few hours) |
| Application Method | Brush, roller, or spray |
| Finish | Matte, slightly textured |
| VOC Content | Low-VOC, environmentally friendly |
Many people assume that refinishing a bathroom vanity means hours of sanding, stripping, and priming, only to end up with uneven surfaces or streaky finishes. But after trying Beyond Paint All-in-One Refinishing Paint in Nantucket, I can tell you that this stuff completely defies that myth.
Right out of the can, it has a smooth, almost creamy consistency that spreads easily without splattering everywhere. I didn’t bother removing the cabinet doors or sanding down the surfaces, thanks to its minimal prep formula.
It self-levels beautifully, leaving a matte finish that feels sophisticated yet durable.
The best part? The coverage is impressive—one pint easily covered 5 cabinet fronts with just two coats.
I was surprised how quickly it dried, so I could get back to using my bathroom sooner than expected. Its water-based acrylic formula makes it safe to use indoors and outdoors, and I didn’t notice any strong fumes during application.
Applying the paint was straightforward, even on tricky surfaces like laminate and glazed tile. It adheres well and feels sturdy once dry, resisting scrubbing and moisture.
Plus, the low-VOC aspect gives peace of mind for indoor use, especially in a small bathroom.
Overall, Beyond Paint Nantucket delivers a professional-looking finish without the fuss of traditional refinishing. Whether you’re updating furniture or sprucing up a vanity, it’s a flexible, easy-to-use solution that really works in real-world projects.
What Are the Best Types of Paint for Bathroom Vanities?
The best types of paint for bathroom vanities are those that can withstand moisture and provide a durable finish.
- Oil-Based Paint: Oil-based paints are known for their durability and resistance to moisture, making them a strong choice for bathroom vanities. They typically provide a smooth finish and are less likely to chip or peel, but they do take longer to dry and have a strong odor during application.
- Latex Paint: Latex paints are water-based, making them easy to clean up and quick to dry. Modern formulations are often designed to be moisture-resistant, which is essential for bathroom environments, and they offer excellent color retention and flexibility.
- Chalk Paint: Chalk paint provides a matte finish that is popular for its vintage appeal and ease of application. While it generally requires a protective topcoat to enhance durability in a moisture-prone area like a bathroom, it adheres well to various surfaces and can create a unique, textured look.
- Enamel Paint: Enamel paint is highly durable and water-resistant, making it an excellent choice for bathroom vanities. It dries to a hard finish that can withstand scrubbing and cleaning, making it ideal for high-traffic areas, although it may require longer drying times compared to other paints.
- Marine-Grade Paint: Marine-grade paint is specifically formulated to withstand harsh environments, including high humidity and moisture. Originally designed for boats, its properties make it an excellent option for bathroom vanities, providing exceptional durability and resistance to mold and mildew.
What Paint Colors Work Best for Bathroom Vanities?
- Soft White: A classic choice that creates a clean, airy feel in the bathroom. Soft white reflects light beautifully, making the space appear larger and more inviting, while also matching well with various décor styles.
- Light Gray: This versatile color offers a modern touch and pairs well with both warm and cool palettes. Light gray can create a calming atmosphere, and it’s a perfect backdrop for contrasting hardware or decorative accents.
- Teal or Turquoise: Ideal for those looking to add a pop of color, teal or turquoise can bring a vibrant, refreshing vibe to the bathroom. These hues work well with white or natural wood accents, contributing to a beachy or spa-like aesthetic.
- Charcoal or Dark Gray: For a bold statement, dark gray can add sophistication and depth to the bathroom. This color works particularly well in larger spaces or when paired with bright fixtures and mirrors that help balance the overall look.
- Soft Pastels (like Mint or Peach): Pastel colors can impart a gentle, serene feel, making them perfect for a relaxing bathroom environment. They complement natural light beautifully and can be paired with white or neutral elements for an updated vintage look.
- Rich Navy Blue: Navy blue is a timeless color that adds elegance and drama to bathroom vanities. It pairs well with gold or brass fixtures, providing a luxurious touch that can elevate the entire space.
- Earthy Tones (like Olive Green or Terracotta): These colors can create a warm, inviting atmosphere in your bathroom. Earthy tones connect to nature, making them ideal for a tranquil space, and they work wonderfully with natural materials like wood and stone.
How Do You Select the Perfect Color for Your Bathroom Vanity?
- Consider the Size of the Bathroom: The size of your bathroom plays a crucial role in color selection. Lighter colors can make a small bathroom feel more spacious, while darker shades may create a cozy atmosphere in larger spaces.
- Match with Existing Fixtures: Take into account the colors of your existing fixtures, such as sinks, tiles, and countertops. Choosing a paint color that complements these elements ensures a cohesive look throughout the bathroom.
- Determine the Desired Mood: Think about the mood you want to create in your bathroom. Soft blues and greens promote tranquility, while bold colors like navy or emerald can add a touch of sophistication and drama.
- Test Samples: Always test paint samples on the vanity and in the actual bathroom lighting before making a final decision. Colors can appear differently under various lighting conditions, so it’s essential to see how they look at different times of the day.
- Consider Trends and Timelessness: While it’s tempting to follow the latest trends, consider opting for timeless colors that won’t quickly go out of style. Neutral colors like white, gray, or beige can provide a classic backdrop that allows for easy updates with accessories.
What Benefits Does High-Quality Paint Provide for Bathroom Vanities?
The benefits of using high-quality paint for bathroom vanities are numerous and can significantly enhance both appearance and durability.
- Durability: High-quality paint is formulated to withstand moisture and humidity, which are common in bathrooms. This resilience helps prevent chipping, peeling, and fading, ensuring that your vanity maintains its fresh look over time.
- Better Coverage: Premium paints often provide superior coverage with fewer coats required, saving both time and effort during the application process. This means that you can achieve a uniform color and finish without needing to apply multiple layers.
- Enhanced Finish: The finish of high-quality paint can be smoother and more visually appealing, offering a professional look to your bathroom vanity. This polished appearance contributes to the overall aesthetic of the bathroom and can elevate the space’s design.
- Mold and Mildew Resistance: Many high-quality bathroom paints contain additives that resist mold and mildew growth. This feature is particularly important in a bathroom environment, where damp conditions can promote such issues, ultimately protecting your vanity from unsightly stains and odors.
- Color Retention: Premium paints typically have better color retention properties, meaning they are less likely to fade over time. This allows your bathroom vanity to maintain its vibrant hue, contributing to a consistently attractive bathroom appearance.
- Easy Cleanup and Maintenance: High-quality paints often have a washable surface that makes cleaning easier. With a simple wipe down, you can maintain the beauty of your painted vanity without the worry of damaging the finish.
What Steps Should You Follow to Paint a Bathroom Vanity Properly?
To paint a bathroom vanity properly, follow these essential steps:
- Choose the Best Bathroom Vanity Paint: Selecting a high-quality paint that is specifically designed for furniture or cabinets is crucial. Look for options that are moisture-resistant and durable to withstand the bathroom’s humid environment.
- Prepare the Vanity Surface: Thoroughly clean the vanity to remove any dirt, grease, or old paint. Sand the surface lightly to create a better grip for the new paint, and fill any holes or imperfections with wood filler, then sand smooth once dry.
- Apply a Primer: Using a primer helps in achieving an even finish and enhances the paint’s adhesion. Choose a primer that is compatible with the type of paint you are using, and apply it evenly, allowing proper drying time.
- Paint with the Right Technique: Use a high-quality brush or roller designed for smooth finishes to apply the paint. Start with thin coats, allowing each layer to dry completely before applying the next, which helps prevent drips and ensures a smooth finish.
- Add a Protective Topcoat: Once the paint is fully dry, applying a clear protective topcoat can enhance durability and provide additional moisture resistance. Choose a water-based polyurethane for easy cleanup and to maintain the paint’s color.
- Reassemble and Install the Vanity: After the topcoat has cured, carefully reattach any hardware and doors. Make sure everything is aligned properly before reinstalling the vanity in its designated spot.
What Preparations Are Necessary Before Painting a Bathroom Vanity?
Before painting a bathroom vanity, several essential preparations are necessary to ensure the best results and durability.
- Clean the Surface: Thoroughly cleaning the vanity is crucial to remove dirt, grime, and any previous finishes. This can be done with a mixture of soap and water or a degreaser, followed by a rinse and complete drying to promote better paint adhesion.
- Sand the Vanity: Sanding the surface helps to roughen it up, creating a texture that allows the new paint to stick better. Use fine-grit sandpaper to scuff the surface lightly, focusing on areas with old paint or glossy finishes, then wipe down the dust with a damp cloth.
- Repair Any Damage: Inspect the vanity for any dents, scratches, or damaged areas that need repair. Fill in holes or cracks with wood filler and sand smooth once it has dried to ensure an even painting surface.
- Use Primer: Applying a quality primer is especially important for bathroom vanities due to moisture levels. A good primer will seal the surface, provide a uniform base for the paint, and enhance adhesion, particularly when using a lighter paint over a darker surface.
- Select the Right Paint: Choosing the best bathroom vanity paint involves selecting a product that can withstand humidity and wear. Look for paints specifically formulated for cabinetry or high-gloss paints that offer durability and easy cleaning, ensuring long-lasting results.
- Remove Hardware: Take off all hardware, such as knobs and pulls, to avoid any paint accidentally getting on them. This also allows for a more thorough paint job without any obstructions, leading to a cleaner finish.
- Protect Surrounding Areas: To prevent paint splatters and drips, use painter’s tape to cover edges, trim, and any surfaces that should not be painted. Additionally, laying down drop cloths or old newspapers around the work area can help catch any spills during the painting process.
How Can You Achieve a Smooth Finish When Painting?
To achieve a smooth finish when painting a bathroom vanity, several key techniques and materials are essential:
- Surface Preparation: Properly preparing the surface is crucial for a smooth finish. This includes cleaning, sanding, and priming the vanity to ensure that the paint adheres well and the surface is even.
- High-Quality Paint: Using the best bathroom vanity paint, typically a satin or semi-gloss finish, can make a significant difference. These types of paint are more durable and resist moisture, which is ideal for bathrooms.
- Brush and Roller Techniques: Choosing the right tools is important for application. A high-density foam roller can provide a smooth finish while a quality brush is necessary for edges and corners to avoid visible brush strokes.
- Thin Coats: Applying multiple thin coats rather than one thick coat is vital for achieving a flawless finish. Each coat should be allowed to dry completely before applying the next, which prevents drips and uneven textures.
- Sand Between Coats: Lightly sanding between coats can help create an ultra-smooth surface. After the first coat dries, a fine-grit sandpaper can be used to knock down any imperfections before applying subsequent layers.
- Final Clear Coat: Adding a clear protective coat at the end can enhance the durability and smoothness of the finish. A polyurethane or polycrylic topcoat can seal the paint and add a beautiful sheen, protecting against moisture and wear.
What Common Mistakes Should You Avoid When Painting a Bathroom Vanity?
When painting a bathroom vanity, avoiding common mistakes can help achieve the best results with your chosen paint.
- Skipping Surface Preparation: Properly preparing the surface is crucial for paint adhesion and longevity. This includes cleaning, sanding, and priming the vanity to ensure the new paint bonds well and withstands moisture.
- Choosing the Wrong Type of Paint: Not all paints are suitable for bathrooms due to high humidity levels. Opting for moisture-resistant, high-quality paint specifically designed for cabinetry will ensure durability and prevent peeling or chipping.
- Ignoring the Grain of the Wood: Failing to consider the natural grain can lead to an uneven finish. Using a paintbrush for detailed areas and a roller for flat surfaces can help achieve a smooth and even coat that highlights the vanity’s character.
- Neglecting to Use Primer: Skipping primer can result in poor color coverage and increased paint usage. A good primer not only helps with adhesion but also blocks stains and provides a uniform base for the topcoat.
- Not Allowing Sufficient Drying Time: Rushing the drying process can lead to smudges and imperfections in the finish. Ensure each coat dries completely before applying the next to achieve a flawless look.
- Overlooking Hardware Updates: Keeping old hardware can detract from a fresh paint job. Updating knobs and handles can enhance the overall aesthetic and complement the new color scheme of the vanity.
- Forgetting About Sealing the Paint: Not sealing the paint can leave the surface vulnerable to moisture and wear. Applying a clear protective topcoat will help guard against damage and enhance the longevity of the painted finish.