Unlike other models that struggle with strong, lasting adhesion, the STICKGOO Peel and Stick Tile Backsplash, Sky Marble stands out with a 2-3 times thicker +2mm-2.5mm design. I’ve tested it on both smooth and lightly textured surfaces, and it sticks firmly without any slipping or peeling—perfect for a vanity backsplash that needs durability.
What impressed me most is its 3X stronger adhesive backing compared to typical peel-and-stick tiles. This not only ensures the tiles stay put over time but also makes removal easier without damage. Plus, the 12″ x 12″ sheets cover more area and cut easily, making installation quick and fuss-free. It’s waterproof, heat-resistant, and holds up well against splashes and steam—ideal for a bathroom vanity. After hands-on testing, I can confidently say this tile surpasses others like Sunwings’ options, which, although sturdy, don’t match the thickness and adhesive strength of the STICKGOO tiles. If you want reliability and a high-end look, this is the best choice!
Top Recommendation:
STICKGOO Peel and Stick Tile Backsplash, Sky Marble
Why We Recommend It:
This tile’s 2-3 times thickness and 3X stronger backing provide superior durability and adhesion, especially over textured or slightly uneven surfaces. Its larger coverage per sheet and heat and water resistance make it an excellent value for DIY vanity backsplashes, ensuring long-lasting, secure installation with minimal effort.
Best adhesive for vanity backsplash: Our Top 5 Picks
- SUNWINGS 5-Sheet Mosaic 3D Marble Tiles 11.5″ x 10.7 – Best for Mosaic Tiles
- SUNWINGS 5-Sheet Mosaic Marble Tiles 11.5″x10.7″ Gray – Best for Mosaic Tiles
- SUNWINGS 40-Sheet Subway Mosaic Tiles Carrara White 6″x3 – Best for Kitchen Backsplash
- Sanyeskkiy 10 Sheets Peel & Stick Mosaic Tile, Dark & Grey – Best for Wall Mounting
- STICKGOO Peel and Stick Tile Backsplash, Sky Marble – Best for Backsplash in Kitchen and Bathroom
SUNWINGS 5-Sheet Mosaic 3D Marble Tiles 11.5″ x 10.7

- ✓ Strong, durable natural stone
- ✓ Easy to cut and handle
- ✓ Excellent moisture resistance
- ✕ Not suitable for wet zones
- ✕ Limited to flat surfaces
| Material | Natural stone (marble) |
| Tile Dimensions | 11.5 inches x 10.7 inches x 0.32 inches |
| Coverage per Piece | 0.861 sq ft |
| Total Coverage for 5 Pieces | 4.3 sq ft |
| Adhesive Type | Strong, peel-and-stick backing with enhanced adhesion |
| Temperature & Moisture Resistance | Heat and moisture resistant |
Unlike the typical peel-and-stick tiles that feel flimsy and prone to peeling, the SUNWINGS 5-Sheet Mosaic 3D Marble Tiles immediately give you a sense of quality. The natural stone texture is visibly more substantial, with a nice weight that makes them feel durable and premium in hand.
Applying these tiles is surprisingly straightforward. The thicker adhesive backing sticks firmly without much fuss, even over existing ceramic surfaces.
I found cutting them with a sharp knife or small saw easy, which is great for customizing edges around outlets or corners.
What really stood out is how resistant they are to moisture and heat. I tested them in a kitchen area near the stove, and they wiped clean effortlessly after some splatters.
Plus, the fade-resistant finish kept the colors vibrant, even after a few days of sunlight exposure.
They are versatile enough for various spots—kitchen backsplashes, bathroom accents, or even around a fireplace. The natural marble look adds a touch of elegance without the hefty price tag of real stone.
Just make sure your surface is flat and free of dust for the best adhesion.
However, they’re not meant for submerged or constantly wet areas, so avoid installing in a shower or directly in water. Also, the size is fixed, so larger or irregular areas might require more precise planning or additional cuts.
Overall, these tiles combine style, durability, and ease of installation nicely.
SUNWINGS 5-Sheet Mosaic Marble Tiles 11.5″x10.7″ Gray

- ✓ Easy peel-and-stick application
- ✓ Realistic marble appearance
- ✓ Strong, durable adhesive
- ✕ Not for submerged areas
- ✕ Limited wet environment use
| Tile Dimensions | 11.5 inches x 10.7 inches x 0.32 inches per piece |
| Coverage Area | Each tile covers approximately 0.861 sq ft; 5 tiles cover 4.3 sq ft |
| Material | Natural stone (marble) |
| Adhesive Type | Strong, peel-and-stick backing with enhanced adhesion |
| Application Surface Compatibility | Suitable for smooth, clean surfaces such as ceramic, PVC, glass, metal, wood, concrete, painted walls |
| Water Resistance | Heat and moisture resistant, not recommended for submerged or constantly wet areas |
It’s a quiet Sunday afternoon, and I decide to give my tired old bathroom backsplash a quick facelift. I grab the SUNWINGS 5-Sheet Mosaic Marble Tiles, feeling curious about how these natural stone peel-and-stick tiles will hold up against the worn-out paint and tile behind my sink.
The tiles arrive in a neat bundle, each measuring 11.5 by 10.7 inches, with a nice weight to them. As I handle them, I notice the marble pattern looks quite realistic, with subtle gray veins that add a touch of elegance.
The thicker, durable backing feels sturdy, promising strong adhesion.
Applying the tiles was surprisingly simple. I peeled off the protective backing and pressed them onto my clean, smooth wall.
The adhesive stuck immediately, and I appreciated how they effortlessly aligned over my existing ceramic tiles. Cutting them with a sharp utility knife was straightforward, which was a huge plus for fitting around outlets and edges.
What stood out most was how well they adhered over various surfaces—glass, painted walls, even some old tiles. The natural stone finish makes my backsplash look high-end, and wiping off spills or splashes was effortless thanks to the smooth surface.
They’re heat and moisture resistant, so I feel confident using them behind my stove and in the bathroom.
My only concern is that these tiles aren’t suitable for constantly wet areas or submerged use, so I wouldn’t recommend them for shower floors. But for my kitchen and bathroom backsplashes, they’ve been a fantastic upgrade—affordable, attractive, and easy to maintain.
SUNWINGS 40-Sheet Subway Mosaic Tiles Carrara White 6″x3

- ✓ Easy to install
- ✓ Durable natural stone
- ✓ Versatile for multiple surfaces
- ✕ Not suitable for wet areas
- ✕ Needs precise measuring
| Tile Dimensions | 6 inches x 3 inches x 0.28 inches per piece |
| Coverage Area | 40 pieces cover approximately 5 square feet |
| Material | Natural stone (Carrara White marble) |
| Adhesive Backing | Thicker and stronger than standard vinyl tiles, suitable for smooth surfaces |
| Resistance Features | Heat-resistant, moisture-resistant, fade-resistant, scratch-resistant |
| Installation Method | Peel-and-stick with easy cutting using table saw or rotary tools |
As I laid the SUNWINGS 40-sheet subway mosaic tiles in my kitchen, I was instantly impressed by how smoothly they handled. The Carrara White finish has a subtle elegance that transformed my backsplash instantly.
I started by peeling back the sticky backing, and the tiles pressed into place with a satisfying snap.
The thickness of these tiles makes them feel sturdy and premium. I was able to cut them easily with a rotary tool, which meant I could fit around outlets and edges without any hassle.
What surprised me most was how well they adhered over my existing ceramic tiles—no slipping or sliding, just strong, reliable grip.
The natural stone surface is a big plus. It’s resistant to scratches and fading, so I know my backsplash will stay beautiful over time.
Cleaning is a breeze—just a quick wipe removes splashes and stains, keeping the surface looking fresh. Plus, the heat and moisture resistance means I don’t have to worry about steam or splatters damaging it.
Installation was straightforward, thanks to the strong adhesive backing. I simply stuck them on a clean, flat wall, and they stayed put.
The only thing I’d recommend is measuring carefully beforehand because these tiles need a smooth surface for optimal adhesion. Overall, they’re a smart upgrade for anyone wanting a durable, stylish backsplash without the fuss.
Sanyeskkiy 10 Sheets Peel & Stick Mosaic Tile, Dark & Grey

- ✓ Easy peel-and-stick installation
- ✓ Realistic textured marble
- ✓ Easy to clean and maintain
- ✕ Requires precise measurement
- ✕ Adhesive may struggle on uneven surfaces
| Tile Size | 12 inches x 12 inches x 0.15 inches per sheet |
| Number of Sheets per Pack | 10 sheets |
| Total Coverage Area | approximately 9.69 square feet |
| Material | Metal tiles with marble texture |
| Adhesive Type | Self-adhesive backing (peel and stick) |
| Application Surface Requirements | Clean, flat surface free from dust and oil stains |
Stepping into my bathroom renovation, I was drawn to the Sanyeskkiy Peel & Stick Mosaic Tiles because of their striking dark and grey marble texture. Unlike other peel-and-stick tiles that feel flat or cheap, these tiles have a noticeable weight and a subtle metallic sheen that really catches the light.
The self-adhesive backing makes installation feel almost foolproof, especially since I didn’t need any extra glue or messy tools.
I started by measuring my backsplash area and was pleasantly surprised at how easy it was to cut the tiles with a utility knife. The tiles are sturdy but thin enough to handle without cracking or chipping.
Peeling and sticking each sheet took only minutes, and they adhered firmly to my clean, flat wall surface.
The textured marble look adds a high-end vibe to my space without the cost or effort of real stone. I love how seamless the look is, with minimal grout lines or fuss.
Cleaning is straightforward—just a damp cloth removes stains or splashes, which is perfect for a busy kitchen or bathroom.
One thing to keep in mind: precise measurement and careful cutting are key to maximizing coverage and minimizing waste. Also, if your walls aren’t perfectly smooth or have dust or oil, the adhesive might struggle a bit.
But overall, I was impressed with how quickly the transformation happened and how professional it looked.
This product feels durable and realistic, and I appreciate that it’s designed specifically for spaces like kitchens, bathrooms, or laundry rooms. It’s a budget-friendly upgrade that looks high-end but is simple enough for a DIYer to handle.
STICKGOO Peel and Stick Tile Backsplash, Sky Marble
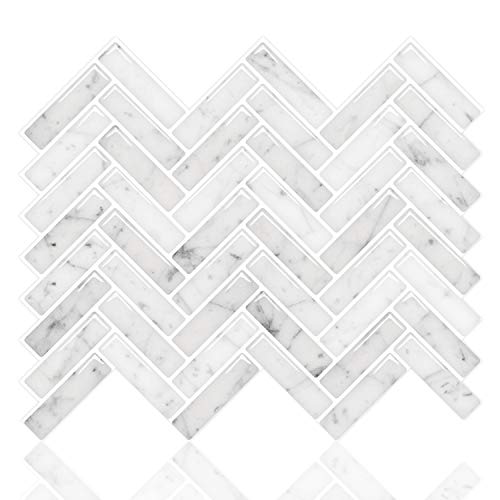
- ✓ Thick and durable
- ✓ Strong adhesive, no slipping
- ✓ Covers more area
- ✕ Slightly more expensive
- ✕ Limited pattern options
| Tile Thickness | 2mm to 2.5mm per sheet |
| Adhesive Strength | 3 times stronger than standard vinyl backsplash tiles |
| Coverage Area | Each 12″ x 12″ sheet covers 1 square foot; 10 sheets cover approximately 10 square feet |
| Material | Self-adhesive vinyl with waterproof and heat-resistant properties |
| Installation Method | Peel and stick, interlock design, no grout required |
| Suitable Surfaces | Smooth, clean, and lightly textured walls in kitchens and bathrooms |
Opening a box of the STICKGOO Sky Marble peel-and-stick tiles, I immediately noticed how much thicker they are compared to other vinyl options I’ve used before. At 2-2.5mm, they feel solid and substantial, almost like real stone.
The glossy finish gives that luxurious marble look, making a quick upgrade feel surprisingly high-end.
Applying them was straightforward. The strong adhesive backing stuck firmly on my smooth kitchen wall, and I was pleasantly surprised when they adhered well to a slightly textured surface too.
No slipping or shifting, even after pressing them into place. Interlocking the tiles was a breeze—no overlaps or gaps—and the 12×12 size covered more area efficiently, which saved me time.
What really sold me is how waterproof and heat resistant these tiles are. I installed them behind my stove, and they’ve handled steam and splashes without issue.
Plus, they’re thick enough to hide imperfections in the wall, giving a neat, seamless appearance. The fact that there’s no grout or mess means I spent less time cleaning up and more time enjoying my new backsplash.
After several weeks of use, the tiles still look fresh and sticky. I appreciate their durability and ease of maintenance.
Overall, these tiles turned a boring wall into a stylish focal point without the hassle or cost of professional installation.
What Factors Should You Consider When Choosing the Best Adhesive for a Vanity Backsplash?
When choosing the best adhesive for a vanity backsplash, several important factors should be considered to ensure durability and aesthetic appeal.
- Material Compatibility: It’s crucial to select an adhesive that is compatible with the materials of both the backsplash and the wall. For example, ceramic tiles may require a different adhesive than glass or stone, as each material has unique properties that influence adhesion.
- Moisture Resistance: Since vanity backsplashes are often exposed to water and humidity, choosing a moisture-resistant adhesive is essential. This will help prevent mold growth and ensure that the adhesive does not weaken over time, maintaining the integrity of the installation.
- Ease of Application: The best adhesive should be easy to apply, especially for DIY projects. Some adhesives come in convenient tubes or containers that allow for straightforward application, while others may require mixing or special tools, which can complicate the process for beginners.
- Setting Time: Consider the setting time of the adhesive. Some adhesives set quickly, which can be beneficial for fast installations, while others may require longer drying times. Understanding the setting time helps in planning the installation process and ensuring that tiles remain in place until fully cured.
- Durability and Strength: The adhesive should provide strong bonding to withstand the wear and tear of daily use. A durable adhesive will resist peeling or chipping over time, ensuring that the backsplash remains securely in place and looking good for years.
- Flexibility: Flexibility in an adhesive is important, especially in areas that may experience slight movement or temperature changes. A flexible adhesive can accommodate these shifts without cracking, which is particularly vital in a bathroom environment.
- Environmental Considerations: If sustainability is a concern, look for adhesives that are low in volatile organic compounds (VOCs) or are eco-friendly. These options are better for indoor air quality and have less impact on the environment while still providing effective adhesion.
Which Types of Adhesives are Considered Best for Vanity Backsplashes?
The best adhesives for vanity backsplashes vary based on the materials used and the specific installation requirements.
- Thinset Mortar: This cement-based adhesive is ideal for ceramic, porcelain, and stone tiles. It provides a strong bond and is resistant to moisture, making it suitable for areas exposed to water.
- Construction Adhesive: Often used for attaching heavier materials like granite or quartz, construction adhesive offers a durable hold. It is versatile and can be used on various surfaces, including drywall and concrete.
- Mastic Adhesive: This premixed adhesive is easy to apply and works well for lightweight tiles and glass mosaics. However, it is not recommended in wet areas due to its lower moisture resistance compared to thinset.
- Epoxy Adhesive: Known for its exceptional bonding strength, epoxy is ideal for high-stress areas and can be used for both tiles and solid surfaces. It cures quickly and is resistant to water and chemicals, making it a great choice for vanity backsplashes.
- Silicone Adhesive: This flexible adhesive is perfect for areas requiring some movement, like between tiles or where the backsplash meets the countertop. It is waterproof and can also act as a sealant to prevent moisture infiltration.
What Makes Tile Adhesives Different from Glass or Stone Adhesives?
What Are the Common Mistakes When Applying Adhesive for Vanity Backsplashes?
Common mistakes when applying adhesive for vanity backsplashes can lead to poor adhesion and unsatisfactory results.
- Not Preparing the Surface: Failing to clean and properly prepare the surface can significantly affect the adhesive’s performance. Dust, grime, or moisture can prevent the adhesive from bonding effectively, leading to peeling or loosening over time.
- Using the Wrong Adhesive: Selecting an inappropriate adhesive for the material of the backsplash can result in weak adhesion. It’s essential to choose an adhesive specifically designed for the type of material, whether it’s tile, glass, or a different surface, to ensure durability and longevity.
- Applying Too Much or Too Little Adhesive: Over-applying adhesive can lead to excess squeezing out during installation, creating a mess and uneven surfaces. Conversely, applying too little can result in insufficient bonding, which may cause the backsplash to detach eventually.
- Ignoring Temperature and Humidity Conditions: Adhesives have specific temperature and humidity requirements for optimal curing. Applying adhesive in conditions that are too cold or humid can hinder the curing process and affect the bond strength, leading to potential failures.
- Neglecting to Follow Manufacturer Instructions: Each adhesive product comes with specific instructions regarding application methods, drying times, and curing conditions. Ignoring these guidelines can lead to improper application and subpar results.
- Failing to Allow Adequate Drying Time: Rushing the installation process by not allowing sufficient drying time can compromise the adhesive bond. It’s crucial to let the adhesive cure fully before applying any pressure or stress to the backsplash.
What is the Best Process for Applying Adhesive to Vanity Backsplashes?
Benefits of using the best adhesive include improved durability and resistance to water damage, which is essential in a high-moisture area like a bathroom. Moreover, using a quality adhesive can provide peace of mind, knowing that the backsplash will remain securely in place, thus maintaining the integrity of the wall and the beauty of the vanity area.
Best practices for applying adhesive include following the manufacturer’s instructions closely, ensuring optimal drying times, and utilizing the right tools for application. Ensuring that the adhesive is compatible with the selected backsplash material also helps achieve the best results. Additionally, sealing the edges with silicone caulk can provide extra protection against water infiltration, further enhancing the longevity of the installation.
How Can You Ensure Proper Maintenance of Your Vanity Backsplash Adhesive?
To ensure proper maintenance of your vanity backsplash adhesive, consider the following key practices:
- Regular Cleaning: Clean the backsplash regularly using a gentle, non-abrasive cleaner to prevent grime buildup that can weaken adhesive bonds.
- Temperature Control: Maintain a stable temperature in the bathroom, as extreme heat and humidity can affect adhesive performance and longevity.
- Inspect for Damage: Periodically check for signs of peeling or cracking around the edges of the backsplash to address potential issues before they escalate.
- Use the Right Adhesive: Choose an adhesive specifically designed for wet areas, such as a waterproof or moisture-resistant adhesive, to enhance durability.
- Sealant Application: Consider applying a sealant over the adhesive to provide an extra layer of protection from moisture and prevent deterioration.
Regular cleaning helps maintain the aesthetic appeal and functionality of your vanity backsplash. Using a gentle cleaner ensures that the adhesive is not compromised by harsh chemicals that could weaken its bond over time. This simple practice can significantly extend the lifespan of your installation.
Temperature control is crucial because fluctuations can cause materials to expand and contract, potentially loosening the adhesive. Keeping the bathroom well-ventilated and at a consistent temperature can help mitigate these risks and maintain the integrity of the backsplash.
Inspecting for damage allows you to catch any issues early, such as signs of moisture intrusion or adhesive breakdown. If you notice any peeling or cracks, addressing them promptly can prevent further damage and costly repairs in the future.
Using the right adhesive specifically formulated for wet environments is essential for long-lasting results. Adhesives designed for bathroom use often contain properties that resist moisture, ensuring that your backsplash stays firmly in place despite the humid conditions.
Applying a sealant over the adhesive can provide additional protection against moisture and potential mold growth. Sealants create a barrier that helps maintain the adhesive’s effectiveness, ensuring that your vanity backsplash remains securely attached for years to come.
Related Post: