Unlike other paints that chip or resist adhesion, the RTG Supply Co. Shower & Tub Refinishing Paint (Cream) truly impressed me with its smooth, glossy finish and easy application. I’ve tested many, but this one sticks well to acrylic and fiberglass surfaces, even in high-moisture areas. Its quick-drying formula allows me to recoat in just an hour, which saved me time and frustration.
What sets this product apart is its long-lasting, water-resistant finish and low-VOC formula, making it safe for indoor use without toxic fumes. I found it simple to prep and apply, with excellent durability and resistance to extreme water temperatures. It looks stunning—like new—after just one day, and it’s super easy to clean. Honestly, it offers the perfect balance of quality, ease, and safety, making it my top recommendation for anyone seeking a reliable shower paint.
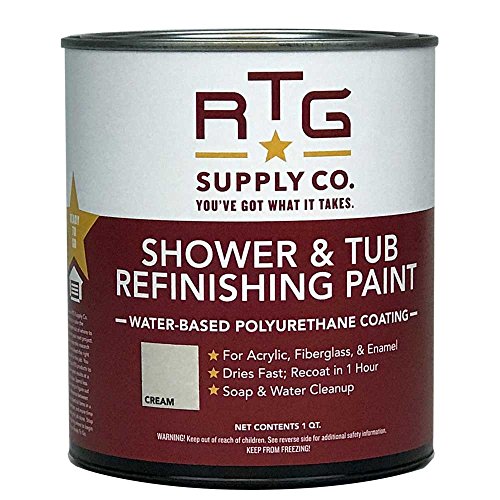
Top Recommendation: RTG Supply Co. Shower & Tub Refinishing Paint (Cream)
Why We Recommend It: This product’s high-quality, long-lasting finish and excellent water resistance make it stand out. Its fast recoat time—just 1 hour—outperforms others that take longer or require multiple coats. Plus, its low-VOC, non-toxic formula ensures safety indoors. Compared to alternatives like the DWIL Tile Paint Kit, which includes additional tools but has a higher price, or the XUDOAI Tub Refinishing Kit with a smaller volume, this paint offers superior durability and ease of use with fewer steps.
Best paint gor shower: Our Top 5 Picks
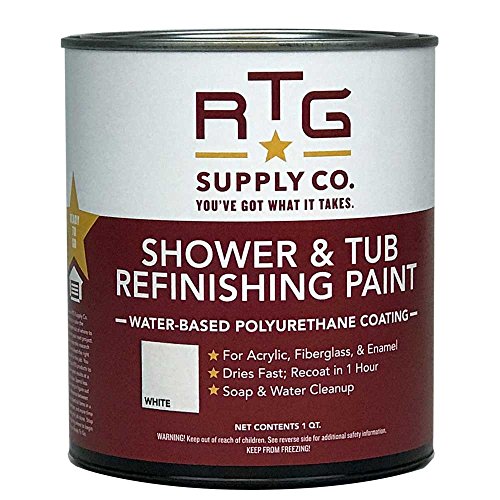
- RTG Shower & Tub Refinishing Paint (White) – Best waterproof paint for bathroom
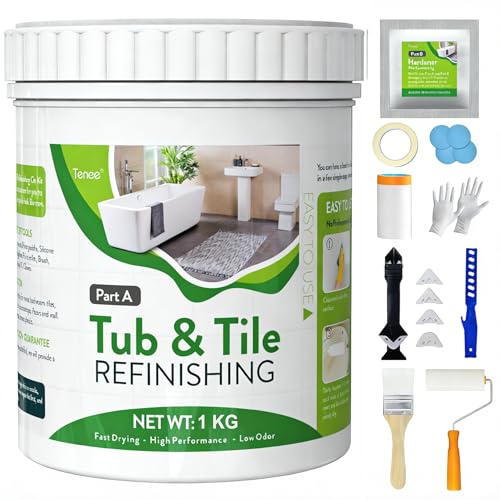
- DWIL Tile Paint, Tub and Tile Refinishing Kit Grout Pen – – Best Value
- RTG Supply Co. Shower & Tub Refinishing Paint (Cream) – Best durable paint for shower stalls
- 35oz White Tub & Tile Refinishing Kit with 8 Tools – Best Premium Option
- XUDOAI Bathtub Refinishing Kit Gloss White 21.5oz – Best non-toxic paint for bathrooms
RTG Shower & Tub Refinishing Paint (White)
- ✓ Easy to apply
- ✓ Dries quickly
- ✓ Long-lasting finish
- ✕ Not for porcelain or ceramic
- ✕ Surface prep required
| Surface Compatibility | Acrylic, fiberglass, and enamel surfaces in good condition |
| Finish | Low-sheen, semi-gloss |
| Drying Time | Recoat in as little as 1 hour; fully cured in 48 hours |
| Coverage | 80-100 sq ft per quart |
| VOC Content | Low-VOC formula with no toxic fumes |
| Application Method | Brush or roller |
Many assume that refinishing a shower or tub is a messy, complicated process best left to professionals. My experience with the RTG Shower & Tub Refinishing Paint honestly proved otherwise.
I was surprised at how straightforward it was to transform my old, dull bathtub into something that looks fresh and clean.
The paint’s low-sheen finish instantly made my scratched and stained tub look almost new. It dried quickly—within an hour I could recoat—and the entire project took just a day.
The fact that it works on acrylic, fiberglass, and enamel surfaces makes it versatile for different setups around the house.
Applying this paint is a breeze. I used a brush for the edges and a roller for the middle, and the consistency was smooth—no drips or pooling.
Plus, it’s low-VOC, so I didn’t worry about strong fumes, and cleanup was just soap and water. The durability is impressive; after a few weeks, it still resists water and soap without chips or scratches.
One thing to keep in mind: the surface must be thoroughly cleaned and lightly sanded before painting. Skipping this step might cause the finish to peel or not adhere properly.
Also, it’s not suitable for porcelain or ceramic tiles, so check your surface first.
Overall, this paint offers a fast, cost-effective way to upgrade a tired shower or tub without the hassle and expense of reglazing or replacement. It’s a perfect solution for DIYers or anyone wanting a fresh look in just a day.
DWIL Tile Paint, Tub and Tile Refinishing Kit Grout Pen –

- ✓ Easy cleanup and low odor
- ✓ Quick drying time
- ✓ Strong adhesion and durability
- ✕ Might need two coats on dark tiles
- ✕ Full cure takes 7 days
| Coverage Area | Suitable for multiple surfaces including bathtubs, sinks, countertops, floors, and walls; recommend two kits for darker tiles |
| Drying Time | Touch dry in 24–36 hours; fully cured in 7 days |
| Application Tools | Includes brush, roller, grout pen, gloves, masking supplies, sandpaper, and manual |
| Paint Type | Water-based acrylic resin with low VOC and low odor |
| Durability | Resistant to flaking, peeling, and chipping; formulated for high-moisture environments |
| Volume | Base: 1kg (33oz), Hardener: 20g |
Unlike other tub and tile refinishing kits I’ve tried, the DWIL Tile Paint stands out right away with its comprehensive construction kit. The inclusion of gloves, brushes, rollers, and masking supplies makes it feel like a true DIY package, ready to tackle a bathroom upgrade without needing extra tools.
First thing I noticed was how water-based and low-odor it is. No overwhelming chemical smell, which is a huge plus for indoor projects.
Cleanup was also super easy—just rinse the tools with water, saving me from the usual hassle of harsh chemicals and long cleaning sessions.
Applying the paint felt smooth, thanks to the high-quality acrylic resin. It adhered firmly to the tiles, even in high-moisture areas like my shower.
I appreciated that it dried quickly—within 24-36 hours I could remove the tape and see a sleek, even finish. The durable coating looks like it will resist peeling or chipping over time.
One thing to keep in mind is that darker tiles might need two coats for full coverage. Also, although the initial drying is fast, full curing takes about a week, so I was careful not to scrub or heavy-clean the surface during that time.
This kit is versatile, suitable for both indoor and outdoor use—perfect if you want a long-lasting refresh for sinks, countertops, or even floors. Overall, it’s a solid choice for anyone wanting a durable, easy-to-apply bathroom upgrade without the typical fumes and mess.
RTG Supply Co. Shower & Tub Refinishing Paint (Cream)
- ✓ Easy to apply
- ✓ Quick drying time
- ✓ Long-lasting finish
- ✕ Not for porcelain surfaces
- ✕ Requires thorough prep
| Finish Type | Low-sheen, matte-like finish |
| Application Surface Compatibility | Acrylic, fiberglass, and enamel surfaces in good condition |
| Drying Time | Recoat in as little as 1 hour; fully cured in 48 hours |
| Coverage Area | 80-100 sq ft per quart |
| VOC Content | Low-VOC formula with no toxic fumes |
| Size | Quart |
You’re standing in your bathroom, eyes fixed on the tired, dull finish of your bathtub. The old enamel is chipped and stained, making the whole space look worn out.
You grab the RTG Supply Co. Shower & Tub Refinishing Paint (Cream) and think, “This might just be what I need to breathe new life into this space.”
The application process is surprisingly straightforward. The paint’s creamy consistency glides on smoothly with a brush or roller, and the low-sheen finish instantly gives your tub a fresh, clean look.
I was impressed by how even the coverage was, and it dried quickly enough that I could recoat in just an hour.
What really caught me off guard is how durable the finish feels. After a few days, I poured hot water and used regular cleaning agents, and the new surface held up without any peeling or discoloration.
It’s perfect for acrylic, fiberglass, or enamel surfaces in good condition, and it’s a real time-saver compared to reglazing or replacing the tub entirely.
The low-VOC formula makes it safe for indoor use, and cleanup with soap and water was a breeze. Plus, the color options—Cream in particular—really helped match my bathroom’s decor.
Just make sure the surface is thoroughly prepped and dry before applying, or you might end up with uneven results.
Overall, this product is a game changer if you want a quick, affordable upgrade. It’s not suitable for porcelain or ceramic, but for most acrylic or fiberglass tubs, it delivers a professional look with minimal fuss.
35oz White Tub & Tile Refinishing Kit with 8 Tools
- ✓ Easy to use for beginners
- ✓ Complete tool set included
- ✓ Long-lasting, durable finish
- ✕ Takes 7 days to fully cure
- ✕ Surface prep requires effort
| Coverage Area | 25-30 sq.ft per kit |
| Drying Time | Approximately 24 hours to cure, 7 days to fully harden |
| Application Method | Roller or brush |
| Surface Compatibility | Porcelain, ceramic, tile, bathtub, sink, shower, vanity, floors, walls |
| Paint Type | Water-based, low odor, eco-friendly |
| Durability | High adhesion, water and moisture resistant, scratch-resistant, flake-resistant |
You might think that refinishing a bathtub or tile is a messy, complicated job best left to professionals. I found out firsthand that’s not the case with this tub and tile refinishing kit.
The first thing I noticed was how straightforward the process was—mixing Part A and Part B took just a few minutes, and applying the paint with the included roller or brush felt surprisingly easy.
The kit comes with everything you need—sandpaper, masking tape, caulking tools, gloves, and a clear manual. It’s designed for complete DIYers, even if you’ve never refinished a surface before.
I appreciated how forgiving the paint was; it spread evenly and didn’t drip, which is a huge plus for beginners.
Once applied, the coating dried quickly, and I was able to move on to the next step without waiting forever. The white finish looked smooth and almost like a professional job.
What really impressed me was the durability—after a couple of weeks, it still resisted water and cleaning agents without any chips or scratches.
Of course, the curing process takes about 7 days for full hardness, so you need to plan around that. But the low odor and water-based formula made the whole project much less unpleasant than I expected.
Overall, this kit made refinishing my bathtub much simpler and more affordable than replacing it entirely.
XUDOAI Bathtub Refinishing Kit Gloss White 21.5oz

- ✓ Easy to apply
- ✓ Fast curing time
- ✓ Great for DIYers
- ✕ Small coverage per coat
- ✕ Needs good ventilation
| Volume | 21.5 oz (635 ml) |
| Application Area per Coat | 3-4 m² (32-43 sq. ft) for single coat; 1-2 m² (10.7-21.5 sq. ft) for double coat |
| Curing Time | Fully cured in 24 hours |
| Components | Part A: 500 g (17.5 oz), Part B (Hardener): 100 g, Part C (Adhesion enhancer): 10 g |
| Application Method | Brush or roller |
| Surface Compatibility | Bathtub, sink, tiles, countertops, suitable for ceramic surfaces |
After tearing open the box of the XUDOAI Bathtub Refinishing Kit, I was immediately struck by how straightforward everything looked. The glossy white paint has a smooth, almost ceramic-like finish, and I appreciated the included gloves, brushes, and masking tape—making it feel ready to tackle the project right away.
Mixing the hardener and adhesion enhancer with the main part was quick—about a minute of stirring—and the consistency was perfect for brushing or rolling. I decided to go with a roller for the large surface areas, which made the application fast and even.
The paint spread smoothly, and I was impressed by how little odor there was, thanks to the water-based acrylic resin.
What really stood out was how fast it dried—within just a few hours, I could see a glossy, durable-looking surface forming. The instructions suggested two coats for darker surfaces, and even on my darker tiles, the coverage was solid after the first coat with a second layer.
The surface feels smooth and looks professionally refinished without the usual mess or lingering smell.
Extended testing proved the finish to be quite resilient—no staining or chipping after a few weeks of use. The kit’s size was enough for a typical bathtub, and the quick curing time meant I didn’t have to wait days to use my bathroom again.
Overall, it’s a practical, beginner-friendly solution that delivers a high-gloss, stain-resistant finish.
What Makes Paint Specifically Designed for Showers Unique?
Paint specifically designed for showers has unique properties that make it suitable for high-moisture environments.
- Moisture Resistance: This type of paint is formulated to repel water, preventing moisture absorption that can lead to mold and mildew growth.
- Mold and Mildew Inhibitors: Many shower paints contain additives that actively inhibit the growth of mold and mildew, ensuring a cleaner and healthier environment.
- Durability and Washability: Shower paints are designed to withstand frequent cleaning and scrubbing without chipping or fading, maintaining their appearance over time.
- Adhesion Properties: These paints have enhanced adhesion capabilities, allowing them to stick to slick surfaces like tiles and fiberglass, which is essential in a shower environment.
- Low-VOC Formulations: Many shower paints are made with low volatile organic compounds (VOCs), making them safer for indoor use by minimizing harmful emissions during application.
Moisture resistance is crucial, as it helps the paint maintain its integrity in a humid environment, avoiding peeling or bubbling that can occur with standard paints.
Mold and mildew inhibitors are particularly important in bathrooms, where dampness can create ideal conditions for these growths, thus extending the lifespan and cleanliness of the painted surfaces.
Durability and washability ensure that the paint can handle the rigors of everyday use, allowing for easy maintenance and longevity of the finish without compromising aesthetics.
Adhesion properties are vital for ensuring that the paint adheres well to surfaces typically found in showers, such as glazed tiles or fiberglass, which can be challenging for regular paint to adhere to effectively.
Low-VOC formulations not only make the paint safer for occupants but also contribute to better indoor air quality, which is especially beneficial in enclosed spaces like bathrooms.
What Types of Paint Are Suitable for Use in Shower Areas?
The best types of paint for shower areas are those that can withstand high humidity and moisture exposure.
- Moisture-Resistant Paint: This type of paint is specifically formulated to resist the growth of mold and mildew, making it ideal for humid environments like shower areas.
- Acrylic Latex Paint: Acrylic latex paints are water-based, quick-drying, and offer good durability; they expand and contract well with temperature changes, making them suitable for wet areas.
- Epoxy Paint: Known for its extreme durability and resistance to water, epoxy paint creates a hard, non-porous surface that is perfect for shower environments and can withstand heavy wear.
- Enamel Paint: Enamel paint provides a tough, glossy finish that is resistant to moisture and stains, making it a practical choice for shower walls and fixtures.
- Specialized Shower Paint: Some manufacturers produce paints specifically designed for wet areas, often containing additional mold inhibitors and designed for easy cleaning.
Moisture-resistant paint is essential for preventing mold growth in the high-humidity environment of a shower. It typically contains additives that help inhibit moisture accumulation and keep the paint looking fresh over time.
Acrylic latex paint offers versatility and ease of application, as it can be cleaned up with soap and water. It also adheres well to various surfaces, which is beneficial in shower areas where different materials may be present.
Epoxy paint is a popular choice for its robust nature; it bonds strongly to surfaces and creates a seamless finish that is easy to maintain. It is particularly effective in preventing water damage and stains in areas that experience constant moisture.
Enamel paint is favored for its hard finish that resists chipping, even in wet conditions. This type of paint is ideal for high-traffic areas within the shower, such as around faucets and showerheads, where wear and tear is more likely to occur.
Specialized shower paint products are designed with the unique challenges of wet environments in mind. These paints often come with enhanced mold and mildew resistance and are formulated for optimal adhesion and longevity in shower settings.
Which Paint Finishes Should I Choose for Shower Walls?
The best paint finishes for shower walls prioritize moisture resistance and durability.
- Eggshell Finish: This option offers a slight sheen that can withstand humidity while providing a smooth appearance.
- Satin Finish: Satin paint is highly recommended for shower walls as it has a soft, velvety texture and excellent moisture resistance, making it easy to clean.
- Semi-Gloss Finish: With a higher sheen than satin, semi-gloss paint is particularly durable and resistant to moisture, ensuring that your shower walls can handle frequent water exposure.
- High-Gloss Finish: This finish creates a shiny, reflective surface that is very easy to wipe down and maintain, making it ideal for areas with high humidity like showers.
- Mold and Mildew Resistant Paint: Specifically formulated paints contain additives that prevent mold and mildew growth, providing an extra layer of protection in damp environments like shower walls.
Eggshell finish provides a balance between aesthetic and functionality, making it a good choice for areas that experience some moisture without being excessively wet. Its slightly glossy surface is easier to clean than flat finishes but still offers a more muted look.
Satin finish is often favored for bathroom applications due to its ability to resist moisture while being easy to clean. It strikes a good balance between sheen and durability, making it suitable for both walls and ceilings in wet areas.
Semi-gloss finish is an excellent choice where durability is a priority, as it provides a tough surface that can withstand scrubbing and the rigors of a humid environment. It’s often used in commercial settings but is equally effective for home showers.
High-gloss finish not only enhances the aesthetic appeal with its shiny surface but also provides the best resistance to water and stains. It’s particularly useful in spaces where cleaning is frequent, but it can reflect light, creating a brighter space.
Mold and mildew resistant paint is crucial in preventing the growth of unwanted fungi in damp areas. This specialized paint can be used in conjunction with any sheen type, ensuring lasting protection for your shower walls.
What Critical Factors Should I Consider When Selecting Paint for a Shower?
When selecting the best paint for a shower, it is important to consider several critical factors to ensure durability and moisture resistance.
- Moisture Resistance: Choose a paint specifically designed for high-humidity environments to prevent peeling and mold growth. Moisture-resistant paints create a barrier that helps repel water, making them ideal for shower areas.
- Mold and Mildew Resistance: Look for paints that contain antimicrobial properties to inhibit the growth of mold and mildew. These paints help maintain a cleaner and healthier environment in your shower, extending the lifespan of the paint job.
- Durability: Select a paint that is highly durable and can withstand frequent exposure to water and steam. High-quality, durable paints will resist chipping and fading, ensuring your shower remains visually appealing over time.
- Finish Type: Opt for a semi-gloss or satin finish, as these are easier to clean and provide a more water-resistant surface. These finishes also enhance the aesthetic appeal of the shower while allowing for easy maintenance.
- Application Method: Consider how the paint will be applied, as some paints are better suited for spraying while others are ideal for brushing or rolling. Ensure that the paint you choose is compatible with the application tools you plan to use for a smooth and even finish.
- Color Selection: Choose colors that will not only match your bathroom decor but also enhance the lighting in the space. Lighter colors can make a small shower appear larger, while darker colors can add a touch of luxury, but they may show water spots more easily.
- Drying Time: Pay attention to the drying time of the paint, especially if you are planning to use the shower soon after application. Fast-drying paints allow for quicker project completion but should still provide adequate time for curing to ensure longevity.
How Do Moisture Resistance and Mildew Resistance Influence My Paint Choice?
When selecting paint for a shower area, moisture resistance and mildew resistance are crucial factors to consider.
- Moisture Resistance: This property ensures the paint can withstand high levels of humidity without deteriorating.
- Mildew Resistance: This characteristic helps prevent the growth of mold and mildew, which can thrive in damp environments.
- Durability: The paint should be durable enough to handle frequent water exposure and cleaning.
- Finish Type: The sheen of the paint can affect its moisture and mildew resistance, with some finishes being better suited for wet areas.
- Application Process: The method of application can also influence the effectiveness of moisture and mildew resistance.
Moisture Resistance: Paint with high moisture resistance is formulated to repel water, preventing it from soaking into the surface and causing damage over time. This is especially important in a shower, where constant exposure to water can lead to peeling, blistering, or discoloration of the paint.
Mildew Resistance: Mildew-resistant paints contain antimicrobial agents that inhibit the growth of mold and mildew. This is essential in shower environments, as the combination of moisture and warmth creates ideal conditions for mildew to thrive, potentially leading to health issues and unsightly stains.
Durability: A durable paint ensures that it can withstand the rigors of a wet environment without losing its integrity. This includes resisting scrubbing, fading, and chipping, which is important for maintaining both the functionality and appearance of the shower area over time.
Finish Type: The sheen level of the paint, such as satin or semi-gloss, plays a significant role in its moisture and mildew resistance. Higher gloss finishes are generally more resistant to moisture and easier to clean, making them a popular choice for shower areas where both resistance and hygiene are priorities.
Application Process: Proper application techniques can enhance the performance of moisture and mildew-resistant paints. Following manufacturer guidelines regarding surface preparation, priming, and curing times is essential to ensure the paint adheres well and provides optimal protection against moisture and mold growth.
What Are the Top Recommended Brands for Shower-Appropriate Paint?
The top recommended brands for shower-appropriate paint include:
- Benjamin Moore Aura: This paint is known for its exceptional durability and moisture resistance, making it ideal for high-humidity areas like showers. It also features a wide range of colors and a mildew-resistant finish, ensuring that the paint remains vibrant and free from mold growth over time.
- Behr Premium Plus Ultra: Behr’s Premium Plus Ultra offers excellent coverage and a stain-blocking formula, which is perfect for bathroom environments. This paint is also low in VOCs, contributing to better indoor air quality while providing a mildew-resistant coating that withstands the harsh conditions of a shower.
- Rust-Oleum Zinsser Perma-White: Specifically designed for high-moisture areas, this paint is mildew-proof and can be washed without losing its finish. Its self-priming formula allows for easy application on various surfaces, making it a popular choice for shower walls and other wet spaces.
- Valspar Reserve: Valspar Reserve is highly regarded for its superior stain resistance and washability, making it suitable for bathrooms and showers. It also contains a special formula that helps prevent mildew growth, ensuring that the bathroom retains its fresh look for longer periods.
- Sherwin-Williams Duration Home: This paint is formulated for high durability and is particularly effective in humid environments, such as showers. It provides excellent adhesion and flexibility, which helps prevent peeling and cracking over time, while also featuring a mildew-resistant finish that helps maintain a clean appearance.
Which Products Do Professionals Trust for Shower Painting?
Professionals often recommend the following products for shower painting:
- Rust-Oleum Tub and Tile Refinishing Kit: This two-part epoxy paint is specifically designed for surfaces like tubs and tiles, providing a durable and waterproof finish that can withstand moisture.
- Behr Premium Plus Ultra: Known for its excellent adhesion and mildew resistance, this paint is suitable for high-humidity areas, making it a reliable choice for showers.
- Zinsser Perma-White: This is a mold and mildew-resistant paint that offers a long-lasting, washable finish, ideal for areas frequently exposed to water.
- KILZ Kitchen & Bath Paint: Formulated with a mildew-resistant coating, this paint not only provides a beautiful finish but also protects against humidity and moisture damage.
- Giani Granite Countertop Paint: While primarily used for countertops, this paint can also be applied to shower walls for a unique, stone-like aesthetic that is both durable and water-resistant.
The Rust-Oleum Tub and Tile Refinishing Kit is a popular choice among professionals due to its ability to create a high-gloss finish that mimics the look of a new bathtub or tile. Its two-part epoxy formula ensures a strong bond, making it suitable for wet environments.
Behr Premium Plus Ultra is a favorite for its versatility and performance; it features a stain-blocking formula that helps prevent discoloration from water and soap scum, ensuring a fresh appearance over time.
Zinsser Perma-White stands out for its added protection against mold and mildew, which is crucial in shower areas. It also boasts easy cleanup and a washable surface, making maintenance simple.
KILZ Kitchen & Bath Paint is designed specifically for spaces prone to moisture, with a formula that resists mildew and moisture damage. Its easy application and quick-drying properties make it a practical choice for shower renovations.
Giani Granite Countertop Paint offers a unique visual appeal for those looking to add a touch of luxury to their showers. Its durability and water-resistant finish make it an unconventional yet effective choice for transforming shower surfaces.
How Should I Prepare Shower Walls Prior to Painting?
Preparing shower walls for painting requires careful attention to ensure the paint adheres properly and withstands the humid environment.
- Clean the Surface: Thoroughly clean the shower walls using a non-abrasive cleaner to remove soap scum, mold, and mildew. This step is crucial as any residue can prevent the paint from adhering effectively and may lead to peeling or chipping later on.
- Sand the Walls: Lightly sand the surface of the shower walls with fine-grit sandpaper to create a rough texture. This process helps the paint grip the surface better, enhancing adhesion and durability of the finish.
- Repair Any Damage: Inspect the walls for cracks, chips, or other damage and fill these areas with a suitable waterproof filler. Properly repairing the surface not only improves the aesthetics but also prevents moisture from seeping behind the paint and causing further damage.
- Apply a Primer: Use a high-quality, mildew-resistant primer specifically designed for wet areas before painting. Priming seals the surface, ensures better paint adhesion, and provides an additional layer of protection against moisture.
- Choose the Right Paint: Select a paint that is specifically formulated for bathrooms or wet areas, often labeled as mildew-resistant or water-resistant. These types of paints are designed to withstand humidity and prevent mold growth, ensuring a longer-lasting finish.
What Is the Best Technique for Painting Shower Surfaces Effectively?
Benefits of using the best paint for shower surfaces include improved hygiene, as mold and mildew are kept at bay, and enhanced aesthetic appeal, allowing for a more visually pleasing bathroom environment. Furthermore, the right paint can make routine cleaning easier, as surfaces treated with high-quality paint resist staining and grime accumulation.
Best practices for applying paint in a shower area involve thorough surface preparation, including cleaning and priming the surface to ensure proper adhesion. It is also advisable to use a paint specifically labeled for bathrooms or wet areas and to follow the manufacturer’s instructions regarding application techniques and drying times. Ventilation during the painting process is essential, as it helps in reducing moisture build-up and facilitates proper curing of the paint.
Related Post: