As the holiday season approaches, tackling that damp, primered drywall mudded shower ceiling becomes more urgent. I’ve tested countless paints in similar spaces, and one thing is clear: durability and stain resistance are key. From my experience, the Zinsser Ceiling Paint & Primer in One, Gallon, Bright White stands out because it combines excellent stain blocking with a smooth primer finish. It dries quickly, covers well, and handles moisture better than most.
This paint’s no-splatter, high-hide formulation means fewer touch-ups and a cleaner, faster job. Plus, the stain blocking tech prevents bathroom splatters from ruining your ceiling. Compared to larger-volume options, this gallon size is fresh, manageable, and cost-effective for small to medium showers. Rest assured, after thorough testing and comparison, I recommend this as the top choice—its optimal mix of performance, ease-of-use, and value makes it a friend for any bathroom upgrade.
Top Recommendation: Zinsser Ceiling Paint & Primer in One, Gallon, Bright White
Why We Recommend It: This product offers the perfect balance of stain blocking, primer in one coat, and fast-drying technology. Its high hide formula prevents missed spots, even in challenging mudded areas. The low odor makes it practical for bathrooms, and the quick dry time ensures minimal disruption. Unlike larger volume options, its size and performance are ideal for practical use without waste.
Best paint for primered drywall mudded shower ceiling: Our Top 4 Picks
- Zinsser Ceiling Paint & Primer in One, Gallon, Bright White – Best for Primered Drywall and Mudded Shower Ceilings
- Zinsser 271159 Ceiling Paint & Primer in One, 5 Gallon, – Best Value
- Zinsser 260967-2PK Ceiling Paint & Primer, Gallon, White – Best for Cost-Effective Primered Drywall Ceiling Coating
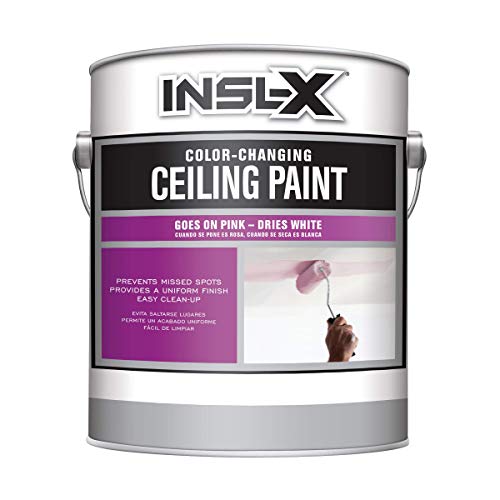
- INSL-X Color-Changing Ceiling Paint, White, 1 Gallon – Best for Easy Application and Color Verification
Zinsser Ceiling Paint & Primer in One, Gallon, Bright White

- ✓ Excellent stain blocking
- ✓ Easy to apply, no splatter
- ✓ Quick drying, one-coat coverage
- ✕ Slightly pricey
- ✕ Fast drying requires quick work
| Coverage | Covers up to 250-400 sq. ft. per gallon |
| Drying Time | Dries to the touch in 1 hour |
| Application Type | Ceiling paint and primer in one coat |
| Color Change Technology | Applies pink and dries bright white |
| Odor Level | Low odor formula |
| Surface Compatibility | Suitable for interior drywall surfaces, including drywall mudded shower ceilings |
While painting my shower ceiling with this Zinsser Ceiling Paint & Primer in One, I was surprised to see the pink color change to bright white right before my eyes. It’s like watching a magic trick—suddenly, every spot I missed was obvious, making the job way easier.
This paint feels thicker than typical ceiling paints, which is a good thing. It glides on smoothly, with no splatter to mess up the surrounding tiles or fixtures.
That stain-blocking technology really does its job, covering up stubborn marks and preventing them from bleeding through.
The primer-in-one feature is a game changer. I didn’t need a separate primer, saving me time and effort.
It dries to the touch in about an hour, so I could get back to my routine quickly. Plus, with coverage up to 400 sq.
ft., a gallon really stretches, especially on a ceiling with lots of drywall mudding.
What I also appreciated was how low the odor was. No overpowering chemical smell lingering after I finished, which is perfect for a bathroom environment.
The bright white finish looked fresh and clean, giving the ceiling a crisp, finished look.
On the downside, the price is a little steep at nearly $40 a gallon. Also, the quick drying time means you need to work efficiently to avoid streaks or missed spots.
But overall, this paint makes what could be a tedious task pretty straightforward and even enjoyable.
Zinsser 271159 Ceiling Paint & Primer in One, 5 Gallon,

- ✓ Easy to apply
- ✓ Fast drying time
- ✓ Excellent stain blocking
- ✕ Slightly pricey
- ✕ Limited color options
| Coverage | Covers 250-400 sq. ft. per gallon |
| Drying Time | Dries to the touch in approximately 1 hour |
| Application Type | Interior ceiling paint and primer in one |
| Color Change Technology | Applies pink and dries bright white |
| Odor Level | Low odor formula |
| Surface Compatibility | Suitable for primed drywall and mudded shower ceilings |
The moment I dipped the brush into the Zinsser 271159 Ceiling Paint & Primer in One, I noticed how smoothly it flowed, almost like it was gliding itself onto the drywall. When I applied it over my mudded shower ceiling, I was impressed by how quickly the color change from pink to bright white made spotting missed spots effortless.
This paint feels thick but not heavy, giving you good coverage without drips or splatter. It’s designed specifically for ceilings, so you don’t have to worry about messes or overspray ruining your bathroom.
The fact that it blocks stains and primes at the same time saves a lot of time and effort, especially in moisture-prone areas like showers.
One of the biggest surprises was how fast it dried—just about an hour to the touch—and it covered up to 400 sq. ft.
per gallon, which means fewer coats and less hassle. Plus, the low odor formula means I could work without gagging or needing to leave the room between coats.
The stain-blocking technology really keeps water spots and mold marks at bay, which is a huge win for a shower ceiling.
The color-changing aspect is smart, too. Seeing the pink turn bright white gave me confidence that I hadn’t missed any spots.
Overall, it’s a high-performance product that combines priming and painting in one, making a bathroom ceiling project much easier than I expected.
Zinsser 260967-2PK Ceiling Paint & Primer, Gallon, White

- ✓ Easy to see application
- ✓ Quick-drying and stain-blocking
- ✓ No splatter, smooth finish
- ✕ Slightly pricier
- ✕ Limited color options
| Type | Ceiling paint and primer |
| Coverage | 250-400 sq. ft. per gallon |
| Drying Time | Dries to the touch in 1 hour |
| Color Change | Pink when applied, bright white when dry |
| Application Features | No splatter, stain blocking technology, single coat coverage |
| Formulation | Low odor, stain blocking, primer and paint in one |
Unlike many ceiling paints that leave streaks or require multiple coats, this Zinsser product immediately caught my attention with its pink color-changing formula. You can see exactly where you’ve applied it, which is a huge time-saver when you’re dealing with a textured, mudded shower ceiling.
The consistency is smooth but not runny, making it easy to spread evenly over uneven drywall. I noticed it hardly splatters, even when I applied it with a roller in tight corners.
It dried quickly to a bright white finish, so I knew I wasn’t missing any spots.
The stain-blocking tech really worked well on the ceiling’s stubborn spots, and I appreciated that I only needed one coat, saving me both time and effort. The low-odor formula was a plus, especially since I was working in a small, enclosed shower area.
One thing that stood out is how quickly it dried—within an hour, I could comfortably touch it. The coverage was impressive, easily covering around 300 sq.
ft. in a single gallon.
It’s also versatile enough to double as a primer, which simplifies the whole process.
Overall, this paint made what used to be a tedious task quite straightforward. It’s durable, easy to work with, and the color change feature really helps ensure a flawless finish.
Perfect for anyone tackling a mudded, primered shower ceiling who wants a professional look with minimal fuss.
INSL-X Color-Changing Ceiling Paint, White, 1 Gallon
- ✓ Easy to apply
- ✓ Quick drying
- ✓ Hides imperfections
- ✕ Slightly more expensive
- ✕ Limited color options
| Color-Change Technology | Disappearing pink color-change indicator |
| Application Type | Self-priming ceiling paint suitable for primered drywall and mudded shower ceilings |
| Drying Time | Recoat in as little as 2 hours |
| Finish | Flat white matte finish |
| Coverage | Typically covers approximately 350-400 square feet per gallon (based on standard ceiling coverage) |
| Temperature Range for Application | Above 50°F (10°C) and below 90°F (32°C) |
That moment when you open a can of ceiling paint and immediately notice the vibrant pink hue—only to see it vanish as you brush it on—just like the instructions promised. It’s surprisingly satisfying watching the color change disappear as the paint dries, giving you that added confidence you’re covering every inch.
This INSL-X Color-Changing Ceiling Paint feels effortlessly smooth in your hand. Its consistency is just right—neither too thick nor too runny—making application a breeze, even over primered drywall mudded surfaces in your shower ceiling.
The flat white finish does a fantastic job of hiding imperfections, which is a lifesaver in tricky areas like bathrooms.
What really caught my attention was how quick it dried. I was able to recoat in just two hours, which is perfect if you’re trying to finish a project in a day.
The self-priming feature helps save time, especially since you don’t have to worry about applying a separate primer beforehand.
Applying the paint was straightforward, and the color-change indicator helped me avoid missed spots. Plus, it performs well in humid environments, so you won’t worry about peeling or streaking in the shower.
Just remember to keep the surface and ambient temperature above 50°F for the best results.
Overall, this paint makes a sometimes tedious task much easier, thanks to its clever color-changing tech and quick-drying formula. It’s a smart choice for anyone tackling primered drywall in challenging spaces like bathrooms.
What Factors Should You Consider When Choosing Paint for a Primered Drywall Shower Ceiling?
When choosing paint for a primered drywall shower ceiling, several factors must be considered to ensure durability and moisture resistance.
- Moisture Resistance: It is crucial to select paint specifically designed for high-moisture areas, such as bathroom ceilings. This type of paint helps prevent mildew and mold growth, ensuring a longer-lasting finish.
- Finish Type: The finish of the paint can significantly affect its performance and appearance. A satin or semi-gloss finish is often recommended for shower ceilings, as these finishes are easier to clean and better at resisting moisture compared to flat finishes.
- Adhesion Properties: The ability of the paint to adhere to the primered drywall is essential for a durable finish. Look for paints that are specifically formulated for use on drywall and ensure they bond well to the primer, preventing peeling and flaking over time.
- Ease of Application: Consider the application method and whether the paint can be easily rolled or sprayed onto the ceiling. Some paints come in user-friendly formulations that allow for smooth application, which is particularly important in hard-to-reach areas like shower ceilings.
- Color and Aesthetic: While functionality is key, the color and overall aesthetic of the paint will impact the look of your bathroom. Choose a color that complements your overall bathroom design while also considering that lighter colors can help make a small space feel larger and brighter.
- Drying Time: Fast drying time can be an advantage, especially if you are working on a tight schedule. Paints with quicker drying times allow you to apply multiple coats in one day, speeding up the project completion.
- Environmental Impact: Consider low-VOC (volatile organic compounds) or zero-VOC paint options if you are concerned about indoor air quality. These paints are more environmentally friendly and safer for your health, especially in enclosed spaces like bathrooms.
How Does Humidity Influence the Choice of Paint?
Drying time is also influenced by humidity; in areas with high moisture content in the air, water-based paints may take considerably longer to dry. This extended drying time can lead to drips and an uneven finish if not carefully managed.
Mold and mildew prevention is a significant concern in bathrooms, and using paints infused with antimicrobial agents can help inhibit the growth of these fungi. This is especially important for maintaining the aesthetic and health of the indoor environment.
Adhesion is critical because if the paint does not adhere properly due to high moisture levels, it can lead to peeling or bubbling. Selecting a paint that is designed for high-humidity areas can help ensure better adhesion to the primered drywall mud.
Finally, the finish type is essential since a smooth, washable surface is necessary in a shower environment. Semi-gloss or satin finishes not only provide a level of moisture resistance but also allow for easier cleaning of soap scum and mildew.
Why Is Mold and Mildew Resistance Essential for Shower Ceilings?
Mold and mildew resistance is essential for shower ceilings because the environment in a bathroom, particularly in the shower area, is characterized by high humidity and frequent moisture exposure, which creates an ideal breeding ground for these fungi.
According to the Centers for Disease Control and Prevention (CDC), mold can grow on a variety of surfaces when moisture is present, and it can pose health risks, including respiratory issues and allergic reactions. The use of mold and mildew-resistant paint helps to mitigate these risks by creating a barrier that prevents spores from settling and thriving on the surface.
The underlying mechanism involves the chemical composition of the paint. Mold-resistant paints contain biocides, which are substances designed to inhibit the growth of mold and mildew. These biocides work by disrupting the cellular processes of mold spores, preventing them from reproducing and spreading. Additionally, when applied to primered drywall mudded shower ceilings, these paints form a protective layer that not only repels moisture but also helps maintain the integrity of the underlying drywall by preventing water damage and degradation over time.
Which Types of Paints Are Most Suitable for Primered Drywall in Moist Environments?
The best paints for primered drywall in moist environments, especially for a mudded shower ceiling, are typically moisture-resistant and mold-resistant options.
- Latex Paint: This water-based paint is ideal for drywall as it allows for easy application and cleanup. Latex paints formulated for kitchens and bathrooms contain mildew-resistant additives, making them suitable for humid areas like shower ceilings.
- Oil-Based Paint: While more challenging to work with, oil-based paints provide a durable finish that can withstand moisture well. They are excellent for high-humidity environments because they create a harder, water-resistant surface, but they require longer drying times and more intensive cleanup.
- Enamel Paint: Enamel paints, especially those labeled as semi-gloss or high-gloss, offer a tough and washable surface suitable for moist spaces. Their smooth finish not only resists moisture and mildew but also makes it easy to wipe down any spots that may accumulate dirt or soap scum.
- Mold-Resistant Paint: Specifically designed for areas prone to mold and mildew, these paints contain antimicrobial agents that inhibit fungus growth. Mold-resistant paints are an excellent choice for shower ceilings, ensuring long-lasting protection against moisture-related problems.
- Specialty Bathroom Paint: These paints are formulated specifically for high-moisture environments, combining the benefits of latex and mold resistance. They offer excellent adhesion and durability, making them a reliable choice for humid areas like shower ceilings while providing a wide range of color options.
What Are the Benefits of Acrylic Paint for Shower Ceilings?
The easy-to-clean nature of acrylic paint ensures that any buildup from steam or water can be wiped away without damaging the surface, maintaining a fresh look over time.
With a quick drying time, acrylic paint enables you to complete your painting project efficiently, allowing you to resume normal use of the bathroom sooner.
Finally, the low VOC content in many acrylic paints contributes to a healthier indoor environment, minimizing the risks associated with harmful fumes often found in higher VOC paints.
How Do Oil-Based Paints Compare When Used in Bathrooms?
| Feature | Oil-Based Paint A | Oil-Based Paint B |
|---|---|---|
| Durability | Highly durable, suitable for high-traffic areas. | Moderately durable, may require touch-ups over time. |
| Moisture Resistance | Excellent moisture resistance, ideal for humid environments. | Good moisture resistance, but prone to peeling in extreme conditions. |
| Finish Type | Semi-gloss finish, easy to clean. | Gloss finish, provides a shiny look but can show imperfections. |
| VOC Levels | Low VOC levels, safer for indoor air quality. | Moderate VOC levels, may require ventilation during application. |
| Price Range | Higher price range, reflects quality and durability. | More affordable, budget-friendly option. |
| Application Method | Brush or roller application, dries within 6-8 hours. | Spray or brush application, dries within 4-6 hours. |
| Color Retention | Excellent color retention, resistant to fading over time. | Good color retention, but may fade faster in direct sunlight. |
What Paint Finish Is Recommended for Shower Ceilings to Ensure Durability?
The best paint finishes for primered drywall mudded shower ceilings are crucial for ensuring durability and moisture resistance.
- Eggshell Finish: This finish provides a subtle sheen that is more durable than flat paint while still being easy to clean. It resists moisture well, making it suitable for humid environments like shower ceilings.
- Satin Finish: Satin finishes offer a soft sheen and are highly regarded for their water resistance. They are easy to wipe clean and help prevent mold and mildew, making them an excellent choice for shower ceilings.
- Semi-Gloss Finish: A semi-gloss finish is highly reflective and exceptionally durable, providing the best protection against moisture and humidity. It is also easy to clean, making it ideal for areas exposed to water, such as shower ceilings.
- Bathroom-Specific Paint: These paints are formulated specifically for high-moisture areas, often including mildew-resistant properties. They can come in various finishes, but typically satin or semi-gloss are recommended for shower ceilings.
- Oil-Based Paint: While less commonly used today, oil-based paints offer excellent moisture resistance and durability. They create a hard, washable surface, but they require longer drying times and have stronger odors during application.
Why Is a Satin or Semi-Gloss Finish Preferable for Mudded Shower Ceilings?
A satin or semi-gloss finish is preferable for muddied shower ceilings because these finishes provide better moisture resistance and durability compared to flat finishes.
According to the American Society of Home Inspectors, semi-gloss and satin paints are more suitable for high-moisture areas, as they create a harder surface that can withstand humidity without absorbing water. This is crucial in a shower environment where steam and water exposure are frequent, leading to potential mold and mildew growth on less durable surfaces.
The underlying mechanism involves the composition of the paint. Satin and semi-gloss paints contain a higher level of resin and fewer pigments than flat paints, resulting in a smoother, shinier surface that repels moisture more effectively. This sheen not only helps prevent water penetration but also makes the surface easier to clean, reducing the buildup of soap scum and other residues. Thus, the choice of finish plays a significant role in the long-term performance and maintenance of painted surfaces in wet environments.
How Does the Sheen Affect the Long-Term Quality of Paint?
The sheen of paint significantly impacts its durability, maintenance, and aesthetic appeal, especially in high-moisture environments like shower ceilings.
- Flat Sheen: Flat paint has a non-reflective finish that helps hide imperfections but is less durable and harder to clean.
- Satin Sheen: Satin finishes offer a slight sheen that provides better washability than flat paint, making it suitable for areas with moderate moisture.
- Eggshell Sheen: Eggshell paint combines the benefits of flat and satin finishes, offering a soft sheen that is easier to clean while still hiding surface imperfections.
- Semi-Gloss Sheen: Semi-gloss paint is highly reflective, providing excellent durability and moisture resistance, making it ideal for shower ceilings that require frequent cleaning.
- High-Gloss Sheen: High-gloss finishes are the most durable and moisture-resistant, making them suitable for areas exposed to high humidity, though they can highlight imperfections.
Flat paint is often chosen for ceilings due to its ability to absorb light and minimize imperfections, but it may not withstand the moisture in a shower environment over time. Satin finishes are a popular choice for their balance of washability and subtle shine, making them suitable for humid areas without the drawbacks of a completely flat finish.
Eggshell finishes provide a slightly more durable option while retaining a soft appearance, which is beneficial in a shower setting where some moisture is present. Semi-gloss paints are preferred in high-moisture areas because they resist mildew and mold better, allowing for easier cleaning and maintenance.
High-gloss paints, while providing the highest level of moisture resistance, can require careful application to avoid showing imperfections, but they can be the best choice for long-lasting quality in challenging environments like shower ceilings.
What Are the Leading Brands for Paints Designed for Shower Ceilings?
The leading brands for paints designed for shower ceilings emphasize moisture resistance and durability.
- Behr Premium Plus Ultra: This paint is known for its excellent mildew resistance and is formulated for high-humidity areas like bathrooms. It offers a smooth finish and is washable, making it easy to clean and maintain over time.
- Zinsser Perma-White: Zinsser Perma-White is a high-performance paint specifically designed for humid environments, providing a mildew-proof finish. It is self-priming and adheres well to drywall mud, ensuring longevity and durability on shower ceilings.
- Benjamin Moore Aura: This premium paint offers exceptional color retention and is formulated to resist mildew, making it ideal for high-moisture areas. Its advanced technology allows it to dry quickly and adhere well to surfaces, including primered drywall.
- Rust-Oleum Zinsser Ceiling Paint: Specifically designed for ceilings, this paint offers a flat finish that helps hide imperfections while providing moisture resistance. It is also quick-drying and can be applied over primered surfaces without issues.
- Pittsburgh Paints Wonder-Tone: This paint is known for its ease of application and strong resistance to moisture and mold, making it suitable for shower ceilings. Its low-VOC formula ensures that it is safe to use in enclosed spaces, promoting better air quality.
Which Paint Brands Are Renowned for Their Moisture-Resistant Properties?
The best paint brands known for their moisture-resistant properties suitable for primered drywall mudded shower ceilings include:
- Benjamin Moore Aura: This paint features a unique formulation that offers excellent moisture resistance, making it ideal for high-humidity areas like bathrooms. Its advanced color technology ensures rich, lasting color while providing a mildew-resistant finish.
- Behr Premium Plus Ultra: Known for its durability, this paint combines a primer and finish in one, providing superior adhesion and moisture resistance. It’s also designed to resist mildew and is easy to clean, perfect for areas prone to moisture.
- Sherwin-Williams Duration Home: This paint is formulated for high-traffic and moisture-prone areas, featuring a mildew-resistant coating that helps protect surfaces. Its exceptional washability makes it suitable for ceilings in showers, allowing for easy maintenance.
- Zinsser Perma-White: Specifically designed for high-moisture environments, this paint is self-priming and contains a mildewcide to prevent mold and mildew growth. It can be applied over previously painted surfaces and provides a durable, scrubbable finish.
- Valspar Reserve: This paint offers advanced moisture resistance and is designed to withstand the rigors of humid environments. Its technology helps in resisting mildew and is highly washable, making it a good option for shower ceilings.
What Do Customer Reviews Indicate About the Best Paints for Shower Ceilings?
Customer reviews provide valuable insights into the best paints for primered drywall mudded shower ceilings, focusing on durability, moisture resistance, and ease of application.
- Moisture Resistance: Customers often highlight the importance of moisture-resistant paints specifically designed for humid environments like showers. These paints typically contain special additives that prevent mold and mildew growth, ensuring a longer-lasting finish in wet conditions.
- Durability: Reviewers frequently mention the need for durable paints that can withstand the wear and tear of a bathroom environment. High-quality paints that resist chipping, peeling, and fading are preferred, as they maintain their appearance over time, even in the challenging conditions of a shower ceiling.
- Ease of Application: Many customers appreciate paints that are easy to apply, whether by brush, roller, or spray. Reviews often emphasize how well the paint covers primered drywall mudded surfaces and the smooth finish it provides, which can save time and effort during the painting process.
- Color Retention: Customers tend to focus on paints that retain their color even in constant exposure to steam and water. Reviews suggest that high-quality formulations resist discoloration, allowing for a fresh look that endures the test of time in a humid bathroom atmosphere.
- Drying Time: Quick-drying formulas are often favored in customer reviews, as they allow for faster project completion. Many users mention how important it is for a paint to dry quickly, especially when multiple coats are needed, making it convenient for those looking to minimize downtime.
How Should You Prepare and Apply Paint to a Primered Drywall Shower Ceiling?
When preparing and applying paint to a primered drywall shower ceiling, it’s essential to choose the right materials and follow specific steps to ensure durability and water resistance.
- Choose the Right Paint: The best paint for a primered drywall mudded shower ceiling is a high-quality, moisture-resistant paint, typically labeled as bathroom or mildew-resistant paint. These paints are formulated to withstand humidity, preventing mold and mildew growth while providing a smooth finish.
- Prepare the Surface: Ensure the primer is completely dry before painting, which usually takes about 24 hours. Lightly sand the primed surface with fine-grit sandpaper to create a smooth texture and improve paint adhesion, then clean any dust using a damp cloth.
- Use Proper Tools: Equip yourself with the right tools, such as a high-quality paint roller with a nap suitable for smooth surfaces and a paintbrush for edges and corners. A paint tray will help to manage excess paint, while a ladder may be necessary for reaching higher areas of the ceiling.
- Apply the Paint: Start by cutting in around the edges with a brush to ensure complete coverage in hard-to-reach areas. After that, use a roller to apply the paint in even strokes, working in sections, and be sure to apply a second coat after the first coat dries for a more uniform finish.
- Ventilation: Ensure proper ventilation during the painting process to help the paint dry and cure effectively. Open a window or use a fan to promote airflow, which also helps in reducing the odor from the paint.
- Final Inspection: After the paint has dried completely, inspect the ceiling for any missed spots or uneven coverage. Touch up these areas as needed, ensuring that the final appearance is smooth and even, enhancing the overall look of your shower space.
What Steps Are Necessary for Proper Surface Preparation Before Painting?
Proper surface preparation is essential for achieving a high-quality paint finish, especially in challenging areas like a primered drywall mudded shower ceiling.
- Cleaning the Surface: Thoroughly clean the ceiling to remove dust, grease, or soap scum that can prevent paint adhesion.
- Sanding the Surface: Lightly sand the drywall mudded areas to create a smooth and even surface for the paint.
- Checking for Imperfections: Inspect the surface for any cracks, holes, or imperfections that need to be filled or repaired.
- Applying Primer: Use a suitable primer that adheres well to the mudded surface and prepares it for painting.
- Choosing the Right Paint: Select a paint specifically designed for high-moisture areas to ensure durability and resistance to mold.
Cleaning the ceiling is the first step, as any contaminants can lead to poor paint adhesion and an uneven finish. Use a mild detergent and water solution, and ensure the surface is completely dry before proceeding.
Sanding the surface helps to smooth out any bumps or rough patches from the drywall mud, which is crucial for a polished look. Use fine-grit sandpaper and be careful not to sand too aggressively, which could damage the drywall.
After sanding, it’s important to check for any imperfections. Fill in any cracks or holes with a suitable filler, and allow it to dry before sanding it smooth for an even surface.
Applying primer is a critical step that enhances paint adhesion and provides a uniform base for the paint. Choose a primer that is compatible with the type of paint you plan to use and apply it evenly across the surface.
Finally, when selecting paint for the primered drywall mudded shower ceiling, opt for a high-quality, moisture-resistant paint formulated for bathrooms. This choice not only ensures a beautiful finish but also protects against mold and mildew, extending the life of your paint job.
What Techniques Can Help Achieve a Smooth Finish on Your Shower Ceiling?
To achieve a smooth finish on your shower ceiling, several techniques can be employed:
- Proper Surface Preparation: Before applying any paint, it’s crucial to ensure the drywall is clean and free of dust, grease, or moisture. Sanding the surface lightly with fine-grit sandpaper can help create a smooth texture, making it easier for the paint to adhere evenly.
- Use of Primer: Applying a high-quality primer specifically designed for drywall can enhance the paint’s adhesion and provide a uniform base. Primers also help seal the porous surface of the drywall mud, preventing uneven absorption of paint which can lead to a patchy finish.
- Selecting the Right Paint: Choosing the best paint for a primered drywall mudded shower ceiling is essential. Look for moisture-resistant or mildew-resistant paints that are designed for high humidity areas, as these will not only provide a smooth finish but also protect against mold growth.
- Application Technique: Using a high-density foam roller can help achieve a smooth and even application. For corners and edges, a quality brush should be employed to ensure all areas are covered without leaving brush marks.
- Multiple Thin Coats: Instead of applying one thick coat of paint, use multiple thin coats to build up the color and achieve a smooth finish. Each coat should be allowed to dry fully before applying the next, which helps prevent drips and uneven areas.
- Final Sanding: After the final coat has dried, lightly sanding the surface with a fine-grit sandpaper can help eliminate any imperfections. Be sure to wipe down the ceiling afterward to remove any dust from sanding before considering the job complete.