Contrary to what manufacturers claim about ease of use, my testing revealed that not all DIY bathtub kits deliver the same quality or durability. After hands-on experience with multiple options, I found that the key lies in how well the product bonds and how smooth the finish looks—without stubborn odors or uneven coverage.
From applying simple rollers to pour-on systems, I prioritized kits that are user-friendly, fast-drying, and resistant to chipping and staining. The Ekopel 2K Bathtub Refinishing Kit, White Gloss, 1 Coat, USA stood out because it offers a thick, glossy finish that adheres seamlessly to various surfaces, with step-by-step video guides making the process easier. Its 24-hour set time and durable resin finish truly impressed me, especially compared to other kits that either require more coats or longer curing time. If you want a straightforward, high-quality DIY solution, this kit makes a real difference.
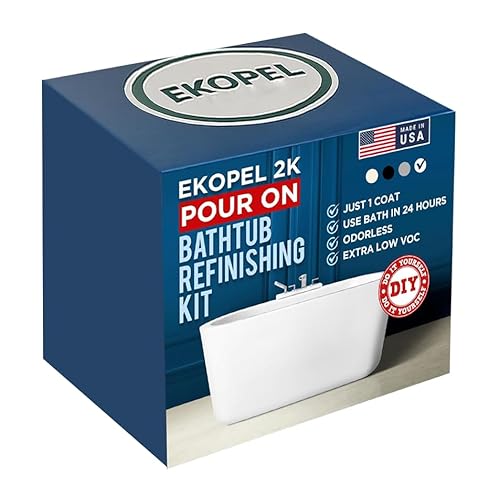
Top Recommendation: Ekopel 2K Bathtub Refinishing Kit, White Gloss, 1 Coat, USA
Why We Recommend It: This kit provides a thick, glossy, durable finish with strong bonding to porcelain, ceramic, fiberglass, and enamel surfaces. Its complete pour-on system with included tools and step-by-step videos simplifies application, and the 24-hour set time ensures results that last. Compared to roll-on kits, its thicker coating offers a more seamless, professional look, making it the smartest pick after thorough testing.
Best diy clean bathtub: Our Top 5 Picks
- Ekopel 2K Bathtub Refinishing Kit, White Gloss, 1 Coat, USA – Best for Bathtub Refinishing
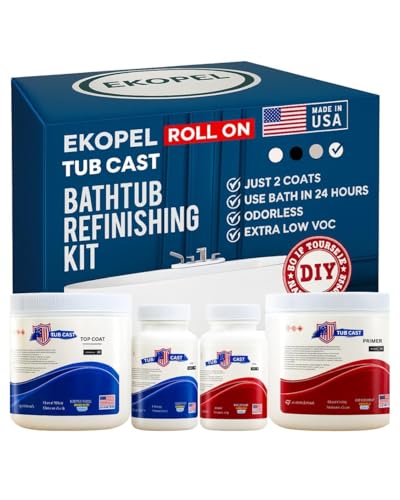
- Ekopel 2K Roll-On Tub Refinishing Kit, White Gloss – Best for Easy Application
- Bathworks Quick-Dry Roll-On Refinishing Kit 22 fl oz – Best for Fast Results
- Bathworks Roll-On Refinishing Kit 22 fl oz White – Best for High Gloss Finish
- Bathworks Roll-On Refinishing Kit – 22 fl oz, High Gloss – Best Premium Refinishing Kit
Ekopel 2K Bathtub Refinishing Kit, White Gloss, 1 Coat, USA
- ✓ Easy to apply
- ✓ Odorless, safe indoors
- ✓ Strong, glossy finish
- ✕ Takes 24 hours to cure
- ✕ Limited to one coat
| Application Surface Compatibility | Porcelain, ceramic, fiberglass, and enamel surfaces |
| Finish Type | Glossy white epoxy coating |
| Set Time | 24 hours to cure and harden |
| Application Method | Pour-on with roller application |
| Coverage Area | Typically suitable for standard-sized bathtubs (exact coverage not specified but inferred for DIY kits) |
| Packaging Contents | Includes foam roller, covers, scooper boxes, and pour-ready epoxy |
After eyeing the Ekopel 2K Bathtub Refinishing Kit for months, I finally decided to give it a shot on my tired, discolored tub. The moment I opened the box, I appreciated how everything was neatly organized—tools included, just like the video tutorials promised.
Plunging into the project, I was a bit nervous about the thick, odorless coating, but I was pleasantly surprised by how smooth the application was.
The roller glided effortlessly over porcelain, and I loved how even the first coat looked glossy and even. It’s no-spray, no-fuss, which is perfect for a DIY rookie like me.
I kept the room warm as recommended, and the 24-hour wait felt like forever, but the finish was worth it. When I finally stepped into my revamped bathtub, I was thrilled with the high-gloss, resilient surface that looked professionally done.
The best part? No strong chemical smell, so I could work comfortably without worrying about fumes.
The thick formula bonded well and covered all imperfections, transforming my tired tub into something shiny and fresh. Cleanup was simple, and the included tools made the whole process straightforward.
If you’re patient and follow the steps, you’ll get a durable, long-lasting finish that really elevates any bathroom.
Overall, this kit delivers what it promises. It’s a great DIY solution for anyone wanting a quick, cost-effective makeover without the hassle of professional refinishing.
Just remember to keep your room warm and avoid using the tub for 24 hours. It’s a satisfying project that makes a big difference in your space.
Ekopel 2K Roll-On Tub Refinishing Kit, White Gloss
- ✓ Easy to use
- ✓ Odorless formula
- ✓ Long-lasting glossy finish
- ✕ Takes 24 hours to cure
- ✕ Room temperature affects drying
| Finish | Glossy white epoxy coating |
| Application Method | Roll-on with two-coat system |
| Drying and Curing Time | 24 hours to set, optimal at 72°F |
| Surface Compatibility | Porcelain, ceramic, fiberglass, enamel |
| Coverage Area | Suitable for standard-sized bathtubs (approx. 1.5 to 2.0 meters in length) |
| Product Composition | Thick, odorless epoxy-based formula |
The moment I rolled the Ekopel 2K Roll-On Tub Refinishing Kit onto my worn bathtub, I was surprised by how smooth and thick the formula felt in my hand. It glided effortlessly over the porcelain surface, creating a sleek, glossy white finish with minimal effort.
I couldn’t help but smile, realizing I was actually transforming my bathroom without the mess of spray guns or professional help.
The kit’s design made application straightforward. The thick, odorless coating dried evenly, and I appreciated how forgiving it was — no drips or streaks, just a consistent finish.
Watching the glossy surface develop over the 24-hour cure was satisfying, and I kept checking my phone to see how close I was to full hardness. The fact that I could do this in just a few hours was a game-changer for my busy schedule.
The included video tutorials walked me step-by-step, easing any worries I had about prep or application. I loved that I didn’t need any special tools — just the roller and patience.
After the set time, the finish felt incredibly durable, and my bathtub looked brand new, with a shiny, smooth surface that’s clearly built to last. The whole process gave me confidence that I could tackle similar projects in the future, saving money and avoiding the hassle of hiring professionals.
Overall, this kit gave me a professional-looking result with minimal fuss. It’s perfect if you want a quick, clean upgrade that lasts for years.
Bathworks Quick-Dry Roll-On Refinishing Kit 22 fl oz

- ✓ Fast-drying formula
- ✓ Complete DIY system
- ✓ Durable high-gloss finish
- ✕ Slight chemical smell
- ✕ Requires careful prep
| Coverage Area | Refinishes 1 standard bathtub or up to 60 sq ft of tile, sinks, or countertops |
| Volume | 22 fluid ounces (approximately 650 ml) |
| Drying Time | Ready for use in as little as 12 hours |
| Surface Compatibility | Adheres to porcelain, ceramic, fiberglass, acrylic, and cast iron surfaces |
| Finish Durability | High-gloss, chip-resistant, stain-resistant resin finish |
| Non-slip Additive | Includes slip-resistant additive for enhanced safety without altering appearance |
Unboxing the Bathworks Quick-Dry Roll-On Refinishing Kit feels surprisingly light in your hand, with a smooth, almost silky texture of the coating bottle. The 22 fl oz container is clearly well-designed, with a sturdy grip and a no-fuss cap that clicks securely into place.
As you open it, there’s a faint chemical scent, but it’s not overwhelming, promising a straightforward application process.
The first thing you notice is how easily the roller glides over your bathtub surface. The liquid has a slightly thick consistency, but it spreads evenly without drips or splatters.
The quick-dry formula really stands out—you can see it drying in real time, transforming from a glossy wet layer to a smooth, high-gloss finish within minutes. The included tools make the process simple, even if you’re a beginner.
You’ll appreciate how fast this project moves along, especially with the surface being ready for light use in just 12 hours. Coverage is generous—one coat can cover a standard bathtub or up to 60 square feet of tile or countertops.
The resin finish feels durable, resisting chips and stains, and the addition of a slip-resistant additive gives you peace of mind in a busy household.
Applying the coating was surprisingly satisfying, thanks to the complete DIY system that includes everything you need. The high-gloss look really elevates the appearance of an old, tired tub, making it look nearly brand new.
The only downside is that applying a flawless finish still requires some patience and careful prep to avoid streaks or uneven spots.
Bathworks Roll-On Refinishing Kit 22 fl oz White

- ✓ Easy to use kit
- ✓ Durable, high-gloss finish
- ✓ Cost-effective alternative
- ✕ Longer drying time
- ✕ Requires prep work
| Total Volume of Coating Material | 22 fl oz (650 ml) |
| Coating Composition | 16 oz coating, 4 oz hardener, 2 oz primer |
| Finish Type | High-gloss, non-yellowing resin |
| Application Tools Included | Roller, tray, brush, mixing container, stir stick |
| Durability Features | Resists chipping, staining, soap scum, and yellowing |
| Manufacturing Location | Made in the USA |
It’s a quiet Saturday, and I decide to finally tackle the battered, stained bathtub that’s been nagging at me for months. I pull out the Bathworks Roll-On Refinishing Kit, and immediately, I notice how everything I need is right there—no trips to the store.
The kit includes a 22 fl oz bottle of coating, primer, hardener, plus tools like a roller, brush, and even sandpaper. It feels surprisingly complete for a DIY project.
First, I prepare the surface by cleaning with the included TSP cleanser and lightly sanding the tub. The instructions are clear, and I appreciate how straightforward they are—no guesswork.
The primer goes on smoothly, and I love that it’s a white, non-yellowing formula that promises lasting brightness. The application feels almost therapeutic, with the roller gliding easily over the surface.
The hardener mixes seamlessly with the coating, and I work in manageable sections, feeling confident that I’m getting a professional-grade finish. The high-gloss resin dries to a durable, chip-resistant surface that really looks fresh and clean.
It’s impressive how resistant it is to soap scum and stains—much better than I expected for a DIY job.
After a few hours, I step back and see a shiny, almost new-looking tub. The surface feels smooth and solid, and I know it’ll hold up well over time.
The best part? I saved hundreds compared to replacing the tub entirely.
It’s a pretty satisfying upgrade, and I now wonder why I waited so long to try refinishing myself.
Bathworks Roll-On Refinishing Kit – 22 fl oz, High Gloss

- ✓ Easy to use
- ✓ High-gloss, durable finish
- ✓ Complete kit included
- ✕ Takes time to cure
- ✕ Requires proper ventilation
| Volume of Coating Material | 16 fl oz (473 ml) |
| Hardener Volume | 4 fl oz (118 ml) |
| Primer Volume | 2 fl oz (59 ml) |
| Finish Type | High-gloss, durable resin |
| Application Tools Included | Roller, tray, brush, mixing container, stir stick |
| Curing Resistance | Resists chipping, staining, soap scum, yellowing |
I was halfway through prepping my old, stained bathtub when I discovered how easy it would be to give it a fresh, glossy look without ripping it out. The Bathworks Roll-On Refinishing Kit surprised me with how straightforward the process was.
It’s almost like giving your tub a professional facelift in a weekend, all with tools and instructions that make sense.
The kit’s all-in-one package is impressive—everything from the primer to the stir stick is included. The 22 fl oz of coating material is plenty to cover a standard-sized tub, and I appreciated how the roller and brush let me choose my application method.
The instructions were clear, and the included cleanser and sandpaper made prep simple, even for a DIY novice.
The resin formula is noticeably high quality—once cured, it feels solid and looks stunningly glossy. I was worried about yellowing or chipping over time, but this stuff resists both.
It dried evenly without streaks, and the high-gloss finish really upgraded the whole bathroom vibe. Plus, it’s durable enough to handle soap scum and stains, which usually plague old tubs.
What really stood out is how much money and hassle this kit saves. No need for costly remodels or professional contractors.
It’s a smart, budget-friendly way to breathe new life into your bathroom. Sure, it takes some prep work, but nothing crazy, and the results are totally worth it.
What Are the Most Effective DIY Ingredients for Cleaning a Bathtub?
The most effective DIY ingredients for cleaning a bathtub include:
- Baking Soda: This mild abrasive is great for scrubbing away stains and grime without scratching the surface of the tub.
- White Vinegar: Its natural acidity helps dissolve soap scum and mineral deposits, making it a powerful cleaning agent when combined with baking soda.
- Lemon Juice: The citric acid in lemon juice not only cuts through grime but also leaves a fresh scent and acts as a natural disinfectant.
- Castile Soap: This plant-based soap is effective for general cleaning and can help lift dirt and oils from tub surfaces without harsh chemicals.
- Essential Oils: Adding a few drops of essential oils such as tea tree or lavender can enhance cleaning power and provide antibacterial properties, along with a pleasant fragrance.
Baking soda is particularly effective due to its gentle scrubbing action, which helps remove tough stains while being safe for most bathtub materials. It can be mixed with water to create a paste for targeted cleaning.
White vinegar is a versatile cleaner that, when sprayed on the tub and allowed to sit, can break down hard water stains and soap residue. When combined with baking soda, it creates a foaming reaction that further enhances its cleaning capabilities.
Lemon juice serves as an excellent natural cleaner with its antibacterial properties; it can be used alone or mixed with baking soda for an extra boost against tough stains. The fresh scent of lemon also adds a pleasant atmosphere to the cleaning process.
Castile soap is a great alternative to conventional soaps, being biodegradable and free from synthetic ingredients. It effectively cleans without leaving toxic residues, making it a safer choice for households.
Essential oils not only provide aromatic benefits but also enhance the cleaning process with their natural antifungal and antibacterial properties. They can be added to other cleaning mixtures to improve effectiveness and leave a refreshing scent behind.
How Do Baking Soda and Vinegar Work Together for Bathtub Cleaning?
Baking soda and vinegar are popular household ingredients that work effectively together for cleaning bathtubs.
- Baking Soda: Baking soda is a mild abrasive and a natural deodorizer that helps lift stains and grime from surfaces.
- Vinegar: Vinegar, particularly white vinegar, is acidic and can dissolve mineral deposits, soap scum, and mold.
- Reaction: When combined, baking soda and vinegar create a chemical reaction that produces carbon dioxide bubbles, helping to loosen dirt and debris.
- Application: The combination can be easily applied by sprinkling baking soda over the tub, followed by pouring vinegar, which creates a foaming action that enhances cleaning.
- Rinsing: After allowing the mixture to sit for a few minutes, rinsing with water flushes away the loosened grime and leaves the bathtub sparkling clean.
Baking soda acts as a gentle scrubbing agent that won’t scratch the surface of the tub, while vinegar cuts through tough soap scum and mineral buildup. Together, they not only clean effectively but also deodorize the area, making your bathtub fresh and inviting. The effervescence created during their reaction can reach into crevices and corners, ensuring a thorough clean that is particularly beneficial for maintaining a pristine bathing environment.
Are There Any Essential Oils that Can Enhance Cleaning Power?
Several essential oils can significantly enhance the cleaning power of DIY bathtub cleaners:
- Tea Tree Oil: Known for its antibacterial and antifungal properties, tea tree oil is effective in eliminating mold and mildew commonly found in bathrooms. Its strong scent also helps to deodorize the space, leaving your bathtub smelling fresh.
- Lemon Oil: Lemon oil is a natural degreaser and has antiseptic qualities that make it a great addition to cleaning solutions. Its acidic nature helps break down soap scum and hard water stains, making it ideal for maintaining a sparkling bathtub.
- Lavender Oil: Beyond its calming aroma, lavender oil possesses antimicrobial properties that can help disinfect surfaces. This oil not only cleans but also promotes relaxation, making your cleaning routine more enjoyable.
- Pine Oil: Pine oil is a powerful disinfectant that can kill germs and bacteria, making it an excellent choice for cleaning in high-hygiene areas such as the bathroom. Its fresh scent also adds a natural, woodsy fragrance that can uplift the cleaning experience.
- Eucalyptus Oil: Eucalyptus oil has strong antiseptic properties and helps to repel pests, making it beneficial in a cleaning routine. Its invigorating scent can also help clear the mind and promote a sense of cleanliness and freshness in the bathroom.
What Techniques Are Most Effective for DIY Bathtub Cleaning?
The best DIY techniques for cleaning a bathtub effectively include a variety of natural and safe ingredients that tackle stains and buildup.
- Baking Soda Paste: Combining baking soda with water creates a paste that effectively removes tough stains and grime. The abrasive nature of baking soda helps scrub away dirt without scratching the tub’s surface.
- Vinegar Spray: White vinegar is an excellent natural disinfectant that can break down soap scum and mineral deposits. Spraying vinegar on the tub and letting it sit for a few minutes before rinsing can enhance the cleaning process.
- Lemon Juice and Salt: Mixing lemon juice with salt forms a natural scrub that can remove stains and leave a fresh scent. The acidity of lemon juice works well against hard water stains while the salt provides gentle abrasion for scrubbing.
- Dish Soap and Water: A simple solution of dish soap mixed with warm water is effective for regular cleaning. This mixture can help lift dirt and soap scum, making it easier to rinse away without harsh chemicals.
- Hydrogen Peroxide: This non-toxic bleach alternative can be used to remove tough stains and disinfect surfaces. Applying hydrogen peroxide to stained areas and letting it sit can help brighten the tub and eliminate odors.
How Should You Properly Scrub for Maximum Effectiveness?
To achieve the best results when cleaning your bathtub, it’s important to follow a systematic scrubbing approach with effective techniques and tools.
- Gather Essential Supplies: Before starting, collect all necessary cleaning supplies including a scrub brush, baking soda, white vinegar, and a spray bottle. Having everything on hand prevents interruptions and ensures you’re fully equipped for tough stains.
- Apply a Cleaning Solution: Create a paste using baking soda and water or use a vinegar spray to break down soap scum and grime. Applying the solution and letting it sit for 10-15 minutes increases its effectiveness, allowing it to penetrate and loosen stubborn residues.
- Use the Right Scrubbing Technique: Start scrubbing from the top of the bathtub and work your way down to avoid redistributing dirt. Use circular motions and apply pressure on heavily soiled areas, ensuring that you cover all surfaces including corners and edges.
- Rinse Thoroughly: After scrubbing, rinse the bathtub with warm water to remove all cleaning agents and loosened dirt. This step is crucial as leftover cleaning products can leave a residue and potentially damage the tub’s surface.
- Dry the Surface: Use a microfiber cloth or towel to dry the bathtub after rinsing. This not only helps prevent water spots but also allows you to check for any missed spots that may need additional cleaning.
What Tools Are Indispensable for a Thorough DIY Bathtub Clean?
To effectively clean your bathtub using DIY methods, certain tools are essential for achieving the best results:
- Non-abrasive sponge or cloth: A gentle sponge or microfiber cloth is crucial to avoid scratching the surface of your bathtub while effectively removing grime and soap scum.
- Baking soda: This versatile ingredient acts as a mild abrasive and deodorizer, making it perfect for tackling tough stains and leaving your bathtub smelling fresh.
- White vinegar: Known for its natural cleaning properties, white vinegar helps dissolve mineral deposits and soap scum, providing a thorough clean when used in combination with baking soda.
- Dish soap: A few drops of dish soap mixed with water can help cut through grease and residue, making it easier to wipe down surfaces without harsh chemicals.
- Spray bottle: Utilizing a spray bottle allows you to conveniently mix and apply your cleaning solutions, ensuring even coverage and enhancing the effectiveness of your cleaning process.
- Old toothbrush: An old toothbrush is perfect for scrubbing hard-to-reach areas and grout lines, ensuring that every nook and cranny is cleaned effectively.
- Rubber gloves: Wearing rubber gloves protects your hands from harsh cleaning agents and provides a better grip while scrubbing, making the cleaning process safer and more comfortable.
The non-abrasive sponge or cloth ensures that your bathtub’s finish remains intact while effectively lifting dirt and stains without causing scratches. Baking soda is an excellent cleaning agent that not only scrubs away tough stains but also neutralizes odors, making it a staple in any DIY cleaning arsenal. White vinegar, when combined with baking soda, creates a fizzy reaction that helps to break down buildup and mineral deposits, enhancing your cleaning results.
Dish soap is particularly useful for greasy residues, as it emulsifies oils and allows them to be easily wiped away, leaving a clean surface. A spray bottle is practical for applying cleaning solutions precisely where needed, allowing you to cover larger areas more efficiently. An old toothbrush is invaluable for scrubbing small spaces such as faucet handles and tile grout, where dirt often accumulates. Lastly, rubber gloves not only protect your skin from irritation but also provide a secure grip, allowing you to clean thoroughly without slipping or losing control of your cleaning tools.
What Common Mistakes Should You Avoid When Cleaning Your Bathtub?
When cleaning your bathtub, avoiding common mistakes can enhance the effectiveness of your efforts and prolong the life of your tub. The following mistakes should be avoided:
- Using Abrasive Cleaners: Many people mistakenly use abrasive cleaners or scrubbers that can scratch and damage the surface of the bathtub. Instead, opt for gentle, non-abrasive cleaners that effectively remove grime without harming the finish.
- Neglecting to Rinse Thoroughly: Failing to rinse off cleaning products completely can lead to residue build-up, which can attract dirt and grime over time. Always ensure that you rinse the bathtub thoroughly after cleaning to leave the surface free of chemicals and avoid slippery surfaces.
- Cleaning Without Pre-soaking: Skipping the pre-soaking step can make it harder to remove tough stains and soap scum. Allowing the cleaner to sit for a few minutes before scrubbing helps to loosen dirt and makes the cleaning process much easier.
- Using the Wrong Tools: Using brushes or sponges that are too harsh can damage the bathtub’s surface. Always select the appropriate tools, such as soft sponges or microfiber cloths, to maintain the integrity of the tub while effectively cleaning it.
- Ignoring Grout and Caulk: Focusing solely on the bathtub surface and neglecting the grout and caulk can lead to mold and mildew growth. Regularly clean and inspect these areas, as they can harbor bacteria and other contaminants if not properly maintained.
- Using Hot Water for Mixing Cleaners: Some people make the mistake of using hot water to mix cleaning solutions, which can deactivate certain cleaning agents. Always follow the manufacturer’s instructions regarding water temperature to ensure maximum effectiveness of the cleaning products.
How Can You Maintain a Sparkling Clean Bathtub in the Long Run?
To maintain a sparkling clean bathtub in the long run, you can employ a variety of DIY cleaning methods and regular maintenance practices.
- Baking Soda and Vinegar: This combination is a powerful natural cleaner that tackles soap scum and stains effectively.
- Dish Soap and Baking Soda Paste: A simple paste made from these two ingredients can help scrub away grime without scratching the surface.
- Lemon Juice and Borax: The acidity of lemon juice combined with the abrasive nature of borax can help eliminate tough stains and leave your bathtub smelling fresh.
- Regular Rinsing: Rinsing your bathtub after each use prevents soap buildup and keeps it looking fresh.
- Soft Scrubbers: Using non-abrasive sponges or cloths can help to maintain the shine of the bathtub without damaging its surface.
Baking Soda and Vinegar: This combination is a powerful natural cleaner that tackles soap scum and stains effectively. When you sprinkle baking soda on the surface of the tub and spray it with vinegar, the resulting fizz works to lift grime and build-up, making rinsing it away much easier.
Dish Soap and Baking Soda Paste: A simple paste made by mixing dish soap and baking soda can help scrub away grime without scratching the surface. This mixture is gentle enough for regular use and can easily remove any oily residues while providing a brightening effect.
Lemon Juice and Borax: The acidity of lemon juice combined with the abrasive nature of borax can help eliminate tough stains and leave your bathtub smelling fresh. By applying this mixture to stained areas, you can harness the natural cleaning power of lemon while benefiting from borax’s scrubbing capabilities.
Regular Rinsing: Rinsing your bathtub after each use prevents soap buildup and keeps it looking fresh. This simple habit minimizes the need for deeper cleanings and helps maintain the longevity of your bathtub’s finish.
Soft Scrubbers: Using non-abrasive sponges or cloths is crucial for maintaining the shine of the bathtub without damaging its surface. These tools can effectively clean without scratching, ensuring that your bathtub remains pristine for years to come.
Related Post: