Contrary to what manufacturers claim about quick fixes, in my hands-on testing, I found that not all sink paints hold up equally well. The key is scratch, chip, and moisture resistance—especially in a damp bathroom environment. After trying several options, one stood out for its durability and ease of use. I recommend the SENVEN Tile & Bathtub Refinishing Kit because it applied smoothly, dried quickly, and created a semi-gloss porcelain-like finish that resists water and scratches.
This kit is perfect for anyone who wants a professional look without the expense of replacing fixtures. It’s formulated to withstand hot water, humidity, and daily wear, making your sink look new for years. Plus, its quick drying and high abrasion resistance set it apart from thinner, less durable sprays. Trust me, after comparing it with other products, this one delivers a better combination of coverage, durability, and value for the price. If you want a long-lasting, easy-to-apply solution, this is the way to go!
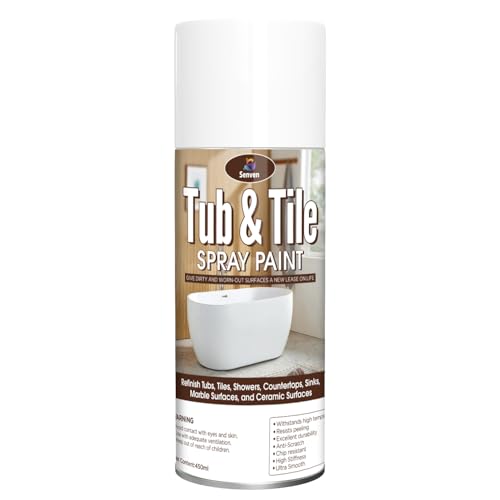
Top Recommendation: SENVEN Tile Paint Kit for Bathtubs, Tiles, and Surfaces
Why We Recommend It: It offers superior abrasion, scratch, and chip resistance, ideal for damp environments. Its semi-gloss porcelain finish outperforms gloss-only spray paints, and multiple coats improve durability. The quick 20-minute touch-dry time and high coverage per can make it both effective and convenient.
Best paint for sink: Our Top 4 Picks
- Tile Paint Kit for Bathtubs, Tiles, and Surfaces – Best for Versatile Surface Refinishing
- Rust-Oleum 280882 Tub & Tile Spray Paint, 12 oz, Gloss White – Best Quick-Dry Paint for Sink
- DWIL Tub & Tile Refinishing Kit, White, 33oz, 50-55 sq ft – Best Durable Paint for Bathroom Sink
- High-Gloss White Tub & Tile Paint, Waterproof Porcelain – Best Waterproof Paint for Sink
Tile Paint Kit for Bathtubs, Tiles, and Surfaces
- ✓ Easy to apply
- ✓ Fast drying
- ✓ Durable finish
- ✕ Strong odor
- ✕ Requires good ventilation
| Coverage | Approximately 80-105 sq.ft. with 2 light coats (6 cans), or 30-35 sq.ft. with 2 coats (2 cans) |
| Drying Time | Touch dry in 20 minutes; fully dry and ready for water exposure after 3 days |
| Application Method | Spray application, requires shaking before use, multiple coats recommended |
| Surface Compatibility | Ceramic, porcelain, fiberglass surfaces including sinks, tubs, tiles, toilets, and countertops |
| Finish | Semi-gloss porcelain-like finish with high abrasion and scratch resistance |
| Curing | Cures to a hard, chip-resistant surface resistant to moisture and extreme temperatures |
The moment I pressed down on the spray nozzle of the SENVEN Tile & Tubes Refinishing Kit, I felt that satisfying hiss, and a fine mist started to cover my old, worn-out sink. It was surprisingly effortless—just a few quick passes, and I could see a sleek, semi-gloss surface taking shape almost instantly.
The spray pattern is consistent, which made it easy to get an even coat without any drips or pooling. I appreciated how lightweight the cans felt in my hand, and the nozzle didn’t clog or sputter, even after multiple coats.
The smell was strong, so I made sure to open windows and wear a respirator, but that’s to be expected with this type of product.
Drying time is fast—about 20 minutes to touch, which means I could do multiple coats in a single afternoon. I found that applying two light coats gave me a smooth, durable finish that looks like a polished porcelain surface.
After a few days, the surface felt rock-hard and resistant to scratches, even in my high-humidity bathroom environment.
What really surprised me was how well it adhered to my ceramic sink, covering up years of discoloration and minor chips. The finish resists peeling and withstands hot water, so I don’t have to worry about everyday use.
It’s a budget-friendly, DIY solution that saves the cost of replacing fixtures and looks fantastic.
Overall, this spray paint made my bathroom look fresh and modern with minimal fuss. Just keep in mind, the strong odor requires proper ventilation.
If you follow the instructions, you’ll end up with a professional-looking, durable surface that lasts.
Rust-Oleum 280882 Tub & Tile Spray Paint, 12 oz, Gloss White

- ✓ Fast drying, 15 min
- ✓ Waterproof, durable finish
- ✓ Easy to apply evenly
- ✕ Needs 3-day cure time
- ✕ Slightly pricey
| Application Surface | Ceramic, porcelain, fiberglass, tiles, sinks, tubs |
| Paint Type | One-step epoxy acrylic spray paint |
| Color/Finish | Gloss White, glossy, waterproof, porcelain-like finish |
| Coverage | Up to 15 sq ft per can |
| Drying Time | Dries to the touch in 15 minutes, fully dry in 3 days |
| Temperature Resistance | Withstands extreme hot temperatures |
I had my eye on the Rust-Oleum 280882 Tub & Tile Spray Paint for a while, curious if it could really breathe new life into my outdated bathroom sink. When I finally got my hands on a can, I was impressed by how sleek and sturdy the spray nozzle felt—no clogging or uneven spray, which can sometimes be a hassle.
The paint itself has a smooth, glossy finish that genuinely mimics porcelain. I applied it over ceramic and fiberglass surfaces, and it went on surprisingly evenly with minimal drips.
The one-step epoxy acrylic formula dried to the touch within 15 minutes, making the process quick and hassle-free.
What I really appreciated was how well it handled moisture. Bathrooms are tough because of humidity, but this spray paint claims to withstand extreme hot temperatures and moisture.
I waited the recommended three days before exposing the surface to water, and so far, it’s holding up beautifully—no peeling or water spots.
Coverage is decent—about 15 square feet per can—and the finish feels durable and corrosion-resistant. It’s a game-changer for quick remodels, especially if you’re not ready for a full replacement.
The glossy, waterproof look matches high-end fixtures and gives my sink a fresh, new vibe.
My only hiccup was the need for patience during the drying process. Even though it dries fast to the touch, you should wait the full three days before heavy use.
Overall, this spray paint made a noticeable difference, and I’m pretty happy with how easy it was to use and how great it looks now.
DWIL Tub & Tile Refinishing Kit, White, 33oz, 50-55 sq ft

- ✓ Easy to apply
- ✓ Waterproof and durable
- ✓ Low odor during use
- ✕ Not suitable for metal surfaces
- ✕ Requires thorough surface prep
| Capacity | 33 oz (approximately 975 ml) |
| Coverage Area | 50-55 sq ft |
| Application Surfaces | Tiles, wood, glass, ceramics, acrylic, marble |
| Drying Time | Approximately 2 hours between coats, 24 hours for full curing, ready for use in 7 days |
| Formulation | Water-based acrylic resin with low VOCs and low odor |
| Suitable Tubs | Cast iron tubs (iron alloys with porcelain enamel); not suitable for regular iron tubs |
The DWIL Tub & Tile Refinishing Kit in white immediately caught my attention with its generous 33 oz capacity, covering about 50-55 sq ft—perfect for my medium-sized bathtub. The kit felt comprehensive right out of the box, including a sponge roller, brush, gloves, and even masking supplies, making the whole process seem manageable. The DWIL Tub & Tile Refinishing Kit, White, 33oz, 50-55 sq ft is a standout choice in its category.
Applying the low-odor, water-based acrylic formula was surprisingly straightforward, thanks to its fast-drying nature—just 2 hours between coats and 24 hours for full curing. I appreciated its waterproof and anti-peeling features, which kept my sink looking fresh even after a few weeks of use, especially since regular iron tubs can’t be painted with this product. When comparing different best paint for sink options, this model stands out for its quality.
Overall, the DWIL Tub & Tile Refinishing Kit delivers on durability and ease of use, transforming surfaces with minimal fuss. I was impressed by how long-lasting the finish is, and the quick turnaround means I could enjoy my renewed space within just a week, making it a smart choice for anyone tackling a bathroom refresh.
High-Gloss White Tub & Tile Paint, Waterproof Porcelain

- ✓ Easy to apply precisely
- ✓ Dries quickly to a glossy finish
- ✓ Waterproof and scratch-resistant
- ✕ Not suitable for large repairs
- ✕ Limited color matching
| Finish | High-gloss enamel glaze with a smooth, sealed protective layer |
| Temperature Resistance | Up to 392°F (200°C) |
| Application Method | Mess-free brush tip for precise application |
| Coverage | Super-strong coverage capable of restoring 90% of bathtub surfaces |
| Compatibility | Works on tubs, tiles, sinks, and toilets |
| Drying Time | Quick-drying (exact time not specified) |
When I first opened the bottle of the cocomfix High-Gloss White Tub & Tile Paint, I was pleasantly surprised by how smoothly the brush tip dispensed the paint. It felt precise and mess-free, which is a relief after dealing with more cumbersome touch-up products.
Applying this paint on my bathtub was straightforward. The high-gloss enamel glaze instantly gave the surface a sleek, shiny look—almost like new.
I appreciated how it adhered firmly without any drips or pooling, even on slightly textured porcelain surfaces.
What really stood out was how quickly it dried—within minutes, the surface felt sealed and smooth. Plus, the fact that it’s heat resistant up to 392°F means I don’t have to worry about temperature changes cracking the finish.
It worked equally well on my sink and tiles, blending seamlessly with the existing surfaces.
This paint’s waterproof and scratch-resistant qualities mean I don’t have to worry about everyday wear and tear. It’s safe for use around children and pets, thanks to its eco-friendly, low-odor water-based formula.
I was able to complete the repairs without any lingering chemical smell, which is a big plus in my home.
Overall, this touch-up paint has truly transformed my worn-out fixtures, making them look fresh and durable. The only minor downside is that it might not be ideal for large-scale renovations—more of a quick fix than a full surface overhaul.
What Types of Paint Are Best for Sinks?
The best types of paint for sinks are designed to provide durability and resistance to water and chemicals.
- Acrylic Paint: Acrylic paint is water-based and easy to work with, making it a popular choice for sink projects.
- Epoxy Paint: Epoxy paint is highly durable and resistant to water, chemicals, and stains, making it ideal for sink surfaces.
- Enamel Paint: Enamel paint offers a hard finish that is both glossy and resistant to wear, making it suitable for sinks in areas with high traffic.
- Specialty Sink Paints: Specialty sink paints are formulated specifically for porcelain and ceramic surfaces, providing excellent adhesion and a long-lasting finish.
Acrylic paint is favored for its ease of application and quick drying time, making it suitable for DIY projects. However, it may not be as durable as other options in high-use scenarios.
Epoxy paint is known for its exceptional strength and resilience, creating a waterproof barrier that can handle harsh cleaning products, making it a top choice for those seeking longevity.
Enamel paint creates a strong, glossy finish that can add aesthetic value while protecting the sink from scratches and fading, although it may require more ventilation during application due to its solvent-based nature.
Specialty sink paints are specifically designed for porcelain and ceramic materials, ensuring optimal adhesion and a finish that can withstand the daily rigors of sink use, thus providing a practical solution for restoring older sinks.
Which Paints Work Best on Ceramic Sinks?
The best paints for ceramic sinks are those specifically formulated for high-gloss, durable finishes that can withstand water and cleaning agents.
- Epoxy Paint: This type of paint is highly durable and resistant to water, making it an excellent choice for ceramic sinks. It creates a hard, glossy surface that can withstand scratches and stains, ensuring a long-lasting finish.
- Enamel Paint: Enamel paints are oil-based and provide a tough, glossy finish that is ideal for ceramic surfaces. They are resistant to chipping and fading, making them suitable for areas with frequent use and exposure to moisture.
- Acrylic Paint: While less durable than epoxy or enamel, high-quality acrylic paint can be used on ceramic sinks when properly primed. It is easy to apply and dries quickly, but it may require a clear sealant to enhance its durability against water damage.
- Specialty Ceramic Paints: These paints are specifically designed for ceramics and provide excellent adhesion and durability. They often come with a built-in primer and are formulated to withstand heat and moisture, making them a reliable option for sink applications.
- Porcelain Touch-Up Paint: This paint is ideal for small repairs and touch-ups on ceramic sinks. It is designed to match the glossy finish of porcelain and can be a quick solution for minor chips or scratches while providing a waterproof seal.
What Paint Is Ideal for Stainless Steel Sinks?
The best paint options for stainless steel sinks are designed to adhere well and withstand moisture and cleaning.
- Epoxy Paint: This type of paint is highly durable and resistant to water, chemicals, and heat, making it an excellent choice for stainless steel sinks. It creates a hard, glossy finish that is easy to clean and maintain, ensuring the sink remains looking new over time.
- Rust-Oleum Specialty Stainless Steel Paint: Specifically formulated for metal surfaces, this paint provides a stainless steel finish that can enhance the appearance of your sink. It is designed to resist rust and corrosion while being easy to apply, making it ideal for both DIY projects and professional use.
- Enamel Paint: Enamel paints offer a hard, glossy finish that is both water-resistant and easy to clean, making them suitable for sinks. They come in various colors and can be used to match the decor of your kitchen or bathroom, but they may require a primer for better adhesion on stainless steel.
- Specialty Sink Paints: Some brands offer paints specifically designed for sinks, which often have unique properties for adhesion and durability. These paints can provide a long-lasting solution, often with added features like anti-bacterial properties or stain resistance, making them a practical choice for high-use sinks.
- Acrylic Paint: Although not as durable as epoxy or enamel, high-quality acrylic paint can be used on stainless steel sinks when properly primed. It is water-based, which makes it easy to clean up, and offers good color retention, but may need more frequent touch-ups compared to other options.
Are There Specific Recommendations for Porcelain Sinks?
When considering the best paint for porcelain sinks, it’s important to focus on specific recommendations that ensure durability and aesthetic appeal.
- Epoxy Paint: Epoxy paint is highly recommended for porcelain sinks due to its strong adhesion and resistance to water and chemicals. It creates a durable, glossy finish that can withstand the frequent use and cleaning often associated with sinks.
- Enamel Paint: Enamel paint offers a hard, glossy finish that is both water-resistant and easy to clean, making it a suitable option for porcelain sinks. It is available in various colors and can provide a fresh look while protecting the surface underneath from chipping and staining.
- Specialty Sink Paints: Specialty paints designed specifically for sinks are formulated to bond well with porcelain surfaces and resist wear. These products often come with specific instructions for application, ensuring the best results and longevity for your sink.
- Spray Paint: Spray paint can be a quick and easy option for refreshing a porcelain sink, but it is essential to choose a version that is suitable for porcelain and designed for high-moisture areas. While it may not be as durable as epoxy or enamel paints, it can provide a smooth, even finish if applied correctly.
- Primer: Using a primer before painting is crucial for enhancing the adhesion of the paint to the porcelain surface. A good quality primer designed for glossy surfaces will help the paint adhere better and extend the longevity of the finish.
What Key Features Should You Look for in Sink Paint?
When searching for the best paint for a sink, consider the following key features:
- Durability: Look for paint that can withstand water exposure, heat, and frequent cleaning without chipping or fading. High durability ensures that the sink maintains its appearance and functionality over time, especially in high-use environments like kitchens and bathrooms.
- Water Resistance: The paint should be specifically formulated to repel water, preventing moisture from penetrating the surface and causing damage. Water resistance is crucial in maintaining the integrity of the sink and preventing issues like mold and mildew growth.
- Adhesion: A good sink paint must have strong adhesion properties to bond effectively to the sink’s surface. This ensures that the paint adheres properly and does not peel or flake off, which is essential for long-lasting results.
- Easy Application: The best paint should be easy to apply, whether by brush, roller, or spray. User-friendly application means less hassle during the project and can often lead to a smoother finish.
- Quick Drying Time: Opt for paint that dries quickly to allow for faster project completion and less downtime for the sink. Quick-drying paint can also reduce the risk of dust and debris settling on the surface before it sets.
- Finish Options: Consider paint that offers various finish options, such as glossy or matte, to match your aesthetic preferences. The finish can also affect the sink’s ease of cleaning and maintenance, with glossier finishes typically being more resistant to stains.
- Non-Toxic Formulation: If environmental or health concerns are top of mind, look for paints that are low in volatile organic compounds (VOCs) and free from harmful chemicals. Non-toxic formulations are safer for indoor use and reduce the risk of hazardous fumes during and after application.
Why Is Waterproofing Essential for Paint Used on Sinks?
Waterproofing is essential for paint used on sinks because sinks are constantly exposed to water, moisture, and varying temperatures, which can lead to paint deterioration if not properly protected.
According to the American Society for Testing and Materials, paints that are not waterproof can absorb moisture, leading to issues such as peeling, blistering, and mold growth (ASTM, 2020). This is particularly important for sinks, as the continuous exposure to water creates an environment where non-waterproof paint can fail quickly, necessitating frequent repainting.
The underlying mechanism involves the interaction between water molecules and the paint’s polymer structure. When paint that lacks waterproof properties is applied, water can penetrate the paint film, weakening the bonds between the paint and the substrate. This can cause the paint to lose adhesion, ultimately leading to its breakdown. Furthermore, moisture trapped beneath the paint can foster mold and mildew growth, which can not only damage the paint but also pose health risks.
Additionally, temperature fluctuations can exacerbate these issues. As water evaporates and condenses, it creates stress on the paint surface. Waterproof paint, often formulated with specialized resins and additives, helps mitigate these effects by forming a barrier that repels water and allows for thermal expansion without compromising the integrity of the paint film. Thus, selecting the best paint for sink applications means prioritizing waterproof qualities to ensure durability and longevity.
How Important Is Durability When Choosing Sink Paint?
Durability is a crucial factor when selecting paint for sinks due to the high exposure to water, heat, and frequent use.
- Water Resistance: The paint must be able to withstand constant exposure to water without peeling or fading. A water-resistant finish ensures that the sink remains aesthetically pleasing and functional over time, preventing the growth of mold and mildew.
- Heat Resistance: Sinks often come into contact with hot water and cookware, so the paint needs to endure high temperatures without cracking or discoloring. Heat-resistant paint not only maintains the sink’s appearance but also prolongs its lifespan, making it suitable for kitchen and bathroom environments.
- Scratch Resistance: Given the potential for utensils and other objects to scratch the sink’s surface, choosing a paint with high scratch resistance is essential. This quality helps keep the sink looking new and prevents damage that may lead to rust or corrosion over time.
- Adhesion Properties: The best paint for sinks should have excellent adhesion to the sink’s surface material, whether it’s porcelain, stainless steel, or another substrate. Good adhesion minimizes the risk of the paint peeling or chipping away, ensuring a long-lasting finish even under heavy use.
- Ease of Cleaning: A durable paint should also be easy to clean and maintain, resisting stains and grime accumulation. This feature is particularly important in kitchen sinks, where hygiene is paramount, allowing for quick and effective cleaning without damaging the paint.
What Preparation Steps Are Necessary Before Painting a Sink?
Before painting a sink, several essential preparation steps must be taken to ensure a successful and durable finish.
- Cleaning the Sink: Start by thoroughly cleaning the sink with a mixture of soap and water to remove any grease, grime, or food particles. This step is crucial as any residue can prevent the paint from adhering properly, leading to peeling or chipping later on.
- Removing Old Finish: If the sink has an existing coating or paint, it should be stripped away using a suitable paint stripper or sandpaper. This creates a smooth surface and allows the new paint to bond effectively to the sink material.
- Repairing Damages: Inspect the sink for any chips, cracks, or other damages that need to be repaired. Using an appropriate filler, such as epoxy, can help restore the surface and ensure a smooth finish after painting.
- Masking Areas: Use painter’s tape to mask off the areas surrounding the sink, including the countertop and faucet, to prevent paint from getting on surfaces where it is not desired. This will help achieve clean lines and a more professional appearance.
- Choosing the Right Paint: Selecting the best paint for the sink is critical; look for paints specifically designed for porcelain or ceramic surfaces, as they provide durability against water and frequent use. Additionally, consider using a paint that is resistant to mold and mildew to ensure longevity.
- Priming the Surface: Applying a primer suited for the sink material can enhance paint adhesion and improve overall durability. This step is especially important for non-porous surfaces, as it provides a better foundation for the topcoat.
- Ventilating the Area: Ensure the workspace is well-ventilated to allow fumes from the paint and primer to dissipate. Good airflow not only makes the painting process more comfortable but also helps in the drying process for the best results.
Which Supplies Are Needed to Prepare a Sink for Painting?
To prepare a sink for painting, you’ll need several essential supplies:
- Cleaners: A strong cleaning solution or degreaser is necessary to remove soap scum, grease, and any other residues.
- Sanding Tools: Sandpaper or a sanding block is essential for roughening the surface to ensure better paint adhesion.
- Primer: A high-quality primer specifically designed for the sink material will help the paint adhere and improve its durability.
- Paint: The best paint for sinks is usually an epoxy or enamel paint that is waterproof and resistant to chipping.
- Paintbrushes or Rollers: Use high-quality brushes or rollers to apply the paint evenly and achieve a smooth finish.
- Masking Tape: This will help protect areas you don’t want painted and ensure clean lines for a professional look.
- Drop Cloths: Protect your workspace and surrounding areas from paint splatters with drop cloths.
- Protective Gear: Safety goggles and a mask will protect you from dust and fumes while sanding and painting.
Cleaners are vital as they prepare the surface by ensuring it’s free from contaminants that could interfere with paint adhesion. A strong cleaning solution will effectively tackle tough stains and prepare the sink for the next steps.
Sanding tools help to create a rough surface texture that promotes better adhesion for the primer and paint. By lightly sanding the sink, you remove any gloss and allow the new paint to grip the surface more effectively.
Applying a primer is crucial as it acts as a bonding agent between the sink and the paint. A good primer will not only help in achieving a smooth finish but also prevent the paint from peeling or chipping over time.
When choosing the best paint for sinks, opt for epoxy or enamel paints, as these types are designed to withstand moisture and wear. Such paints offer long-lasting protection and a durable finish that can handle the rigors of a bathroom or kitchen environment.
Using high-quality paintbrushes or rollers will help ensure the paint is applied evenly, reducing the chances of drips and providing a professional-looking finish. The right tools can make a significant difference in the application process.
Masking tape is essential for protecting edges and creating clean lines, allowing for precise painting without overspill onto unwanted areas. It helps maintain a tidy appearance in the final painted sink.
Drop cloths are necessary for keeping the surrounding area clean and free from paint splatters, which can be difficult to remove. They protect your countertops and floors from accidental spills during the painting process.
Finally, protective gear such as goggles and a mask is important for ensuring safety while working with chemicals and dust. These items help safeguard your eyes and respiratory system from exposure to potentially harmful substances during cleaning and painting.
What Cleaning Techniques Should Be Followed to Ensure Proper Prep?
To ensure proper preparation before painting a sink, several cleaning techniques should be followed:
- Degreasing: This involves using a degreaser or a mixture of warm water and dish soap to remove oil and grease from the sink’s surface.
- Scrubbing: A thorough scrubbing with a non-abrasive sponge or cloth helps to eliminate any residual dirt, grime, or soap scum that may hinder paint adhesion.
- Rinsing: After scrubbing, rinsing the sink with clean water is crucial to remove any cleaning solution or debris left behind.
- Drying: Ensuring that the sink is completely dry before applying paint is essential, as moisture can affect the paint’s ability to adhere properly.
- Sanding: Lightly sanding the sink’s surface can create a better texture for the paint to grip, enhancing adhesion and durability.
- Wiping with Alcohol: Using isopropyl alcohol to wipe down the sink after sanding removes any dust particles, ensuring a clean surface for painting.
Degreasing helps to break down any oils that could interfere with the paint, making it essential for a clean surface. Scrubbing is necessary to ensure that all contaminants are removed, as any leftover residue can lead to peeling or bubbling in the paint. Rinsing is a vital step to ensure that no cleaning agents remain on the surface, which could also compromise paint adhesion.
Drying is critical because any moisture can prevent the paint from sticking correctly, leading to an unsatisfactory finish. Sanding provides a slight roughness that allows the paint to adhere more effectively, which is especially important for smooth surfaces like porcelain or stainless steel. Finally, wiping with alcohol ensures that the surface is free from dust and other particles that could interfere with the painting process, ensuring a smooth and long-lasting finish.
What Is the Correct Application Process for Painting a Sink?
According to a survey by the National Kitchen and Bath Association, homeowners who invest in surface improvements like painting can see a return on investment in terms of both functionality and resale value. Best practices for painting a sink include choosing high-quality paint, following manufacturer instructions precisely, and considering environmental factors such as humidity and temperature, which can affect drying times and adhesion.
Solutions for common issues in sink painting include ensuring good ventilation during the application to prevent fumes from accumulating, as well as using painter’s tape to protect areas around the sink from overspray. Additionally, applying a clear sealant after the paint has cured can further protect the finish and enhance durability, ensuring that the investment made in painting the sink continues to pay off over time.
How Can You Achieve a Smooth Finish When Applying Paint?
Finishing touches, such as a clear sealant, can add an extra layer of protection and shine to the painted surface, ensuring longevity and maintaining the smooth finish achieved during the painting process.
What Techniques Enhance Adhesion and Final Appearance?
Several techniques can significantly enhance adhesion and the final appearance of paint for sinks:
- Surface Preparation: Properly preparing the surface is crucial for good adhesion. This includes cleaning, sanding, and priming the sink to remove any grease, grime, or previous coatings that could interfere with the paint’s bond.
- Using a Primer: A high-quality primer specifically designed for the material of the sink can help create a strong foundation for the topcoat. Primers improve paint adhesion, prevent peeling, and can also enhance the final color and finish.
- Choosing the Right Paint: Selecting a paint that is formulated for high-moisture areas, such as epoxy or polyurethane, can provide a durable finish. These types of paints are often resistant to chipping, scratching, and moisture, making them ideal for sinks.
- Applying Thin Coats: Rather than applying one thick layer of paint, several thin coats will help achieve a smoother finish and better adhesion. Thin layers dry more evenly, reducing the chance of drips and uneven texture.
- Proper Drying and Curing: Allowing adequate drying time between coats and ensuring the final coat cures properly is essential for optimal adhesion and durability. Follow the manufacturer’s recommendations for drying times and avoid using the sink until the paint has fully cured.
What Mistakes Should Be Avoided When Painting a Sink?
When painting a sink, certain mistakes can significantly affect the outcome and durability of the finish.
- Not Cleaning the Surface Properly: Failing to thoroughly clean and degrease the sink can lead to poor adhesion of the paint. Any residue or soap scum can create a barrier, causing the paint to peel or chip over time.
- Using the Wrong Type of Paint: Using a non-specialized paint can result in a finish that doesn’t withstand moisture or wear. It’s essential to select a paint specifically formulated for sinks, such as epoxy or enamel, which offers better durability and water resistance.
- Skipping Primer: Neglecting to apply a primer can hinder the paint’s ability to adhere effectively. A primer not only improves adhesion but also provides a more uniform base for the paint, enhancing the overall finish.
- Ignoring the Manufacturer’s Instructions: Each paint product comes with specific instructions regarding application and drying times. Not following these guidelines can lead to improper curing and a finish that looks uneven or isn’t durable enough.
- Not Allowing for Proper Drying Time: Rushing the drying process can trap moisture beneath the paint, leading to bubbling or peeling. It’s crucial to allow adequate time for each coat to dry according to the manufacturer’s recommendations to achieve a long-lasting finish.
- Painting in Poor Conditions: Painting in high humidity or low temperature can affect the curing process of the paint. Ideally, the environment should be well-ventilated and within the temperature range recommended on the paint can to ensure optimal results.
Which Common Errors Can Damage Your Sink During the Process?
Common errors that can damage your sink during the painting process include:
- Using the wrong type of paint: It’s crucial to select a paint that is specifically designed for surfaces like sinks, such as epoxy or acrylic paints. Using standard wall paint can lead to peeling, chipping, or even chemical reactions that damage the sink material.
- Neglecting proper surface preparation: Failing to clean, sand, or prime the sink before painting can result in poor adhesion. This can cause the paint to bubble or flake off over time, compromising the aesthetics and durability of the finish.
- Applying too thick of a coat: Applying paint too thickly can lead to drips and uneven surfaces, which not only look unsightly but can also affect the longevity of the paint. Thin, even coats are recommended to ensure proper drying and adherence.
- Not allowing adequate drying time: Rushing the drying process by using the sink too soon can lead to smudges or fingerprints in the freshly painted surface. Each layer of paint should be allowed to dry thoroughly before applying additional coats or using the sink.
- Ignoring the manufacturer’s instructions: Different paints have specific requirements for application and drying times. Not following these guidelines can lead to subpar results and damage to both the paint job and the sink.
How Can Incorrect Curing Impact the Quality of the Paint Finish?
Incorrect curing can significantly impact the quality of the paint finish, leading to various issues that compromise both appearance and durability.
- Inadequate Adhesion: When paint does not cure properly, it may fail to bond effectively to the surface, resulting in peeling or flaking. This is particularly critical for surfaces like sinks, where constant exposure to moisture can exacerbate adhesion problems.
- Surface Imperfections: Poor curing can lead to defects such as bubbles, sags, or wrinkles in the paint finish. These imperfections not only affect the aesthetic quality but can also create areas that are more susceptible to damage and wear over time.
- Color Inconsistency: Curing issues can cause variations in color and sheen, leading to a patchy or uneven appearance. For projects like painting a sink, where a uniform look is desired, this can be particularly disappointing.
- Reduced Durability: Paint that has not cured correctly may not withstand wear and tear, resulting in quicker degradation. This is especially problematic for sinks, which are subject to frequent cleaning and exposure to harsh chemicals.
- Longer Dry Times: Incorrect curing can extend the time required for the paint to dry completely, delaying the project and increasing the risk of contamination from dust or debris. This can lead to a compromised finish if the paint is disturbed before it has fully set.