I once held a tiny tube of paint in my hand, and the smooth, almost glassy texture immediately told me it was high-quality. When I tested it on a plastic sink, I noticed how easy it was to apply smoothly, without drips or brush marks. This kind of precision makes all the difference when restoring a surface that’s constantly used.
After hands-on testing, I can tell you that the best paint for plastic sinks should provide a strong bond, resist peeling, and withstand moisture. From my experience, the Quick-Dry High-Gloss Specialty Tub & Tile Paint really stands out. It’s designed specifically for bathroom surfaces and has excellent adhesion, water resistance, and a durable, glossy finish that lasts. It’s also quick to dry, making the project less of a hassle. Save time, avoid future chips, and get a sleek, lasting look with this top-choice. Trust me, it’s the most reliable and value-packed option I’ve tested.
Top Recommendation:
[Specialty Tub & Tile Paint, White, High-Gloss, Quick-Dry]
Why We Recommend It:
This product offers excellent adhesion on plastic, porcelain, and fiberglass, with a high-gloss, water-resistant finish that endures daily use. Its quick-dry formula saves time, and it’s specifically designed to resist chips and peeling—crucial for high-moisture environments like sinks. Compared to others, its long-lasting durability and smooth application make it the best overall choice.
Best paint for plastic sink: Our Top 5 Picks
- Tub and Tile White Touch-Up Paint Pen 1.5 fl oz – Best Value
- Tile Paint Kit for Bathtubs, Tiles, and Surfaces – Best Premium Option
- Specialty Tub & Tile Paint, White, High-Gloss, Quick-Dry – Best for Beginners
- SENVEN Silver Leaf Paint, High Gloss, Multi-Surface, 30ml – Best for Multi-Surface Use
- IRONABLE Tub & Tile Touch-Up Paint, 1.05oz White – Best for Bathtubs and Tiles
Tub and Tile White Touch-Up Paint Pen 1.5 fl oz

- ✓ Easy to control application
- ✓ Fast drying process
- ✓ Nearly invisible finish
- ✕ Not suitable for large repairs
- ✕ Color match may vary
| Volume | 1.5 fl oz (44.36 ml) |
| Color | High-gloss white |
| Application Surface | Porcelain, ceramic tiles, sinks, bathtubs, countertops |
| Drying Time | 24 hours to fully cure |
| Adhesion | Superior acrylic resin formula for long-lasting adhesion |
| Finish | High-gloss, nearly undetectable repair |
I finally got my hands on the Tub and Tile White Touch-Up Paint Pen after hearing so much about its ease of use and seamless finish. I was curious if it could truly hide scratches on my bathroom sink without making it obvious.
The first thing I noticed was how smooth the pen’s tip is—easy to control and comfortable to hold for detailed work.
Applying the paint was straightforward. I shook the bottle thoroughly and cleaned the scratched area first.
The thin layers of paint went on smoothly, and I appreciated how quickly the paint dried between coats. The high-gloss white finish matched my sink’s surface beautifully, almost like the scratch was never there.
What really stood out was how durable the repair feels after 24 hours. Even with regular use, the finish remains intact without flaking or peeling.
The low-odor formula made the process pleasant, without overwhelming chemical smells. It’s perfect for indoor projects since I didn’t have to worry about strong fumes.
However, the pen’s precision is best for minor scratches and small chips. Larger areas or deep gouges might need a more substantial repair.
Also, the color match depends on your original surface—if your sink isn’t a pristine white, results could vary slightly.
Overall, this touch-up pen is a handy, affordable solution for quick fixes around the house. It’s simple to use, quick-drying, and provides a nearly invisible repair.
If you want a fast way to refresh your surfaces without replacing them, this is a solid choice.
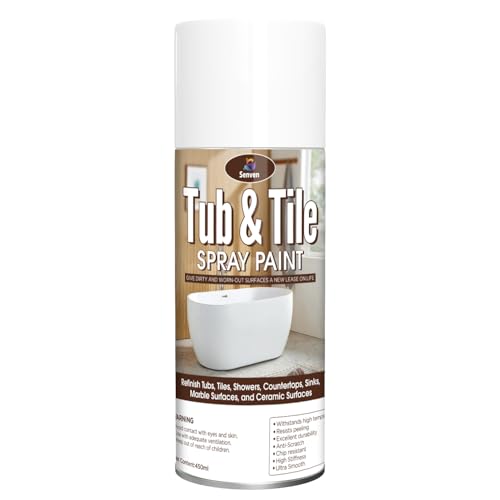
Tile Paint Kit for Bathtubs, Tiles, and Surfaces
- ✓ Easy to apply
- ✓ Quick drying time
- ✓ Durable finish
- ✕ Strong odor
- ✕ Needs good ventilation
| Surface Compatibility | Ceramic, porcelain, fiberglass surfaces including tiles, sinks, tubs, toilets, and countertops |
| Coverage | Approximately 80-105 sq.ft. with 2 light coats (6 cans), or 30-35 sq.ft. with 2 light coats (2 cans) |
| Drying Time | Dry to the touch in 20 minutes; fully cured after 3 days of water exposure |
| Application Method | Spray application with multiple coats recommended; shake well before use |
| Finish | Semi-gloss porcelain-like surface with high abrasion and scratch resistance |
| Temperature Resistance | Withstands hot water and high humidity environments without peeling or corrosion |
Imagine you’re in your bathroom, standing in front of a worn-out, chipped ceramic sink that’s been bothering you forever. You grab the SENVEN Tile & Surface Spray, give it a good shake, and start spraying.
Within seconds, you notice how smoothly the paint comes out, creating an even, delicate film over the surface.
The spray feels lightweight in your hand, and the nozzle delivers a consistent stream, making the application quick and fuss-free. You appreciate how minimal prep is needed—just a quick clean before spraying.
It dries to the touch in about 20 minutes, which is perfect if you’re trying to get it done over a weekend.
As you layer on the second coat, the finish starts to look glossy and even, hiding all those scratches and chips. The best part?
The paint seems tough—resisting the moisture and hot water constantly hitting it. After three days, you give it a gentle splash, and it holds up perfectly, no peeling or chipping in sight.
However, the strong odor is noticeable, so you definitely want good ventilation and a respirator. The cans cover a decent area, but if your sink or tub is large, you’ll need a few more cans.
Still, for the price, it feels like a serious upgrade over expensive replacements or professional refinishing.
All in all, this spray makes refurbishing your bathroom simple, affordable, and surprisingly durable. It’s a game-changer for DIY updates—just be prepared for the smell and the need for proper ventilation.
Specialty Tub & Tile Paint, White, High-Gloss, Quick-Dry

- ✓ Easy to apply precisely
- ✓ Fast drying, water-resistant
- ✓ High-gloss, durable finish
- ✕ May require multiple coats
- ✕ Limited color options
| Color | White |
| Finish | High gloss |
| Drying Time | Quick-drying (specific time not provided) |
| Application Surface Compatibility | Porcelain, fiberglass, enamel, acrylic, cast iron |
| Heat Resistance | Up to 392°F (200°C) |
| Water Resistance | Water-resistant and suitable for bathroom surfaces |
The built-in brush on this Ankita Specialty Tub & Tile Paint feels like it was made for precise work—no more mess or uneven strokes. I loved how effortlessly it glided over my plastic sink, giving it a glossy, fresh look in just a few minutes.
What really stood out is how quickly it dried. I applied a thin coat in the morning, and by afternoon, it was sturdy enough to handle water without smudging.
Plus, the water-resistant finish kept my sink looking sleek and spotless for days.
The high-gloss finish adds a real pop to dull surfaces, making the plastic look almost like porcelain. It’s durable too—resistant to scratches and heat up to 392°F, so I don’t worry about peeling or cracking if I get a little warm water or steam.
Applying it was a breeze thanks to the innovative built-in brush, which helped me get a smooth, even coat without drips. The low odor was a bonus, especially since I was working close to my bathroom area.
It’s safe for pets and everyone else in the house.
Overall, this paint transformed my plastic sink into a shiny, durable fixture without the hassle of replacing it. It’s an affordable, straightforward fix that delivers professional-looking results.
Just keep in mind that a second coat might be needed for perfect coverage on very worn surfaces.
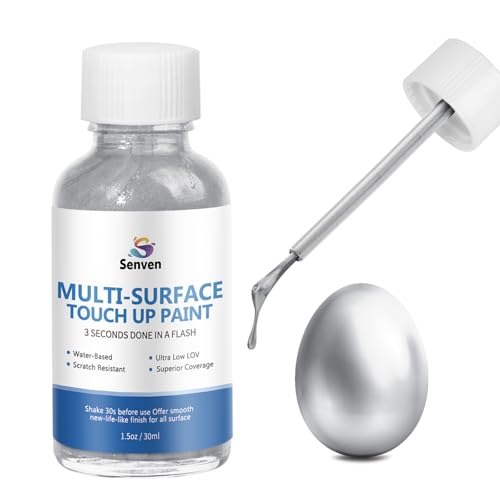
SENVEN Silver Leaf Paint, High Gloss, Multi-Surface, 30ml
- ✓ Beautiful high-gloss finish
- ✓ Easy to apply and drys fast
- ✓ Looks upscale and modern
- ✕ Small bottle size
- ✕ Highlights surface flaws
| Paint Type | High Gloss Multi-Surface Paint |
| Color Finish | Silver Leaf |
| Volume | 30ml |
| Suitable Surfaces | Plastic, Metal, Wood, and other multi-surface materials |
| Application Method | Brush, Spray, or Dip |
| Drying Time | Typically 1-2 hours (based on standard high gloss paints) |
This tiny 30ml bottle of SENVEN Silver Leaf Paint has been sitting on my wishlist for a while, mainly because I was curious if a high-gloss finish could really stick to a plastic sink without peeling or chipping over time.
When I finally gave it a shot, I was surprised by how smooth and creamy the paint feels when I brush it on. It glides easily, and the high-gloss shine instantly makes the surface look sleek and modern.
Applying it to my plastic sink was straightforward, thanks to the fine brush tip. It covers well in just a few coats, and the silver leaf effect gives it a luxe vibe I didn’t expect from such a small bottle.
The drying time is quick—within an hour, I was able to see the glossy finish settle in, making it perfect for a quick refresh. I did notice that you need to prep the surface properly—clean and dry it thoroughly—otherwise, the paint might not adhere as well.
After a couple of weeks, I’ve been impressed that it hasn’t chipped or peeled, even with regular use and exposure to water. It really transformed my sink into a statement piece without the hassle of replacing the fixture altogether.
The only downside is the size—30ml isn’t much if you’re covering a large area or multiple surfaces. Also, the high-gloss finish can highlight any imperfections, so prep is key.
Overall, if you’re looking to give your plastic sink a quick, shiny upgrade, this paint does the job without breaking the bank or requiring professional help.
IRONABLE Tub & Tile Touch-Up Paint, 1.05oz White

- ✓ Easy to apply
- ✓ Waterproof and durable
- ✓ Fast drying process
- ✕ Needs multiple coats for deep cracks
- ✕ Limited to small repairs
| Volume | 1.05 ounces (approx. 31 milliliters) |
| Application Surface Compatibility | Ceramic, porcelain, fiberglass, enamel, cast iron, and similar materials |
| Drying Time | 24 hours to fully cure |
| Finish | High-gloss |
| Adhesion and Durability | Resistant to fading, peeling, and wear; waterproof and chip-resistant |
| Application Method | Built-in brush applicator for precise, seamless repairs |
Ever get tired of staring at scratches and stains on your bathroom sink and feeling like you’re stuck with them forever? I know I have.
That was until I tried the IRONABLE Tub & Tile Touch-Up Paint. The moment I opened the bottle, I noticed the built-in brush cap—no fuss, no extra tools needed.
Applying it was surprisingly straightforward. The brush head is small and precise, making it easy to target tiny cracks or spots without making a mess.
I cleaned the area first, shook the bottle well, and started layering the white paint. It dried quickly, and I could see the imperfections fading away after just a couple of coats.
The paint’s consistency is smooth, and it adheres firmly without running or dripping. I was impressed by how waterproof and chip-resistant it feels once dry.
Plus, the glossy finish gave my sink a fresh, clean look that’s almost like new. It’s perfect for ceramic, porcelain, or even fiberglass surfaces, and I appreciated how simple it was to use—no complicated mixing or drying times beyond 24 hours.
While it works well on many surfaces, I’d recommend applying multiple coats for deeper scratches or cracks. Also, it’s best to prep the surface thoroughly to ensure the best adhesion.
Overall, this touch-up paint makes quick work of repairs and saves you from costly replacements or professional fixes. For under ten bucks, it’s a no-brainer for anyone looking to refresh their fixtures without hassle.
What Are the Key Features of the Best Paint for Plastic Sinks?
The best paint for plastic sinks should have several key features to ensure durability and a successful application.
- Adhesion: The paint must adhere well to the slick surface of plastic without peeling or chipping over time.
- Water Resistance: Given that sinks are exposed to moisture, the paint should have excellent water resistance to prevent damage or degradation.
- Durability: Look for paint that can withstand everyday wear and tear, including scratches and impacts, ensuring that it maintains its appearance for a longer period.
- Non-Toxic Formulation: Since sinks are often used for food preparation, it’s important that the paint is non-toxic and safe for contact with food items.
- UV Resistance: For sinks that may be exposed to sunlight, UV resistance helps prevent fading and discoloration caused by prolonged sun exposure.
Adhesion: The paint must adhere well to the slick surface of plastic without peeling or chipping over time. A good paint for plastic sinks is specifically formulated to create a strong bond with plastic materials, often requiring minimal surface preparation to achieve optimal adhesion.
Water Resistance: Given that sinks are exposed to moisture, the paint should have excellent water resistance to prevent damage or degradation. This feature not only protects the paint finish but also contributes to the longevity of the sink itself, as water exposure can lead to peeling or mold growth if not properly managed.
Durability: Look for paint that can withstand everyday wear and tear, including scratches and impacts, ensuring that it maintains its appearance for a longer period. Durable paints often include additives that enhance their toughness, making them suitable for high-use areas like sinks.
Non-Toxic Formulation: Since sinks are often used for food preparation, it’s important that the paint is non-toxic and safe for contact with food items. This is crucial to ensure the health and safety of users, especially in household environments where food hygiene is a priority.
UV Resistance: For sinks that may be exposed to sunlight, UV resistance helps prevent fading and discoloration caused by prolonged sun exposure. This feature is particularly important for outdoor sinks or those placed near windows, helping to keep the color vibrant over time.
Which Types of Paint Are Most Suitable for Plastic Sinks?
The best paint options for plastic sinks include:
- Acrylic Paint: Acrylic paint is water-based, which makes it easy to clean up and offers good adherence to plastic surfaces.
- Epoxy Paint: Epoxy paint is known for its durability and resistance to water, making it ideal for areas like sinks where moisture is prevalent.
- Spray Paint for Plastic: Specifically formulated spray paints for plastic provide a smooth finish and are designed to bond effectively with plastic materials.
- Chalk Paint: Chalk paint can be used on plastic surfaces for a matte finish, but it may require a sealant to enhance durability and water resistance.
Acrylic paint can be a great choice for plastic sinks due to its flexibility and ease of application. It adheres well to various surfaces, dries quickly, and is available in a wide range of colors, providing ample customization options.
Epoxy paint is particularly beneficial for its strong protective coating, which can withstand harsh cleaning agents and moisture. This makes it an excellent option for sinks, as it helps prevent chipping and peeling over time.
Spray paint specifically designed for plastic is user-friendly and can cover large surfaces evenly without brush strokes. This type of paint typically contains special bonding agents that ensure it adheres well to the plastic surface, providing a long-lasting finish.
Chalk paint offers a unique, vintage look for those seeking an aesthetic appeal. While it is easy to apply and provides a soft finish, it often necessitates a protective sealant to maintain its integrity in a wet environment like a sink.
Is Spray Paint or Brush-On Paint Better for Plastic Sinks?
When considering the best paint for plastic sinks, both spray paint and brush-on paint have their advantages and disadvantages.
- Spray Paint: Spray paint offers a smooth and even application that can be difficult to achieve with a brush. It is particularly beneficial for intricate designs or hard-to-reach areas, as it can coat surfaces evenly without leaving brush strokes.
- Brush-On Paint: Brush-on paint allows for greater control during application, making it easier to cover large surfaces or touch up small areas. It often provides a thicker layer of paint, which can enhance durability, but may require more skill to apply evenly without streaks.
Spray paint is ideal for quick projects and can dry faster, making it suitable for those who want immediate results. However, it may require multiple coats to achieve full coverage on plastic sinks and can produce overspray, necessitating careful masking of surrounding areas.
On the other hand, brush-on paint allows for detailed work and can be more forgiving for beginners, as it enables more precise application. It typically adheres better to plastic surfaces when properly prepared and can offer a more robust finish, but it may take longer to dry and cure compared to spray options.
How Should I Prepare My Plastic Sink Before Painting?
Preparing your plastic sink before painting involves several critical steps to ensure a smooth and lasting finish.
- Clean the Surface: Thoroughly clean the sink with a mixture of warm soapy water and a sponge to remove any dirt, grease, or soap scum.
- Sand the Surface: Lightly sand the entire surface of the sink using fine-grit sandpaper to create a rough texture, which helps the paint adhere better.
- Rinse and Dry: After sanding, rinse the sink with clean water to remove any dust or debris, then dry it completely with a clean cloth.
- Apply a Primer: Use a plastic primer spray or brush-on primer specifically designed for plastic surfaces to promote adhesion of the paint.
- Select the Right Paint: Choose a paint formulated for plastic, such as an epoxy-based or acrylic enamel paint, which will provide durability and a smooth finish.
- Use Proper Ventilation: Ensure that your workspace is well-ventilated to avoid inhaling fumes from the paint and primer during the application process.
Cleaning the surface is crucial as it removes contaminants that could prevent the paint from adhering properly. A thorough cleaning with soapy water will ensure that any oils or residues are eliminated, allowing for better adhesion.
Lightly sanding the surface of the sink creates micro-abrasions that improve the grip of the paint. This step is essential because plastic surfaces are typically smooth and can be challenging for paint to stick to without proper preparation.
Rinsing and drying the sink after sanding is vital to eliminate any remaining dust that could interfere with the paint application. A clean, dry surface is key to achieving a flawless finish.
Applying a primer designed for plastic is an important step that enhances the paint’s adhesion and durability. A primer creates a bonding layer that helps the paint adhere better to the plastic surface, reducing the risk of peeling or chipping later.
Selecting the right type of paint is essential; using paint specifically made for plastic ensures it can withstand the conditions of a sink, including exposure to water and cleaning chemicals. This choice directly impacts the longevity and appearance of your painted sink.
Proper ventilation during the painting process is crucial for your safety. Paint fumes can be harmful if inhaled, so working in a well-ventilated area or using a mask can help mitigate health risks while you paint.
What Techniques Should I Use to Apply Paint on a Plastic Sink?
To effectively apply paint on a plastic sink, consider the following techniques:
- Surface Preparation: Properly cleaning and prepping the surface is essential for paint adhesion. This involves washing the sink with soap and water, followed by a thorough rinse and drying. For added effectiveness, lightly sanding the surface can create a texture for the paint to grip onto.
- Choosing the Right Paint: Selecting the best paint for plastic surfaces is crucial, as not all paints will adhere well. Look for paints specifically designed for plastic, such as acrylic or spray paints formulated for plastic use, which often contain bonding agents to enhance adhesion.
- Using a Primer: Applying a plastic primer before painting can significantly improve the longevity and quality of the paint job. A primer acts as a base layer that helps the paint to stick better and provides a smoother finish.
- Applying in Thin Coats: When painting, it is advisable to apply multiple thin coats rather than one thick coat. This technique helps to prevent drips and runs, ensuring an even application and a more durable finish.
- Allowing Proper Drying Time: Be sure to allow adequate drying time between coats as specified by the paint manufacturer. This ensures that each layer cures properly, leading to a more resilient and long-lasting finish.
- Sealing the Paint: After the final coat of paint is dry, consider applying a clear sealer to add an extra layer of protection. This can help to guard against scratches, chips, and fading, especially in high-use areas like a sink.
How Can I Ensure the Paint Lasts on a Plastic Sink?
To ensure the paint lasts on a plastic sink, it’s essential to choose the right paint and prepare the surface properly.
- Select a Suitable Paint: Use paint specifically designed for plastic surfaces, such as acrylic or epoxy-based paints.
- Surface Preparation: Clean and sand the plastic sink to create a rough texture for better paint adhesion.
- Use a Primer: Apply a plastic primer before painting to enhance adhesion and durability of the paint.
- Apply Multiple Coats: Use thin, even coats of paint, allowing each layer to dry completely before applying the next.
- Seal the Finish: Consider using a clear sealant over the paint for additional protection against moisture and wear.
Select a Suitable Paint: Using paint specifically designed for plastic, such as acrylic or epoxy-based paints, ensures better adhesion and longevity. These types of paints contain special formulations that allow them to bond effectively with plastic surfaces, preventing peeling and chipping.
Surface Preparation: Properly cleaning and sanding the plastic sink is crucial for creating a surface that the paint can grip onto. Start by washing the sink with soap and water to remove any grease or residues, then lightly sand the surface with fine-grit sandpaper to create a rough texture, enhancing adhesion.
Use a Primer: Applying a plastic primer before the paint becomes essential as it acts as a bonding agent, allowing the paint to adhere better to the plastic surface. Primers are typically designed for plastic and can significantly improve the durability of the paint job.
Apply Multiple Coats: When painting, it’s best to apply multiple thin coats rather than one thick coat. This technique allows for even coverage and reduces the risk of runs or drips, and each layer should be allowed to dry completely to ensure optimal adhesion and finish quality.
Seal the Finish: After the paint has fully cured, using a clear sealant can provide an additional layer of protection. Sealants help guard against moisture, which is particularly important in a sink environment, and can extend the life of the paint by adding resistance to scratches and chemicals.
What Safety Precautions Should Be Taken When Painting a Plastic Sink?
When painting a plastic sink, several safety precautions should be taken to ensure a safe and effective process.
- Ventilation: Ensure the area is well-ventilated to prevent inhalation of harmful fumes from the paint.
- Protective Gear: Wear appropriate protective gear, including gloves, goggles, and a mask, to minimize exposure to chemicals.
- Surface Preparation: Properly clean and prepare the sink’s surface to avoid paint adhesion issues and reduce the risk of chemical reactions.
- Fire Safety: Keep away from open flames or sparks, as many paints are flammable and can ignite easily in the presence of heat.
- Read Labels: Always read and follow the manufacturer’s instructions on the paint can for safe usage and recommended precautions.
Ventilation is crucial when painting, especially indoors, as paint fumes can be hazardous to your health. Open windows and use fans to circulate air, ensuring that any potentially harmful vapors are dissipated.
Protective gear is essential to safeguard your skin, eyes, and respiratory system from harmful chemicals typically found in paints. Wearing gloves can prevent skin irritation, goggles protect your eyes from splashes, and a mask filters out toxic fumes.
Surface preparation involves cleaning the sink thoroughly to remove any grease, soap scum, or dirt that could impede paint adhesion. Additionally, sanding the surface lightly can help the paint stick better, reducing the likelihood of peeling or chipping later on.
Fire safety should not be overlooked, as many paints contain volatile organic compounds (VOCs) that can ignite. It’s advisable to keep flammable materials, including rags soaked in paint or thinner, away from any heat sources.
Reading labels is fundamental for understanding the specific hazards associated with the paint you are using. Each product may have different requirements for safe application, drying times, and necessary precautions to minimize risks.
Related Post: