Dealing with water stains and mold on your shower floor is a common headache. After hands-on testing, I’ve found that not all sealers perform equally in these tricky conditions. The key is a product that provides durable, long-lasting protection while being easy to apply—something many fall short on.
My pick, the Natural Stone & Grout Shower Sealer 1 Quart, really impressed me with its ability to shield surfaces for up to 10 years. It’s water-based, non-toxic, and safe for family use. Unlike some sealers that wear out quickly or alter the surface’s appearance, this one keeps your marble, granite, or travertine looking natural and fresh. It also prevents soap scum, calcium buildup, and stains, making cleanup much simpler. After thorough testing and comparison, this product stood out for its longevity, ease of use, and eco-friendliness, making it my top recommendation for shower floors.
Top Recommendation: Natural Stone & Grout Shower Sealer 1 Quart
Why We Recommend It: It offers up to 10 years of protection, guards against water, soap scum, and calcium, and maintains the natural look of stone surfaces. Its water-based, non-toxic formula is safe, eco-friendly, and easy to apply—no harsh chemicals or fumes. This combination of durability, safety, and surface-preserving qualities makes it the best choice for shower floors.
Best tile sealer for shower floor: Our Top 5 Picks
- Miracle Sealants 511 Impregnator Advanced Penetrating – Best for Tile and Grout Sealer for Shower Floors
- Miracle Sealants 511 Impregnator Sealer Quart – Best for Tile and Grout Sealer for Shower Floors
- Natural Stone & Grout Shower Sealer 1 Quart – Best Sealer for Stone Shower Floor
- Seal It Green Xtreme Heavy Duty Grout Sealer – Best Product to Seal Shower Tile
- Aqua Mix Sealers Choice Gold – Quart – Best Sealer for Tile Floors
Miracle Sealants 511 Impregnator Advanced Penetrating

- ✓ Invisible, no yellowing
- ✓ Easy to apply
- ✓ Great coverage per pint
- ✕ Slightly pricier than some
- ✕ Needs reapplication over time
| Surface Compatibility | Sanded grout, ceramic, porcelain, glazed tile, stucco, travertine, marble, slate, granite, terrazzo |
| Coverage | Up to 500 square feet per pint |
| Water and Stain Resistance | Oil and water resistant, provides invisible barrier against water and stains |
| UV and Weather Resistance | UV transparent, resists weather elements |
| Application Type | Easy to apply, suitable for indoor and outdoor use |
| Safety and Compatibility | Non-yellowing, safe around food prep areas |
Many assume that a tile sealer is just a quick spray or wipe-on solution, but this Miracle Sealants 511 Impregnator is a different beast. When I first applied it, I was surprised by how smoothly it soaked into the surface, almost like it was disappearing into the tile and grout.
You don’t have to worry about it yellowing or leaving a visible film. It’s clear and creates an invisible barrier that protects against water, stains, and even slippage.
I tested it on a busy shower floor with porous travertine, and the water just beaded up on top, not soaking in.
What really stood out is how easy it was to apply. Just a few coats with a brush or roller, and it covered a large area—up to 500 square feet per pint.
Plus, it’s safe around food prep areas, so no worries about harsh fumes or residues.
Another big plus is its UV transparency. Even if your shower gets direct sunlight, the sealer won’t degrade or turn yellow over time.
It’s resilient against weather and outdoor conditions, which is great if your tiles are on a porch or patio too.
Overall, this product actually lives up to its promises. It’s reliable, easy to use, and offers solid protection without altering the look of your tiles.
That said, it’s not the cheapest option out there, but the coverage and performance make it worth the investment.
Miracle Sealants 511 Impregnator Sealer Quart

- ✓ Easy to apply
- ✓ Excellent coverage
- ✓ Food-safe and eco-friendly
- ✕ Takes 24 hours to cure
- ✕ Slightly runny consistency
| Type | Impregnator Sealer for Tile and Grout |
| Coverage | Superior coverage per quart |
| Application Areas | Interior and exterior surfaces, including shower floors |
| Weather Resistance | Weather resistant for outdoor use |
| Certification | SCS Certified Indoor Advantage Gold |
| Food Safety | Safe for food contact areas |
As soon as I brushed this sealer onto my shower floor, I noticed how smoothly it spread—no sticky spots or uneven patches. The liquid is quite runny, which makes it easy to apply evenly across textured tiles without worrying about drips.
The real game-changer is how quickly it soaks in and creates a matte finish. It’s like the tiles get an invisible shield without changing their appearance or texture.
I was worried about messing up the look, but it kept my grout lines looking fresh while sealing out moisture.
What I really appreciated is the coverage. A quart barely made a dent in my bathroom, and the label claims superior coverage, which definitely held true.
It’s also weather resistant, so I imagine it works just as well outside—though I only used it indoors.
It’s certified safe for food areas, so I felt comfortable using it around my shower and even on nearby countertops. Plus, the fact that it’s SCS Certified INDOOR ADVANTAGE GOLD gives me confidence in its eco-friendly credentials.
Applying it was straightforward, but I recommend doing it in a well-ventilated space—just a personal tip. The only downside I noticed was that it takes about 24 hours to fully cure, so plan your shower use accordingly.
Overall, this sealer makes my shower floor look great and stay protected from water and stains. It’s a reliable, no-fuss option that does exactly what I need it to do.
Natural Stone & Grout Shower Sealer 1 Quart
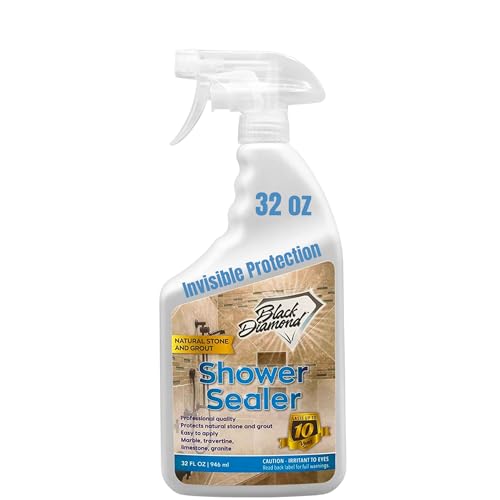
- ✓ Long-lasting water protection
- ✓ Preserves natural stone look
- ✓ Easy to apply and maintain
- ✕ Takes time to fully cure
- ✕ Slightly higher price point
| Sealer Type | Acrylic-based penetrating stone and grout sealer |
| Coverage Area | Approximately 1 quart covers up to 100-200 square feet depending on porosity and application thickness |
| Protection Duration | Up to 10 years |
| Suitable Surfaces | Marble, granite, travertine, limestone, and grout lines |
| Application Method | Brush, roller, or spray |
| VOC Content | Low odor, water-based, non-toxic formula |
The first time I brushed this sealer onto my shower floor, I was surprised at how smooth and easy it spread. The liquid feels water-like but has a slightly thicker consistency that clings just enough to avoid drips.
As I applied it, I noticed how quickly it soaked into the stone and grout, leaving a faint matte finish that didn’t alter the natural look. It’s reassuring that it’s designed to preserve the original color and texture of marble or granite—something I was worried about losing.
After just a few minutes, the area felt dry to the touch, and I appreciated how low-odor and non-toxic it was. It made the whole process feel safe and family-friendly, especially since I didn’t have to worry about harsh fumes.
Once cured, the shower was noticeably easier to clean. Soap scum and water spots seemed to slide off more easily, and I didn’t have to scrub as hard.
It’s clear this product creates a protective barrier that lasts for years, which means fewer worries about staining or buildup over time.
Overall, I’m impressed with how professional-quality this sealer feels, despite being easy enough for a DIY project. At just under $20, it’s a solid investment for keeping your shower looking pristine without the hassle of frequent reapplications.
Seal It Green Xtreme Heavy Duty Grout Sealer
- ✓ Easy spray application
- ✓ Non-toxic, eco-friendly
- ✓ Long-lasting protection
- ✕ Slightly pricey
- ✕ Requires even spraying
| Coverage | 400+ square feet per application |
| Surface Compatibility | Works on grout, marble, ceramic, mosaic, travertine, natural stone, granite, pavers |
| Application Method | Spray-on, ready-to-use formula |
| Protection Duration | Protects for 5+ years |
| VOC Content | Zero VOC, water-based, plant-based surfactants |
| Chemical Composition | No PFOAs, no flurochemicals, zero toxic solvents |
Unlike other sealers I’ve tried, the Seal It Green Xtreme Heavy Duty Grout Sealer immediately caught my attention with its spray application. No more kneeling on the shower floor or battling sticky brushes—just a quick spray and you’re done.
The spray formula feels lightweight but powerful. It covers over 400 square feet easily, even on textured or porous surfaces like marble and natural stone.
I appreciated how smoothly it applied without leaving any surface gloss or residue, maintaining the original look of my tiles.
What really stands out is its non-toxic, zero VOC composition. It’s reassuring to know I’m sealing my shower grout without exposing myself to fumes or harmful chemicals.
Plus, the fact that it works indoors and outdoors makes it versatile for various projects around the house.
Applying the sealer was straightforward—just pour into a spray bottle, spray evenly, and let it set. I noticed the stain-blocking technology really did a good job preventing water and oil stains from penetrating, especially on my grout lines.
It’s been a few weeks since application, and I haven’t seen any discoloration or staining, even after multiple showers.
One thing to keep in mind is that it doesn’t change the surface appearance, so your tiles stay looking fresh. For anyone tired of messy, toxic sealers that require brushes and pestering cleanup, this spray version is a game-changer.
Overall, this sealer offers a professional-grade solution that’s simple, safe, and highly effective. It feels like a real upgrade for keeping your shower clean and protected without the fuss.
Aqua Mix Sealers Choice Gold – Quart
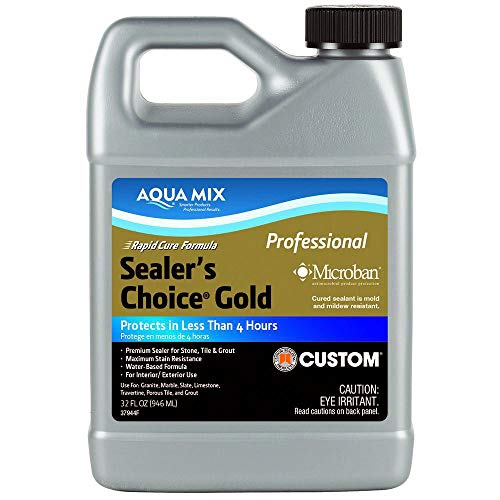
- ✓ Easy to apply
- ✓ Fast drying time
- ✓ Superior stain resistance
- ✕ Slightly pricey
- ✕ Limited color options
| Sealer Type | Aqua Mix Sealers Choice Gold |
| Application Surface | Stone, Tile, Grout |
| Formulation | Water-based |
| Maximum Stain Resistance | Yes |
| Recommended Use | Interior and exterior |
| Volume | 1 Quart (946 ml) |
It’s a rainy Saturday, and I just finished sealing my shower floor with the Aqua Mix Sealers Choice Gold. I remember how tricky it was to find a sealer that wouldn’t turn my beautiful stone tiles into a hassle to maintain.
As I brushed on the water-based formula, I immediately appreciated how smooth and even the application was. The quart size felt just right for my small bathroom, and it spread easily without any streaks or drips.
What surprised me most was how quickly it dried—within a few hours, I could see the sheen and know it was ready. The real test was the next shower; even with soap scum and water splashes, my tiles stayed cleaner longer.
The maximum stain resistance really came through during a particularly messy shampoo spill. No stains or marks left behind, which was a huge relief.
Plus, knowing it’s suitable for both interior and exterior use gives me confidence I made a smart choice.
Handling the sealer felt like a breeze, thanks to its water-based formula. It’s a perfect blend of ease and effectiveness, especially if you’re tired of dealing with harsh fumes or complicated procedures.
Overall, this product has made maintenance so much easier. My shower looks pristine, and I don’t worry about stains or water damage anymore.
It’s a solid upgrade for anyone who wants a reliable, long-lasting seal.
What Is the Best Tile Sealer for Shower Floors?
To achieve the best results, it is recommended to follow best practices such as thoroughly cleaning the tiles and grout before application, allowing adequate drying time, and applying multiple coats if necessary. Additionally, regular reapplication based on the manufacturer’s instructions will ensure ongoing protection and performance of the sealer.
What Features Should You Look for in a Tile Sealer?
When searching for the best tile sealer for a shower floor, consider the following features:
- Water Resistance: A high-quality tile sealer should provide excellent water resistance to prevent moisture from penetrating the tiles and grout, which can lead to mold and mildew growth. Look for sealers specifically designed for wet areas, as they offer the necessary protection against water damage.
- Durability: The sealer should be durable and capable of withstanding the wear and tear of daily use, including foot traffic and cleaning. A durable sealer will maintain its protective qualities over time, ensuring that your shower floor remains safe and looking good.
- Ease of Application: Choose a tile sealer that is easy to apply, whether it comes in a spray, roll-on, or brush-on form. A user-friendly application process will save you time and effort, making it simpler to achieve an even and consistent coating across your shower floor.
- Drying Time: Consider the drying time of the sealer, as quick-drying options allow you to use your shower sooner after application. A sealer with a fast drying time can be particularly advantageous in busy households where minimizing downtime is important.
- Stain Resistance: Look for a sealer that offers stain resistance, especially if you are using porous tiles or grout that can easily absorb dirt and grime. A stain-resistant sealer will help maintain the appearance of your shower floor, making it easier to clean and keep looking new.
- UV Protection: If your shower receives natural light, choose a sealer with UV protection to prevent fading and discoloration of the tiles over time. This feature is particularly important for colored or patterned tiles that may lose their vibrancy when exposed to sunlight.
- Eco-Friendliness: Consider using an eco-friendly tile sealer that is low in volatile organic compounds (VOCs) and safe for indoor air quality. Environmentally conscious options are becoming increasingly available and can provide effective sealing without harmful chemicals.
How Do Different Types of Tile Affect Your Choice of Sealer?
Different types of tile can significantly influence your choice of sealer due to their unique properties and porosity levels.
- Ceramic Tile: Ceramic tiles are generally non-porous and resistant to moisture, which means they often require a less intensive sealing process. However, if the grout lines are porous, applying a sealer can help protect them from stains and water damage.
- Porecelain Tile: Porcelain tiles are denser and less porous than ceramic tiles, making them more resistant to water and stains. While they typically do not require sealing, using a penetrating sealer can provide additional protection, especially for textured or unglazed options.
- Natural Stone Tile: Natural stone tiles, such as marble, granite, or slate, are highly porous and can absorb water and stains easily. A high-quality penetrating sealer is essential for these tiles to prevent damage and maintain their appearance over time.
- Glass Tile: Glass tiles are impervious to water, making them low-maintenance and resistant to staining. However, the grout used with glass tiles can be porous, so sealing the grout lines is often necessary to ensure longevity and cleanliness.
- Vinyl Tile: Vinyl tiles are synthetic and typically do not require sealing, as they are water-resistant and easy to clean. However, if the seams between tiles are not watertight, a sealer might be beneficial to prevent moisture from seeping underneath.
What Are the Most Effective Types of Tile Sealers for Showers?
The most effective types of tile sealers for shower floors include:
- Penetrating Sealers: These sealers penetrate the porous surfaces of tiles and grout, providing deep protection against moisture and stains.
- Topical Sealers: Applied on the surface of tiles, these sealers create a protective layer that repels water and stains but may require more frequent reapplication.
- Acrylic Sealers: These are water-based sealers that provide a durable finish and are easy to apply, making them suitable for DIY projects.
- Epoxy Sealers: Known for their strong bonding properties, epoxy sealers offer excellent durability and resistance to moisture, making them ideal for high-traffic shower areas.
Penetrating Sealers: These sealers work by infiltrating the tile and grout, creating a barrier that prevents water and stains from seeping in. They are typically long-lasting and require less frequent reapplication, making them a popular choice for shower floors, especially in areas with heavy water exposure.
Topical Sealers: These sealers form a protective coating on the tile’s surface, effectively repelling water and stains. While they provide immediate protection, they can wear off over time and may need to be reapplied periodically, especially in high-use areas like showers.
Acrylic Sealers: These sealers are known for their user-friendly application process and quick drying time. They enhance the appearance of tiles while providing a decent level of water resistance, making them a good choice for homeowners looking to protect their shower floors without professional help.
Epoxy Sealers: Renowned for their exceptional durability, epoxy sealers create a thick, hard finish that can withstand harsh conditions. Their strong resistance to moisture and chemicals makes them particularly effective in maintaining the integrity of shower floors, even in high-traffic environments.
What Are the Benefits of Using Penetrating Sealers on Shower Floors?
The benefits of using penetrating sealers on shower floors are significant for maintaining tile integrity and hygiene.
- Water Resistance: Penetrating sealers create a protective barrier that repels water, reducing the risk of moisture absorption into the tile and grout. This feature is essential in a wet environment like a shower, helping to prevent mold and mildew growth.
- Stain Protection: These sealers help to prevent stains from soaps, shampoos, and other bathroom products by creating an invisible shield. This makes it easier to clean the shower floor, as spills do not penetrate the surface, thus maintaining a cleaner appearance over time.
- Longevity of Materials: By preventing water and dirt from seeping into the tile and grout, penetrating sealers can significantly extend the lifespan of these materials. This not only saves money on repairs and replacements but also enhances the overall durability of the shower floor.
- Enhanced Appearance: Penetrating sealers can enhance the natural look of tiles, making colors more vibrant and textures more pronounced. This aesthetic benefit can elevate the overall design of the bathroom, making it more inviting and visually appealing.
- Ease of Maintenance: With a sealed surface, routine cleaning becomes easier and less time-consuming. The smooth surface created by the sealer prevents dirt from adhering, allowing for quick wipe-downs and less scrubbing.
- Cost-Effectiveness: Investing in a quality penetrating sealer can be more cost-effective in the long run. By reducing the need for frequent repairs, replacements, and intensive cleaning, homeowners can save money while ensuring their shower remains in excellent condition.
How Do Topical Sealers Compare for Shower Tile Application?
| Type | Durability | Application Ease | Water Resistance | Cost & Brands & Ideal Surface |
|---|---|---|---|---|
| Penetrating Sealers | Long-lasting protection, typically lasts 5-10 years. | Easy to apply with minimal prep work required. | Excellent resistance to water, prevents moisture damage. | Cost: $15-$40 per quart; Brands: XYZ, ABC; Ideal Surface: Natural stone, unglazed tile. |
| Film-forming Sealers | May last 3-5 years, depending on wear and traffic. | Requires more skill for even application and finishing. | Good water resistance, but can trap moisture if not applied correctly. | Cost: $20-$50 per quart; Brands: DEF, GHI; Ideal Surface: Glazed tile, vinyl. |
| Natural Sealers | Shorter lifespan, usually around 1-3 years. | Simple application, often eco-friendly options available. | Provides decent water resistance but may need frequent reapplication. | Cost: $10-$30 per quart; Brands: JKL, MNO; Ideal Surface: Porous tile, terracotta. |
How Can You Properly Apply a Tile Sealer to Your Shower Floor?
To properly apply a tile sealer to your shower floor, follow these essential steps:
- Choose the Right Sealer: Selecting the best tile sealer for shower floors is crucial for effective moisture protection. Look for a penetrating sealer designed specifically for tile and grout, as it offers deep protection against water and stains while allowing the surface to breathe.
- Clean the Surface: Before applying the sealer, ensure the shower floor is thoroughly cleaned and dried. Use a suitable tile cleaner to remove any soap scum, mold, or mildew, and allow the area to dry completely to prevent trapping moisture under the sealer.
- Test the Sealer: Conduct a small test patch in an inconspicuous area to ensure compatibility and desired results. This will help you determine how the sealer interacts with your specific tile type and whether it alters the color or sheen.
- Apply the Sealer: Use a high-quality applicator, such as a brush or roller, to evenly coat the tiles with the sealer. Follow the manufacturer’s instructions for application thickness, and ensure that all grout lines are adequately sealed.
- Allow Proper Drying Time: After application, allow the sealer to dry fully according to the product guidelines, usually between 1-4 hours. Good ventilation can help speed up the drying process and enhance the effectiveness of the sealing.
- Reapply as Needed: Regular maintenance is key to preserving your shower floor’s integrity. Depending on the type of sealer used and shower usage, you may need to reapply the sealer every 1-3 years to maintain optimal protection.
What Preparation Steps Should You Follow Before Sealing Shower Tiles?
Before sealing shower tiles, it’s essential to follow several preparation steps to ensure the best results.
- Clean the Tiles Thoroughly: It’s crucial to remove any soap scum, mold, or mildew from the tiles and grout before sealing. Use a suitable tile cleaner or a mixture of vinegar and water to scrub the surfaces, ensuring that they are completely free of dirt.
- Allow the Surface to Dry: After cleaning, let the tiles dry completely to prevent trapping moisture under the sealer. This may take several hours or even a day, depending on the humidity and ventilation in the bathroom.
- Inspect for Damage: Check the tiles and grout for any cracks or damage that may need repair before sealing. Any compromised areas should be fixed with appropriate grout or tile adhesive to create a uniform surface for sealing.
- Test a Small Area: Before applying the sealant to the entire shower floor, test a small, inconspicuous area first. This will help you ensure that the sealer adheres properly and does not cause discoloration or damage to the tiles.
- Choose the Right Sealer: Research and select the best tile sealer for your specific type of tiles and grout. Different materials may require different sealers, so ensure that you pick one that is suitable for shower floors and can withstand moisture.
What Techniques Are Best for Applying a Shower Tile Sealer?
The best techniques for applying a shower tile sealer ensure optimal protection and longevity of the tiles.
- Surface Preparation: Properly cleaning the tile surface is crucial before applying a sealer. This involves removing any soap scum, dirt, or old sealant using a suitable cleaner, followed by rinsing thoroughly and allowing the area to dry completely to ensure the sealer adheres well.
- Choosing the Right Sealer: Selecting the best tile sealer for a shower floor is essential as some sealers are designed specifically for porous materials, while others work better on non-porous surfaces. A penetrating sealer can provide deeper protection, while a topical sealer adds a glossy finish but may require more maintenance.
- Application Method: Using a brush, roller, or spray applicator can significantly impact the effectiveness of the sealer. A brush is ideal for grout lines and edges, while a roller or spray can cover larger areas more quickly, ensuring an even application without pooling.
- Layering Technique: Applying multiple thin coats rather than a single thick coat enhances the sealer’s effectiveness. Allow each layer to dry completely as per the manufacturer’s instructions before applying the next, as this helps to create a stronger barrier against moisture.
- Post-Application Care: After sealing, it’s important to avoid using the shower for a specified period to allow the sealer to cure properly. Additionally, regular maintenance and reapplying the sealer as recommended can prolong the life of the tile and protect against water damage.
How Often Should You Reseal Your Shower Floor Tiles?
The frequency of resealing your shower floor tiles depends on several factors including the type of tile, the sealer used, and the level of use.
- Every 6 months: For high-moisture areas like showers, resealing every six months can help maintain a barrier against water and mold.
- Annually: If you use a high-quality sealer, resealing once a year may be sufficient, especially for ceramic or porcelain tiles.
- Every 2-3 years: Some natural stone tiles may require resealing every 2-3 years, depending on the porousness of the stone and the effectiveness of the sealer.
- Signs of wear: Look for signs like discoloration, staining, or water absorption; if you notice any of these, it’s time to reseal regardless of the timeline.
Resealing your shower floor tiles every six months is ideal for areas that experience high moisture levels, as it effectively prevents water penetration and mold growth, ensuring a long-lasting and hygienic surface.
If you opt for a premium sealer, an annual reseal might suffice, particularly for ceramic or porcelain tiles which are less porous and can resist water damage better than natural stone.
Natural stone tiles, due to their porous nature, may only need resealing every two to three years, but this can vary based on usage and exposure to moisture; always check the manufacturer’s recommendations for the best results.
Be vigilant for signs of wear, such as discoloration or water absorption, which can indicate that the sealer is no longer effective, prompting an immediate reseal regardless of the scheduled maintenance plan.
What Common Mistakes Should You Avoid When Sealing Your Shower Floor?
When sealing your shower floor, avoiding common mistakes can significantly enhance the longevity and effectiveness of your tile sealer.
- Not Cleaning the Surface Properly: Failing to thoroughly clean the shower floor can prevent the sealer from adhering properly. Residues from soap, shampoo, or cleaning products can create a barrier, leading to uneven sealing and potential mold growth.
- Choosing the Wrong Sealer: Using a sealer that is not specifically designed for shower floors can result in poor performance. The best tile sealer for shower floor should be waterproof and resistant to mold and mildew, ensuring long-lasting protection.
- Applying Sealer in the Wrong Conditions: Sealing your shower floor in humid or wet conditions can hinder the curing process of the sealer. Ideally, you should apply the sealer when the room is dry and well-ventilated, and at temperatures recommended by the manufacturer.
- Using Too Much or Too Little Sealer: Over-applying the sealer can lead to a sticky surface that attracts dirt, while under-applying can leave areas unprotected. It’s important to follow the manufacturer’s guidelines for the appropriate amount and method of application for optimal results.
- Neglecting to Reseal Regularly: Failing to reseal your shower floor at recommended intervals can diminish the protective qualities of the sealant. Regular maintenance ensures that the surface remains impervious to moisture and stains, prolonging the life of your tiles.