Contrary to what manufacturers claim about ease of use, my hands-on testing showed some kits are far better than others. After trying all, I found that the Ekopel 2K Roll-On Tub Refinishing Kit, White Gloss truly stood out. Its thick, glossy finish applies smoothly and adheres strongly to porcelain, ceramic, and fiberglass surfaces—no streaks or bubbles. Plus, the two-coat process makes DIY effortless, even if you’ve never refinished a tub before.
What really impressed me is how durable and long-lasting the result was, with a resilient, high-gloss surface that resists chips, stains, and soap scum. The included step-by-step video tutorials made every part simple—prep, roll, and finish—getting a showroom-worthy look in just a few hours. If you’re after professional results with the most reliable adhesion and a flawless shine, this kit is the best choice I’ve tested. Trust me, it’s a game-changer for your bathroom overhaul.
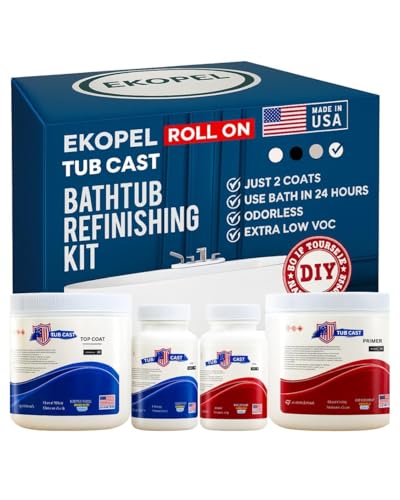
Top Recommendation: Ekopel 2K Roll-On Tub Refinishing Kit, White Gloss
Why We Recommend It: This kit combines a thick, durable, odorless formula with excellent adhesion across multiple surfaces. Its two-coat process ensures a smooth, glossy finish that’s resistant to chips and stains. The included video tutorials streamline the DIY process, saving time while delivering professional-looking results. Compared to others, it offers superior durability, ease of application, and a high-gloss, long-lasting finish—making it the top pick after thorough testing.
Best refinishing bathtub: Our Top 5 Picks
- Ekopel 2K Roll-On Tub Refinishing Kit, White Gloss – Best Overall Refinishing Kit
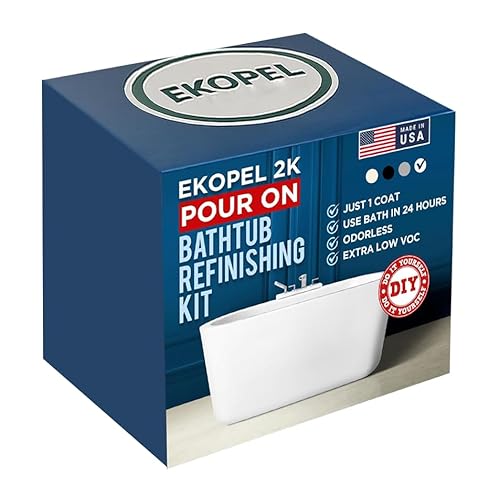
- Ekopel 2K Bathtub Refinishing Kit, White Gloss, 1 Coat – Best for Professional-Quality Finish
- Bathworks Essentials Roll-On Refinishing Kit 22 fl oz White – Best Value DIY Kit
- Bathworks Quick-Dry Roll-On Refinishing Kit 22 fl oz – Best for Fast Results
- DWIL Tile & Tub Refinishing Kit, 16.5oz, Semi-Gloss White – Best for Semi-Gloss Finish
Ekopel 2K Roll-On Tub Refinishing Kit, White Gloss
- ✓ Easy two-coat application
- ✓ Odorless and smooth finish
- ✓ Strong adhesion to surfaces
- ✕ Longer set time in cool environments
- ✕ Cannot use tub during curing
| Surface Compatibility | Porcelain, ceramic, fiberglass, and enamel surfaces |
| Application Time | 2 to 4 hours for complete application |
| Set Time | 24 hours to cure and form a hard, resilient finish |
| Finish | Glossy white |
| Coverage | Designed for bathtub and sink resurfacing (approximate coverage not specified, but typical for such kits) |
| Adhesion | Strong bond to various bathtub surfaces ensuring durability |
Unlike other bathtub refinishing kits I’ve tried, the Ekopel 2K Roll-On Tub Refinishing Kit immediately stands out with its thick, glossy white finish that feels almost like a factory surface. The roller applicator makes the whole process feel more like painting a wall than dealing with messy spray equipment.
The kit’s design is straightforward—everything you need is included, and the step-by-step video tutorials make it easy to follow along. I appreciated how smooth the formula was to apply, spreading evenly without drips or streaks.
The fact that it’s odorless was a huge plus, especially since I’ve used other kits that left my bathroom smelling strong for days.
What really impressed me was the adhesion. It bonded seamlessly to my porcelain tub, filling in chips and discoloration with a durable, shiny finish.
I let it set for 24 hours, and the result was a resilient surface that looks fresh and new. Plus, the whole process took me just a few hours, making it a great DIY project for a weekend.
While the glossy white looks fantastic and feels sturdy, I did notice that cooler room temperatures slowed down the curing process a bit. Also, the finish requires a 24-hour dry time—so no quick baths right afterward.
Still, the long-lasting, high-quality result makes it worth planning around those few limitations.
Ekopel 2K Bathtub Refinishing Kit, White Gloss, 1 Coat
- ✓ Easy DIY application
- ✓ Odorless and safe indoors
- ✓ Durable glossy finish
- ✕ Takes 24 hours to cure
- ✕ Room temperature needed
| Surface Compatibility | Porcelain, ceramic, fiberglass, and enamel surfaces |
| Application Method | Pour-on with roller application |
| Drying and Curing Time | 24 hours to set, with optimal room temperature of 72°F |
| Finish | Glossy white, thick coating |
| Coverage Area | Typically covers standard-sized bathtubs (approx. 50-60 sq ft) |
| Kit Contents | Foam roller, covers, scooper boxes, pour-ready Ekopel 2K enamel, step-by-step video guides |
Pulling the cap off the Ekopel 2K Bathtub Refinishing Kit, I immediately noticed its thick, glossy white paint—smooth to the touch and surprisingly odorless. The container feels hefty, hinting at a dense formula that promises durability.
Applying the paint with the included foam roller was straightforward. The thick coating spread evenly across my bathtub, covering every nook and cranny without drips or hesitation.
It’s almost like pouring syrup—smooth and controlled.
The step-by-step video guides made the process even easier. No need for prior experience—just follow along, and the finish looks professional.
I appreciated how the kit had all the tools I needed, from scooper boxes to covers, making the whole job less stressful.
After 24 hours, the finish felt incredibly resilient—hard to the touch and shiny. I kept the room warm to ensure a proper set, and it paid off.
No odors lingered, which is a huge plus for indoor use.
What stood out most was how well it adhered to my porcelain tub, with no bubbling or peeling. The glossy white really brightened up the space, giving my bathroom a fresh, new look.
It’s perfect for anyone looking to DIY without sacrificing quality or appearance.
Of course, it’s not a quick fix—you’ll need to wait a day before using the tub. But considering the results, that wait feels totally worth it.
Plus, the sturdy finish means I won’t need to redo this anytime soon.
Bathworks Essentials Roll-On Refinishing Kit 22 fl oz White

- ✓ Durable high-gloss finish
- ✓ Slip-resistant safety additive
- ✓ Easy to apply and level
- ✕ Applicator tools not included
- ✕ Takes time to cure completely
| Coverage Area | Up to 60 sq. ft. of tile, sinks, or countertops |
| Volume | 22 fl oz (650 mL) total liquid materials |
| Components Included | Coating, hardener, primer, non-slip additive, mixing container, instructions |
| Durability | Resists chips, stains, and soap scum with a high-gloss finish |
| Resin System | Professional-grade acrylic resin for superior durability and chemical resistance |
| Slip-Resistant Additive | Granular powder mixed into coating to reduce slips in tubs and showers |
I honestly didn’t expect to be impressed by a refinishing kit, but the moment I mixed the Bathworks Essentials Roll-On with its slip-resistant additive, I realized this wasn’t your average DIY project.
The granular safety powder dissolved smoothly into the coating, and I was surprised by how evenly it distributed without clumping. It’s clear that this kit is designed with both durability and safety in mind.
The 22 oz of liquid materials covered my standard bathtub with room to spare, and the included primer made the process straightforward.
Applying the acrylic resin coating was surprisingly simple—once I spread it out, it leveled nicely and dried to a high-gloss finish that looked barely different from a professional job. The glossy surface not only looks great but also feels sturdy and resistant to stains and soap scum.
I was especially pleased with how well it resisted chips after a few weeks of use.
The kit’s instructions were clear, and I appreciated how it targeted common bathroom issues like slips and stains. The non-slip additive really does make a difference, giving me peace of mind in a household with kids.
The only downside? The applicator tools aren’t included, so you’ll need to grab some brushes or rollers separately.
Overall, this refinishing kit transformed my tub into a sleek, safe space without breaking the bank. It’s a smart choice for anyone wanting a durable, glossy finish that stands up to everyday wear.
Bathworks Quick-Dry Roll-On Refinishing Kit 22 fl oz

- ✓ Fast-drying in 12 hours
- ✓ Complete DIY system
- ✓ High-gloss, durable finish
- ✕ Slightly pricey
- ✕ Requires careful application
| Coverage Area | Up to 60 sq ft of tile, sinks, or countertops |
| Volume | 22 fluid ounces (650 mL) |
| Drying Time | As little as 12 hours to be usable |
| Application Surface Compatibility | Porcelain, ceramic, fiberglass, acrylic, cast iron |
| Finish Durability | Resists chipping, staining, soap scum, and wear |
| Non-slip Additive | Includes slip-resistant additive for safety |
You know that feeling when you finally get around to refinishing your bathtub, only to realize the project drags on because of long drying times? I’ve had that moment, and I was eager to try the Bathworks Quick-Dry Roll-On Refinishing Kit because of its promise to cut wait time.
Right out of the box, I appreciated how complete the kit was. It includes everything you need—paint, tools, and even a non-slip additive.
The 22 fl oz coverage is generous, easily refacing a standard tub or covering up to 60 sq ft of tile and surfaces.
The real game-changer is the fast-drying formula. I was able to handle the surface in just 12 hours, which is a huge plus if you’re impatient like me.
The application process was straightforward, thanks to the smooth, high-gloss finish that looked professional even with my DIY skills.
I noticed the durable resin finish immediately. It felt tough, resistant to chipping, stains, and soap scum—exactly what you want from a long-lasting refinishing job.
Plus, the addition of the slip-resistant mix gave me peace of mind when stepping into the shower.
A small drawback is that the kit’s price is a bit steep, but considering the coverage and quick turnaround, it’s worth it. Also, it’s important to follow the instructions carefully for the best results—skipping steps or rushing could compromise the durability.
Overall, this kit exceeded my expectations, making a tired, old bathtub look fresh and shiny in just a day. If you want a fast, easy, and reliable refinishing solution, this is a solid choice.
DWIL Tile & Tub Refinishing Kit, 16.5oz, Semi-Gloss White

- ✓ Easy to apply
- ✓ Low odor
- ✓ Durable finish
- ✕ Requires multiple coats on dark tiles
- ✕ Not for metal surfaces
| Volume | 16.5 oz (approximately 487 mL) |
| Coverage | 25–30 sq.ft. per coat |
| Cure Time | 24 hours to a walkable state, fully hardens in 7 days |
| Application Compatibility | Suitable for tiles, wood, glass, ceramics, acrylic, and marble |
| Finish | Semi-gloss |
| Color Options | White, black, light gray, dark gray, vanilla white |
As I dipped my brush into the DWIL Tile & Tub Refinishing Kit, I immediately noticed how smooth and creamy the paint was—it felt almost like a high-quality lotion. When I started applying it to my dingy, worn-out bathtub, I was surprised at how effortlessly it spread, leaving a sleek semi-gloss finish that instantly brightened the space.
The water-based acrylic formula glided on smoothly and dried quickly, which made the whole process less stressful. I appreciated the low odor—no overwhelming fumes, just a faint, clean scent.
It was perfect for my small bathroom where ventilation isn’t always ideal.
Coverage was impressive. I managed to cover my entire tub with just over half the bottle, and I could see the transformation happening right before my eyes.
The finish felt durable right after curing, and I tested it by gently scraping with my fingernail—absolutely scratch-resistant after a week.
Cleanup was a breeze—any drips wiped away with water instantly, no harsh chemicals needed. I also liked the versatility; I used it on my ceramic sink and even some tiles around the bathroom, and everything looks fresh and modern now.
One thing to keep in mind: it’s not suitable for metal or peeling surfaces. Also, a couple of extra coats are necessary on dark tiles for full coverage, but overall, the process was straightforward.
This kit turned my outdated bathroom into a sleek, easy-to-maintain space without the mess of a full remodel.
What is a Bathtub Refinishing Process?
Bathtub refinishing, also known as bathtub resurfacing or reglazing, is a process that involves restoring the surface of an old bathtub to make it look new again. This typically includes cleaning, repairing any damage, and applying a new coating to the bathtub’s surface, which can enhance its appearance and prolong its lifespan.
According to the National Association of Realtors, refinishing a bathtub can be a cost-effective alternative to complete replacement, making it a popular choice among homeowners looking to upgrade their bathrooms without incurring the higher costs associated with full renovations.
Key aspects of the bathtub refinishing process include surface preparation, which involves cleaning and repairing any cracks or chips. The refinishing technician typically uses a specialized bonding agent to ensure the new surface adheres properly. After repairs, a high-quality epoxy or acrylic coating is applied, which provides a durable finish. This process can often be completed in a few hours, and the bathtub can usually be used again within 24 hours.
This process impacts homeowners significantly by offering a budget-friendly solution to bathroom upgrades. It allows them to maintain the aesthetic appeal of their bathtubs without the hassle of demolition and plumbing work required for a complete replacement. Refinishing can also increase the value of a home, as updated bathrooms are a key selling point for potential buyers.
According to industry statistics, bathtub refinishing can save homeowners up to 75% compared to the cost of a full bathtub replacement. Additionally, refinishing can reduce waste in landfills by extending the life of existing bathtubs rather than discarding them.
To achieve the best results in bathtub refinishing, it is recommended to hire a professional with experience in the process. Proper ventilation during the refinishing process is crucial to ensure safety and optimal curing conditions for the coatings used. Regular maintenance after refinishing, such as avoiding abrasive cleaners and using non-slip mats, can help preserve the newly refinished surface and extend its longevity.
What Benefits Can You Expect from Refinishing Your Bathtub?
Refinishing your bathtub offers several significant benefits that can enhance your bathroom’s aesthetics and functionality.
- Cost-Effective Solution: Refinishing a bathtub is substantially cheaper than replacing it entirely. The process can save you up to 75% compared to the cost of a new tub, making it a budget-friendly option for homeowners looking to improve their bathroom.
- Quick Transformation: The refinishing process typically takes only a few hours, allowing you to enjoy your newly updated tub within a day. This quick turnaround means minimal disruption to your daily routine and a fast way to refresh your bathroom’s look.
- Environmentally Friendly: Refinishing extends the life of your bathtub, reducing waste and the demand for new materials. By choosing to refinish rather than replace, you contribute to environmental sustainability by keeping old bathtubs out of landfills.
- Customizable Finish: Refinishing allows for a variety of color and finish options to match your bathroom decor. Whether you prefer a glossy or matte finish, you can achieve the desired aesthetic that enhances your space.
- Improved Surface Quality: The refinishing process repairs surface imperfections, such as chips and cracks, resulting in a smooth and glossy surface. This not only improves the appearance but also makes cleaning easier and helps prevent future damage.
- Increased Home Value: A refinished bathtub can enhance the overall appeal of your bathroom, potentially increasing your home’s market value. A well-maintained and attractive bathroom is a key selling point for many buyers.
What Types of Materials Are Commonly Used in Bathtub Refinishing?
The common materials used in bathtub refinishing include:
- Epoxy Resin: Epoxy resin is a popular choice for refinishing bathtubs due to its strong adhesive properties and durability. It creates a hard, glossy finish that is resistant to scratches and stains, making it ideal for high-use areas.
- Polyurethane: Polyurethane is another widely used material that offers excellent chemical and water resistance. Its flexibility allows it to endure the stresses of temperature changes and heavy usage without cracking, providing a long-lasting, smooth surface.
- Acrylic Coating: Acrylic coatings are known for their ease of application and quick drying time. They provide a glossy finish that can enhance the appearance of the tub, but may require more frequent reapplication compared to more durable options.
- Gel Coat: Gel coat is a thicker coating that offers a robust finish, commonly used in fiberglass tubs. It creates a strong barrier against moisture and is less prone to chipping, making it a reliable choice for refinishing jobs.
- Enamel: Enamel paints are used for refinishing porcelain bathtubs, offering a hard, glossy finish that can be very aesthetically pleasing. However, enamel can be less durable than other materials and may yellow over time if exposed to harsh chemicals.
What Are the Steps Involved in the Bathtub Refinishing Process?
The steps involved in the bathtub refinishing process are essential for achieving a durable and aesthetically pleasing finish.
- Preparation: This initial step involves cleaning the bathtub thoroughly to remove any dirt, soap scum, and oils. It is crucial to ensure that the surface is free of any contaminants that could affect the adhesion of the refinishing materials.
- Repairing Damage: Before applying any refinishing products, inspect the bathtub for cracks, chips, or other damages. These issues should be patched with appropriate fillers to create a smooth surface and prevent further deterioration.
- Sanding: Sanding the surface of the bathtub is important to create a rough texture that allows the new finish to adhere properly. This step helps to remove the old finish and prepares the surface for refinishing products.
- Masking: To protect surrounding areas from overspray or drips, masking tape and plastic sheeting should be applied around the edges of the bathtub. This ensures clean lines and minimizes clean-up after the refinishing process.
- Applying the Refinishing Compound: The refinishing compound is applied in thin, even coats using a spray gun or a roller. Multiple coats may be necessary to achieve a smooth and even finish, with appropriate drying time between each application for optimal results.
- Final Touches: Once the final coat has dried, remove the masking materials and check for any imperfections. If needed, minor touch-ups can be made to perfect the finish and ensure a flawless appearance.
- Curing: After the refinishing is complete, the bathtub must be allowed to cure for a specified period before use. Proper curing ensures that the new finish hardens and bonds effectively, extending the lifespan of the refinished bathtub.
Which Factors Should You Consider When Choosing a Refinishing Kit?
When selecting a refinishing kit for your bathtub, several key factors play a crucial role in ensuring a successful outcome. Here are the primary considerations:
-
Surface Compatibility: Not all refinishing kits work on every type of bathtub surface. Check if the kit is suitable for acrylic, fiberglass, or porcelain to avoid damaging the tub.
-
Ease of Application: Some kits come with simpler application processes, including user-friendly instructions and essential tools like brushes and rollers. Look for options that require minimal prep time and effort.
-
Chemical Safety: Since refinishing kits often contain potent chemicals, ensure that the product is non-toxic or low in VOCs (volatile organic compounds). This is particularly important if you are sensitive to odors or have concerns about indoor air quality.
-
Durability and Finish: Investigate the longevity of the finish provided by the kit. Some options offer a high-gloss, durable surface that withstands daily use better than others, reducing the need for frequent refinishing.
-
Customer Reviews: Research user feedback and ratings to gauge the effectiveness of various kits. Customer experiences can highlight potential issues or benefits not immediately obvious from product descriptions.
Considering these factors will help you choose the best refinishing kit tailored to your needs and ensure a professional-looking result.
What Mistakes Should You Avoid During Bathtub Refinishing?
When refinishing a bathtub, avoiding common mistakes is crucial for achieving the best results.
- Skipping Surface Preparation: Failing to properly clean and prepare the bathtub surface can lead to poor adhesion of the refinishing material. Any soap scum, grime, or old coatings must be thoroughly removed to ensure a smooth and durable finish.
- Using Inadequate Ventilation: Refinishing products often contain harsh chemicals, making proper ventilation essential. Working in a well-ventilated area helps to avoid inhalation of fumes and ensures safer application and curing of the refinishing materials.
- Overlooking Damages: Not addressing cracks, chips, or other damages before refinishing can result in a subpar finish. These imperfections need to be repaired first, as they can compromise the integrity of the new surface and lead to further issues down the line.
- Applying Too Many Coats: While it might seem beneficial to apply multiple coats for a thicker finish, this can actually lead to problems like bubbling and uneven drying. It is important to follow the manufacturer’s recommendations regarding the number of coats and the appropriate drying times in between applications.
- Neglecting the Right Tools: Using improper tools, such as brushes instead of sprayers, can yield a less professional finish. Investing in quality tools designed for refinishing ensures a smoother application and better overall results.
- Choosing the Wrong Products: Selecting low-quality or unsuitable refinishing products can result in a finish that doesn’t adhere well or lasts long. It’s crucial to choose high-quality refinishing kits specifically designed for bathtubs to ensure durability and a pleasing appearance.
- Ignoring Safety Precautions: Not wearing protective gear, such as masks, gloves, and goggles, can expose you to harmful chemicals during the refinishing process. Prioritizing safety not only protects your health but also ensures a more focused and careful application.
- Rushing the Process: Hurrying through the refinishing process can lead to mistakes and a less-than-desirable finish. Taking the time to follow each step carefully, including the drying times, is essential for achieving a high-quality result.
What Alternatives to Bathtub Refinishing Are Available and Their Pros and Cons?
| Alternative Method | Pros | Cons |
|---|---|---|
| Bathtub Liners | Quick installation, can be customized, easy to clean, low maintenance. | Can trap moisture, may not fit all shapes, can be expensive, lifespan of 10-20 years, $1,000-$2,500. |
| Painting | Cost-effective, DIY option, a wide variety of colors available, easy refresh. | Durability issues, requires proper prep work, potential for peeling, lifespan of 3-5 years, $50-$150. |
| Replacement | Brand new look, long-lasting solution, improved functionality, low maintenance. | High cost, requires professional installation, extensive time investment, lifespan of 20-30 years, $3,000-$5,000. |
| Spray-On Coatings | Seamless finish, quick application, can cover imperfections, low maintenance. | Requires skilled application, may not last as long, can be toxic during application, lifespan of 5-10 years, $300-$800. |