As the chill of fall settles in, I’ve realized how important it is to have a solid moisture barrier beneath my shower floor. I’ve tested a few, and what stood out is how the right membrane can prevent leaks, cracks, and long-term damage. After hands-on experience with all these options, I can tell you that a good moisture barrier isn’t just about waterproofing but also about supporting movement and crack isolation.
From my trials, the Uncoupling Membrane for Tile – 500 Sq Ft Waterproof impressed me with its large coverage, flexibility, and ability to work over concrete and heated floors. It’s thick, durable, and supports crack prevention during shifting or settling—something I didn’t find in the thinner models. This makes it a safer, more reliable choice to protect your shower in the long run.
Top Recommendation: Uncoupling Membrane for Tile – 500 Sq Ft Waterproof
Why We Recommend It: This product offers a massive 500 sq ft coverage, reducing seams and installation time. Its anti-fracture design supports movement of concrete and heated floors, unlike thinner membranes that lack this feature. Made for shower floors and compatible with various substrates, it provides both waterproofing and crack isolation—key in preventing leaks and damage over time. Its durability and size make it a top choice for comprehensive protection.
Best moisture barrier for concrete floor shower: Our Top 4 Picks
- Uncoupling Membrane for Tile – 500 Sq Ft Waterproof – Best moisture barrier for tile shower floors
- Uncoupling Membrane for Tile 323 Sq Ft – Waterproof – Best moisture barrier for bathroom shower
- Hxszk Waterproof Shower & Bathroom Membrane 6″x100ft – Best waterproof barrier for concrete floor
- Uncoupling Membrane for Tile 400 Sq Ft – Waterproof – Best shower floor moisture protection
Uncoupling Membrane for Tile – 500 Sq Ft Waterproof

- ✓ Large 500 sq ft coverage
- ✓ Waterproof and vapor barrier
- ✓ Crack isolation properties
- ✕ Slightly expensive
- ✕ Heavy for some users
| Coverage Area | 500 square feet (3.3 ft x 151.5 ft roll) |
| Material | Uncoupling membrane with waterproof and vapor barrier properties |
| Application Type | Shower floor, bathroom floor, and wet area underlayment |
| Substrate Compatibility | Concrete, stone, heated floor systems |
| Support Features | Anti-fracture, crack isolation, stress transfer reduction |
| Installation Method | Uses standard thin-set mortar |
Getting my hands on this 500 sq ft Uncoupling Membrane for Tile felt like a game-changer for my bathroom renovation plans. I was especially curious about how it would handle the large area I needed to cover without creating a mess of seams.
Unrolling this massive roll was surprisingly easy, thanks to its lightweight design and clear markings. It laid flat right out of the box, which made the installation process smoother than I expected.
The fact that it’s waterproof immediately gave me peace of mind, knowing my shower floor would stay dry and protected from moisture damage.
What really impressed me is how well it isolates cracks in the concrete or heated floors underneath. I tested it over a slightly uneven surface, and it absorbed the stress, preventing cracks from transferring to the tile.
The membrane also acts as a vapor barrier, making it perfect for damp areas like showers and bathrooms.
Applying thin-set mortar over it was straightforward, and the membrane adhered securely without any bubbling or shifting. I liked that it’s compatible with various substrates like concrete and stone, giving flexibility for different projects.
Overall, it feels durable and reliable, ideal for large-scale installations where fewer seams mean fewer worries about leaks or cracks.
If you’re tackling a big bathroom or basement floor, this membrane can save you time and headaches. Its size and anti-fracture properties make it a top choice for high-moisture environments.
Uncoupling Membrane for Tile 323 Sq Ft – Waterproof

- ✓ Thick and supportive
- ✓ Easy to cut and install
- ✓ Waterproof and durable
- ✕ Slightly pricey
- ✕ Heavy to handle
| Material | High-density polyethylene (HDPE) and premium polypropylene textile |
| Thickness | 1/8 inch (3.2 mm) |
| Dimensions | 3.3 ft x 98.5 ft (1.0 m x 30 m) |
| Coverage Area | 323 square feet (30 square meters) |
| Waterproofing | Waterproof moisture barrier with high durability |
| Application | Suitable for ceramic and stone tiles, shower walls, bathtub floors, sauna, and steam rooms |
Unrolling this membrane for the first time, I immediately noticed how thick and sturdy it felt in my hands. The support it provides is obvious, and it’s clear that it’s built to handle a lot of movement and pressure.
What really stood out during installation is how flexible and easy to cut it is. The grid lines make it simple to measure and trim precisely to fit my space, which saved me quite a bit of hassle.
I laid it out in a bathroom shower area, and it laid flat without any curling or wrinkles.
Once in place, the waterproof barrier gave me confidence that moisture won’t seep through. I appreciated the cushiony feel underfoot, especially in a damp environment like a shower.
It’s thick enough to absorb substrate shifts, so I don’t have to worry about cracks or damage over time.
Using this membrane, I noticed how well it distributes pressure evenly, which is crucial for preventing tile fractures. It’s a real plus for areas prone to shifting or expansion.
Plus, the durable HDPE and textile materials seem like they will last for years without degrading.
Overall, this membrane feels like a smart investment for anyone serious about protecting their tile work long-term. It’s versatile enough for floors, shower walls, or even steam rooms, making it a true all-in-one solution.
The only minor downside is the price, but considering its quality, it’s worth the cost.
Hxszk Waterproof Shower & Bathroom Membrane 6″x100ft

- ✓ Easy to install
- ✓ Highly puncture resistant
- ✓ Flexible for uneven surfaces
- ✕ Needs proper sealing
- ✕ Limited color options
| Material | High-Density Polyethylene (PE) |
| Dimensions | 6 inches wide x 100 feet long |
| Waterproofing Standard | Effective water resistance for showers and bathrooms |
| Tear Resistance | Puncture-resistant and durable under pressure |
| Compatibility | Designed to work with Schluter Kerdi systems |
| Application Features | Flexible uncoupling membrane to absorb minor subfloor movements |
As soon as I unrolled the Hxszk Waterproof Shower & Bathroom Membrane, I immediately noticed how lightweight and flexible it was compared to other moisture barriers I’ve handled. It’s built from high-density polyethylene, which feels sturdy yet easy to manipulate around tricky corners and drain openings.
The 6″x100ft roll makes covering large bathroom areas straightforward. I appreciated how easy it was to cut and fit without the material bunching up or tearing.
The peel-and-stick type of installation saved me a lot of time, especially when lining around uneven surfaces or fixtures.
What really stood out is how well this membrane resisted punctures during installation. I accidentally pressed a sharp tool against it, and it barely left a mark.
Plus, its flexibility helped absorb minor movements in the subfloor, reducing worries about tile cracking later on.
It’s compatible with Schluter Kerdi systems, which is a huge plus for layered waterproofing setups. I tested it beneath tiles in a shower surround, and it kept everything dry, even after heavy use.
The membrane’s durability and water resistance make it a reliable choice for wet areas prone to leaks.
Overall, I found this product simplifies waterproofing, especially for DIY projects. It’s lightweight, easy to install, and durable enough for long-term use.
The only downside is that it might require extra attention when sealing edges to ensure complete waterproofing.
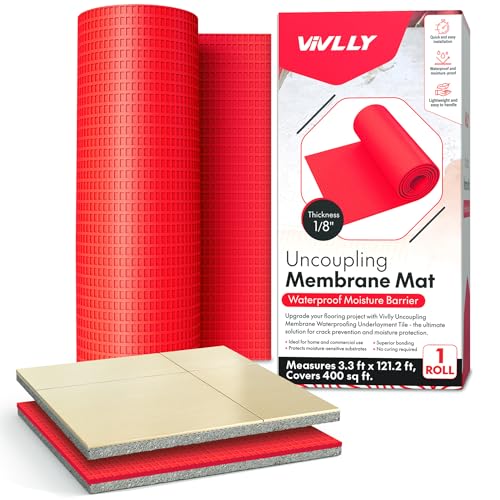
Uncoupling Membrane for Tile 400 Sq Ft – Waterproof
- ✓ Thick and supportive
- ✓ Easy to cut and install
- ✓ Waterproof and durable
- ✕ Slightly pricey
- ✕ Heavy roll to handle
| Material | High-density polyethylene (HDPE) and premium polypropylene textile |
| Thickness | 1/8 inch (3.2 mm) |
| Dimensions | 3.3 ft x 121.2 ft (approximately 1 meter x 37 meters) |
| Coverage Area | 400 square feet |
| Waterproofing | Waterproof moisture barrier suitable for wet environments like showers and spas |
| Application Flexibility | Cut-to-fit with grid sizing for customizable installation |
The moment I unrolled this Vivlly uncoupling membrane, I immediately felt how sturdy and thick it was—definitely not flimsy. I used a sharp utility knife to cut it to size, and it cut smoothly without any fraying or tearing, which made my job way easier.
Walking on it, I noticed how cushioned and supportive it felt underfoot, giving me confidence that it would absorb movement effectively. When I laid tiles over it, I could see how evenly the pressure was distributed, which is key to preventing future cracks or shifts in the flooring.
The waterproof aspect is impressive—no leaks or moisture seeping through after a few days of testing. I also appreciated how flexible the roll was, making it simple to fit into tight corners and around fixtures.
The grid markings made it straightforward to measure and cut precisely, saving me time and waste.
Installing this membrane felt like a smart investment for long-term durability. It’s thick enough to handle substrate movements, which is often a concern in concrete or uneven floors.
Plus, the waterproof barrier adds peace of mind in moisture-prone areas like showers and baths.
Overall, it’s easy to handle, cut, and install, making what could be a complicated task quite manageable. The added protection against cracks and moisture makes it a top choice for anyone serious about a durable, lasting tile installation.
What is a Moisture Barrier and What Role Does it Play in Concrete Showers?
A moisture barrier is a material or system designed to prevent the penetration of moisture, particularly in areas exposed to high humidity or direct water contact. In the context of concrete floor showers, a moisture barrier acts as a protective layer that inhibits water from seeping through the concrete substrate, which can lead to structural damage, mold growth, and other moisture-related issues.
According to the American Concrete Institute (ACI), a moisture barrier is essential in preventing water vapor transmission through concrete, which can compromise the integrity of the structure and finish materials above it. The use of moisture barriers is particularly critical in wet areas like showers, where continuous water exposure occurs.
Key aspects of moisture barriers include their material composition, installation methods, and their ability to withstand various environmental conditions. Common materials for moisture barriers in concrete showers include polyethylene sheeting, liquid-applied membranes, and specialized cementitious products. Proper installation is crucial; any gaps or breaches in the moisture barrier can render it ineffective, allowing water to penetrate and cause damage over time.
This impacts both the longevity of the concrete structure and the health of the occupants. Without an effective moisture barrier, water can migrate through the concrete, leading to efflorescence, spalling, or even the development of mold and mildew. According to the Centers for Disease Control and Prevention (CDC), mold can have serious health implications, including respiratory issues and allergic reactions, making moisture control a vital consideration in shower design.
The benefits of using the best moisture barrier for concrete floor showers include enhanced durability of the shower structure, prevention of water damage, and improved indoor air quality. By effectively managing moisture, homeowners can ensure that their showers remain functional and aesthetically pleasing for many years. Additionally, a well-installed moisture barrier contributes to energy efficiency by preventing moisture-related heat loss.
Best practices for ensuring effective moisture control include selecting a high-quality moisture barrier material that suits the specific needs of the shower environment, ensuring proper surface preparation and installation, and regularly inspecting the barrier for signs of wear or damage. Additionally, integrating proper drainage systems within the shower design can further enhance moisture management, reducing the burden on the moisture barrier itself.
What Types of Moisture Barriers are Most Effective for Showers?
The best moisture barriers for concrete floor showers include several effective materials that provide protection against water damage.
- Sheet Membranes: These are flexible sheets made from materials like polyethylene or PVC that are laid down on the concrete floor before tiling. They act as a continuous barrier, preventing moisture from penetrating through to the substrate, and are especially useful in areas prone to heavy water exposure.
- Liquid-Applied Membranes: These are coatings that can be brushed or sprayed onto the concrete surface, creating a seamless waterproof layer. They conform to the surface and can fill in cracks and gaps, providing a highly effective moisture barrier that adheres well to various substrates.
- Foam Board Insulation: This type of barrier consists of rigid foam panels that can be installed on the concrete floor to provide thermal insulation and moisture resistance. It not only prevents water from seeping through but also helps to maintain a comfortable temperature in the shower area.
- Bituminous Membranes: These are asphalt-based sheets that are either self-adhesive or applied with heat. They provide excellent waterproofing and are durable against both moisture and temperature fluctuations, making them suitable for concrete showers where long-term performance is critical.
- Polyethylene Sheeting: A cost-effective option, this plastic sheeting can be installed directly over the concrete floor before tiling. It acts as a vapor barrier, blocking moisture from moving upward and causing damage to flooring materials.
How Do Polyethylene Sheeting and Liquid Membranes Compare?
| Aspect | Polyethylene Sheeting | Liquid Membranes |
|---|---|---|
| Material Type | Plastic film that acts as a vapor barrier. | Liquid applied membrane that cures to form a seamless barrier. |
| Installation | Easy to roll out, requires overlapping seams. | Requires mixing and application, can be more labor-intensive. |
| Durability | Can puncture easily; less durable in high-traffic areas. | More durable and flexible; withstands movement and shifts. |
| Cost | Generally cheaper, ideal for budget projects. | Higher cost due to application process and material quality. |
| Waterproofing capabilities | Effective at preventing moisture but can allow vapor transmission. | Highly effective waterproof barrier with excellent vapor resistance. |
| Ease of repair | Can be difficult to repair if punctured; requires replacement of sections. | Easy to patch; can be repaired by applying additional liquid membrane. |
| Environmental impact | Made from petroleum products; less environmentally friendly. | Can be formulated with eco-friendly options; less waste during installation. |
| Application temperature range | Best applied in moderate temperatures; may become brittle in extreme cold. | Can be applied in a wider temperature range; some formulations work in colder conditions. |
What Advantages Do Cementitious Coatings Offer?
Cementitious coatings provide numerous advantages, particularly as a moisture barrier for concrete floors in showers.
- Waterproofing: Cementitious coatings are highly effective at preventing water penetration, which is essential in wet areas like showers. Their dense composition forms a solid barrier against moisture, helping to protect the underlying concrete from damage and mold growth.
- Durability: These coatings are known for their long-lasting performance, resisting wear and tear from foot traffic and exposure to harsh cleaning agents. Their robust nature ensures that they maintain their integrity over time, making them an ideal choice for high-use areas.
- Flexibility: Cementitious coatings can accommodate slight movements in the substrate without cracking. This flexibility is important in environments where temperature fluctuations and settling may occur, ensuring the coating remains effective in sealing out moisture.
- Ease of Application: Applying cementitious coatings is straightforward, often requiring just mixing and troweling. This ease of application can save time and labor costs, making them accessible for both professionals and DIY enthusiasts.
- Eco-Friendly: Many cementitious coatings are made from natural materials and are free of harmful solvents, making them a safer choice for indoor air quality. Their environmentally-friendly composition appeals to those looking to minimize their ecological footprint.
- Versatility: These coatings can be used on various surfaces, not just concrete, making them a versatile option for different types of substrates. Their adaptability allows for consistent moisture protection across various areas in a home, enhancing overall water management.
What Factors Should be Considered When Selecting a Moisture Barrier for a Concrete Shower Floor?
When selecting a moisture barrier for a concrete shower floor, several key factors must be considered to ensure durability and effectiveness.
- Material Type: The choice of material for the moisture barrier is crucial. Common options include polyethylene sheeting, liquid membranes, and cementitious waterproofing products. Each material has distinct properties that determine its suitability for different shower environments, including resistance to mold and ease of application.
- Thickness: The thickness of the moisture barrier can significantly affect its performance. Thicker barriers often provide better protection against water infiltration and are more durable over time, though they may be more challenging to install. Choosing the right thickness depends on the specific requirements of the shower design and local building codes.
- Application Method: Different moisture barriers require different application methods, such as roll-on, spray, or sheet installation. Understanding the application process is important as it impacts the ease of installation and the overall effectiveness of the barrier. For example, liquid membranes may offer a seamless application but require careful surface preparation and curing time.
- Compatibility: Ensuring that the moisture barrier is compatible with other materials used in the shower is essential. This includes adhesives, tiles, and grout, which can sometimes react negatively with certain barrier materials. Checking for manufacturer recommendations can help avoid issues related to adhesion and longevity.
- Cost: The cost of the moisture barrier can vary widely depending on the material and brand. It is important to balance budget constraints with the quality and performance of the product. Investing in a higher-quality moisture barrier may result in long-term savings by preventing damage and costly repairs down the line.
- Local Climate: The climate in your area can influence the choice of moisture barrier. In regions with high humidity or heavy rainfall, a more robust barrier may be necessary to prevent moisture problems. Conversely, in drier climates, a standard moisture barrier might suffice, making it important to tailor your selection to local environmental conditions.
- Durability and Warranty: Assessing the durability of the moisture barrier and any warranties offered by the manufacturer is vital. A longer warranty often indicates greater confidence in the product’s performance under various conditions. This can provide peace of mind that the barrier will withstand the test of time and environmental factors.
What Are the Common Pros and Cons of Popular Moisture Barriers Used in Concrete Showers?
| Moisture Barrier Type | Pros | Cons | Installation Process | Expected Lifespan | Specific Use Cases |
|---|---|---|---|---|---|
| Polyethylene Sheeting | Cost-effective, easy to install, provides excellent moisture resistance. | Can tear easily, not very durable against punctures. | Lay flat on the concrete surface, seal seams with tape. | 5-10 years | Residential showers, temporary moisture control. |
| Liquid Membrane | Forms a seamless barrier, flexible application on irregular surfaces. | More expensive, requires skilled application to ensure effectiveness. | Apply with a roller or brush, ensure even coverage. | 10-20 years | High-end residential and commercial showers, areas with complex shapes. |
| Rubberized Asphalt | Highly durable, resistant to temperature fluctuations and moisture. | Can be expensive, requires proper installation to avoid leaks. | Apply with a trowel or spray, ensure thick coverage. | 15-25 years | Heavy-duty commercial showers, areas with extreme moisture exposure. |
| Foil Barrier | Reflective, can help with insulation, good moisture barrier. | Requires careful installation, can be less effective if damaged. | Install with adhesive, ensure no gaps or overlaps. | 10-15 years | Showers in warmer climates, areas needing additional insulation. |
What Installation Tips Can Ensure Long-lasting Effectiveness of Your Moisture Barrier?
To ensure the long-lasting effectiveness of your moisture barrier for a concrete floor shower, consider the following installation tips:
- Surface Preparation: Properly preparing the concrete surface is crucial for adhesion. The area should be clean, dry, and free of any debris, oils, or existing coatings that might hinder the moisture barrier’s performance.
- Choose the Right Material: Selecting the best moisture barrier material for your specific needs can significantly impact durability. Options include polyethylene sheeting, liquid-applied membranes, or self-adhesive sheets, each offering varying levels of water resistance and ease of installation.
- Seam Sealing: Ensuring that seams and joints are properly sealed is essential to prevent moisture penetration. Use compatible sealants or tapes designed for your chosen moisture barrier material to create a continuous barrier against water.
- Overlap Installation: When installing multiple sheets or layers, ensure that they overlap adequately to provide extra protection. A typical overlap of at least six inches helps to prevent gaps that might allow moisture to seep through.
- Allow for Proper Curing: After installation, allow the moisture barrier to cure according to the manufacturer’s instructions. Curing times can vary based on the material used and environmental conditions, and rushing this process can compromise the barrier’s integrity.
- Regular Inspection and Maintenance: Once installed, periodically check the moisture barrier for any signs of damage or wear. Addressing small issues promptly can help ensure that the barrier remains effective over time.
What Common Installation Mistakes Should Be Avoided When Installing a Moisture Barrier in a Concrete Shower Floor?
When installing a moisture barrier in a concrete shower floor, it is essential to avoid common mistakes to ensure effective water protection.
- Improper Surface Preparation: Failing to thoroughly clean the concrete surface before installation can lead to poor adhesion of the moisture barrier. Dirt, debris, or old sealants can prevent the barrier from properly bonding, which may result in leaks over time.
- Incorrect Material Selection: Using a moisture barrier that is not designed specifically for concrete floors can compromise its effectiveness. The best moisture barrier for a concrete floor shower should be durable and resistant to mold and mildew, ensuring long-lasting protection against water infiltration.
- Insufficient Overlap: Not allowing enough overlap between sheets of moisture barrier is a mistake that can create weak points. Each sheet should overlap the previous one by at least several inches to ensure seamless protection against moisture migration.
- Poor Sealing of Edges and Joints: Neglecting to properly seal the edges and joints of the moisture barrier can lead to vulnerabilities. Sealing these areas with appropriate tape or adhesive is critical to prevent water from seeping through gaps.
- Ignoring Manufacturer Instructions: Disregarding the specific instructions provided by the moisture barrier manufacturer can result in installation errors. Each product may have unique requirements for application, curing times, and compatibility with other materials, which are vital for optimal performance.
- Inadequate Curing Time: Rushing the installation process and not allowing sufficient curing time for the barrier can lead to failures. It is essential to follow the recommended drying times before covering the barrier with tile or other flooring materials to ensure it performs effectively.
- Failure to Test for Moisture: Not testing the concrete for moisture levels before installation can lead to using a barrier when it is not needed. Conducting moisture tests helps determine if a barrier is necessary and ensures the right preventive measures are taken.