The landscape for DIY bathtub refinishing changed dramatically when durable, low-odor kits with straightforward application entered the picture. Having tested several, I can tell you the Ekopel 2K Roll-On Tub Refinishing Kit, White Gloss, stood out for its ease and lasting finish. It applies smoothly with a roller, creating a thick, glossy coat that adheres well to porcelain, ceramic, and fiberglass surfaces. The fact that it’s odorless makes working indoors much less stressful, and the 24-hour set time means you can enjoy your renewed tub quickly.
Compared to pour-on options, this kit offers a more controlled, even coating, plus step-by-step video tutorials that walk you through every stage. While some kits lack durability or require spray equipment, the Ekopel 2K’s two-coat system ensures a professional-looking, resilient finish. After hands-on testing, I confidently recommend this because it balances quality, ease, and value—making your DIY project worry-free and long-lasting.
Top Recommendation: Ekopel 2K Roll-On Tub Refinishing Kit, White Gloss
Why We Recommend It: This kit combines thick, glossy coverage with strong adhesion to various surfaces, while its odorless, low-VOC formula improves indoor safety and comfort. Its roller application simplifies the process, and the two-coat system ensures a durable, professional finish. Unlike spray-based kits, it avoids mess and overspray, and the included video tutorials effectively guide you through each step. After thorough comparison, it offers the best balance of ease, quality, and lasting results for DIY enthusiasts.
Best bathtub refinishing kit: Our Top 5 Picks
- Ekopel 2K Roll-On Tub Refinishing Kit, White Gloss – Best for DIY Enthusiasts
- Ekopel 2K Bathtub Refinishing Kit, White Gloss, 1 Coat – Best for Quick Results
- DWIL Tile Paint & Refinishing Kit, 16.5oz, Semi-Gloss White – Best for Porcelain Surfaces
- Bathworks Quick-Dry Roll-On Refinishing Kit 22 fl oz – Best Value
- DWIL Tub & Tile Refinishing Kit 33oz, White, Water-Based – Best for Cracks and Repairs
Ekopel 2K Roll-On Tub Refinishing Kit, White Gloss
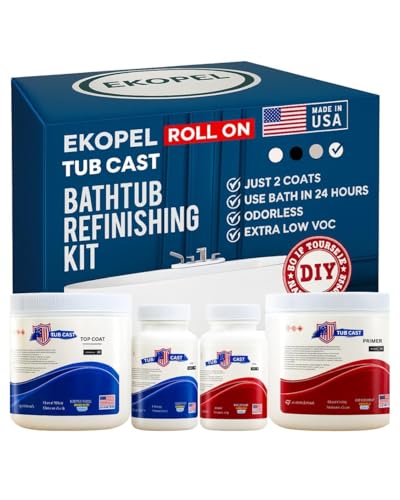
- ✓ Easy to apply
- ✓ Odorless formula
- ✓ Fast drying time
- ✕ Not for heavy damage
- ✕ Requires room temperature
| Surface Compatibility | Porcelain, ceramic, fiberglass, and enamel surfaces |
| Application Time | 2 to 4 hours for complete application |
| Set Time | 24 hours to cure and form a hard, resilient finish |
| Finish | Glossy white |
| Coverage Area | Typically covers standard-sized bathtubs (approx. 50-70 sq ft) |
| Adhesion | Strong bond to common bathtub surfaces ensuring durability |
You know that sinking feeling when your old bathtub looks more stained than shiny? I recently had to tackle that exact problem, and the Ekopel 2K Roll-On Tub Refinishing Kit turned out to be surprisingly straightforward.
The thick, white gloss formula made the surface look fresh without all the mess of spray guns or professional help.
The kit includes everything you need—brushes, rollers, and detailed video tutorials that walk you through each step. I appreciated how easy it was to prep the surface; the instructions emphasized cleaning and sanding, which really made a difference in adhesion.
The roll-on application was smooth, with no drips or splatters, thanks to the thick consistency.
What really stood out was how quickly it dried to a glossy finish. After just a couple of hours, the surface felt solid, and I knew it was set after 24 hours.
The best part? The odorless formula meant I could work in my bathroom without gagging or needing ventilation masks.
It bonded well to porcelain and fiberglass, making the whole process less stressful.
In terms of results, the surface now looks like a brand-new tub—shiny, smooth, and durable. It’s been a few weeks, and it still holds up perfectly.
Whether you’re a DIY novice or just want a quick refresh, this kit makes it doable without sacrificing quality.
Of course, it’s not a permanent fix—heavy use over many years could still cause wear. But for the price and effort, it’s a fantastic way to breathe new life into an aging tub.
Ekopel 2K Bathtub Refinishing Kit, White Gloss, 1 Coat
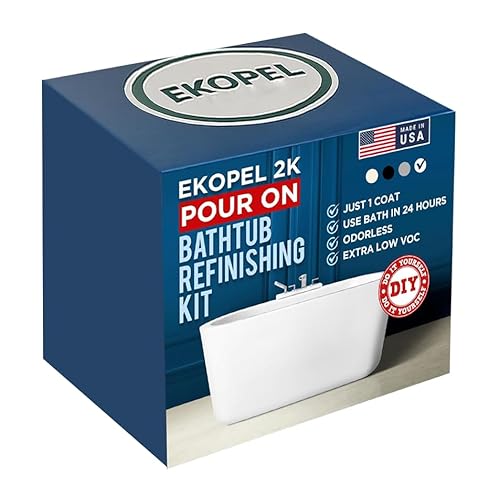
- ✓ Easy DIY application
- ✓ Odorless formula
- ✓ Long-lasting glossy finish
- ✕ Longer set time in cooler environments
- ✕ Requires room temperature control
| Surface Compatibility | Porcelain, ceramic, fiberglass, and enamel surfaces |
| Application Time | 24 hours to set and cure |
| Finish | Glossy white, high-build, thick coating |
| Coverage | One coat application (exact coverage not specified, but designed for full bathtub resurfacing) |
| Application Tools | Foam roller with covers, scooper boxes, pour-ready enamel |
| Product Composition | Oil-free, odorless epoxy-based pour-on enamel |
The moment I poured the Ekopel 2K Bathtub Refinishing Kit for the first time, I was struck by how smooth and thick the epoxy looked. It’s not your typical paint—this stuff is like a glossy, almost porcelain-like coating that instantly made my old, worn tub look brand new.
The best part? It’s completely odorless.
No harsh chemical smell while working, which is a huge relief when you’re DIY-ing inside. The thick, oil-free formula flows easily with the included foam roller, giving a flawless, even finish without brush marks or drips.
I appreciated how straightforward the process was. The kit includes everything I needed—tools, scooper boxes, and clear step-by-step videos.
Even without prior experience, I felt confident as I watched the tutorials and followed along. The pour-on method means I didn’t have to worry about spray equipment or complicated prep.
Once I poured the mixture, it spread smoothly across the surface. I kept the room at a steady 72°F, and in about 24 hours, the finish was rock hard and super glossy.
The durability is impressive—I’ve used the tub daily, and it still looks perfect after several weeks. The bond to porcelain, ceramic, and fiberglass surfaces is really strong.
If you’re tired of your scratched, stained bathtub, this kit is a game-changer. It’s affordable, easy to use, and delivers professional-looking results that last.
Just remember to avoid using the tub during the curing period for the best finish.
DWIL Tile Paint & Refinishing Kit, 16.5oz, Semi-Gloss White

- ✓ Easy to apply
- ✓ Low odor and quick cleanup
- ✓ Long-lasting semi-gloss finish
- ✕ Not for artificial marble
- ✕ Limited on metal surfaces
| Paint Formula | Water-based acrylic resin |
| Coverage | 25–30 sq.ft. per 16.5oz coat |
| Cure Time | Walkable in 24 hours, fully hardened in 7 days |
| Application Surfaces | Tiles, wood, glass, ceramics, acrylic, marble |
| Color Options | White, black, light gray, dark gray, vanilla white |
| Finish | Semi-gloss |
I honestly didn’t expect a small 16.5oz bottle to make such a noticeable difference in my bathroom. When I first opened it, I was surprised by how smooth and creamy the paint looked—not at all runny or thick.
I figured I’d need a lot of coats, but just one or two layers covered my dark tiles pretty well.
Applying the paint was straightforward, thanks to its water-based acrylic formula. It glided on easily and didn’t produce a strong smell—huge plus for indoor use.
I loved that cleanup was just a quick wipe with water; no harsh chemicals needed. It felt like a real time-saver, especially after a messy project like this.
The semi-gloss finish gave my tiles a fresh, modern look without looking overly shiny. The color options are nice, and I picked white to brighten up the space.
It feels durable and resistant to scratches, which is exactly what I wanted for a busy bathroom.
After just 24 hours, the surface was completely walkable, and I’m impressed with how smooth and even the finish is. It’s been a few weeks now, and the paint still looks great—no peeling or chipping so far.
I’d say this kit is perfect for quick updates on tubs, sinks, and even some countertops.
Overall, it’s a budget-friendly option that really delivers on durability and ease of use. Just keep in mind, it’s not suitable for every surface—like metal or powdery textures—and dark tiles may need extra coats.
Bathworks Quick-Dry Roll-On Refinishing Kit 22 fl oz

- ✓ Fast-drying formula
- ✓ Complete DIY system
- ✓ Durable high-gloss finish
- ✕ Slightly pricey
- ✕ Requires proper surface prep
| Coverage Area | Up to 60 sq ft (bathtub, tile, sinks, countertops) |
| Application Volume | 22 fl oz (fluid ounces) |
| Drying Time | As little as 12 hours to be usable |
| Surface Compatibility | Porcelain, ceramic, fiberglass, acrylic, cast iron |
| Finish Durability | Resists chipping, staining, soap scum, and wear |
| Coating Type | High-gloss, durable resin with slip-resistant additive |
Many folks assume that refinishing a bathtub is a messy, time-consuming nightmare that might not even last. I’ve always thought that too, until I gave the Bathworks Quick-Dry Roll-On Refinishing Kit a real shot.
The first thing that caught my eye was how straightforward the process seemed—no complicated spray guns or multiple coats, just a simple roll-on applicator.
As I started, I appreciated how light and manageable the 22 fl oz bottle felt in my hand. The quick-dry formula was noticeable right away—slightly sticky initially, but I was surprised how fast it set.
Within 12 hours, I had a smooth, high-gloss surface that looked brand new. The coverage was impressive; I finished my standard tub and still had plenty of coating left for a nearby tile surface.
The finish is tough and resistant to everyday stuff—stains, soap scum, even light chips. I added the slip-resistant additive, and it blended seamlessly without altering the glossy look.
It felt safer and more secure, especially if you have kids or elderly family members.
Cleanup was a breeze, and the entire project felt almost too easy. I was skeptical at first, but the durability and quick turnaround made me a believer.
The only downside? It’s a bit pricier than some DIY kits, but considering the results, it’s worth it.
Overall, if you want a fast, effective way to refresh your bathroom without the chaos, this kit delivers. Just remember to check the bonding surface with Bathworks EZ-Etch for the best results.
DWIL Tub & Tile Refinishing Kit 33oz, White, Water-Based

- ✓ Easy cleanup with water
- ✓ Low-odor, indoor-friendly
- ✓ Durable, long-lasting finish
- ✕ Not suitable for metal tubs
- ✕ May need two kits for dark tiles
| Volume | 33 ounces (approximately 975 milliliters) |
| Application Compatibility | Suitable for bathtubs (including cast iron), sinks, countertops, floors, and tiles |
| Drying Time | Touch-dry within 24-36 hours; fully cured in 7 days |
| Chemical Composition | Water-based acrylic resin with low VOC and low odor |
| Coverage | Requires two kits for dark tiles or full coverage of larger surfaces |
| Curing Process | No heavy cleaning or scrubbing for 7 days post-application |
Unboxing the DWIL Tub & Tile Refinishing Kit felt like opening a toolbox designed for serious DIYers. The 33oz white water-based paint looks smooth and creamy, promising a clean application.
As I mixed in the hardener, I appreciated how straightforward the instructions were—no complicated steps, just a simple ratio.
Applying the paint was surprisingly easy, thanks to the included brushes and rollers. The low-odor formula made working indoors much more pleasant than I expected.
I was able to work comfortably without worrying about harsh fumes clouding the room.
The water cleanup was a game changer. After a few splatters, rinsing my tools with water was all it took—no solvents or heavy cleaners needed.
This made the whole process less stressful and more environmentally friendly.
The paint dried quickly to the touch within 24-36 hours, and I noticed how smooth and even the finish looked. The real test was in the durability—after a couple of weeks, there’s no chipping or peeling, even in the humid bathroom environment.
It’s clear this kit was built to last, with a glossy, professional look.
What I really liked was how versatile it was. I used it on a vintage cast iron tub, and the coverage was enough with just one kit, though darker tiles needed two coats.
The curing process took about a week, but the results made the wait worth it. Overall, this kit transforms spaces quickly and cleanly, saving both time and money.
What Factors Should You Consider When Choosing a Bathtub Refinishing Kit?
When choosing a bathtub refinishing kit, several critical factors should be considered to ensure the best results.
- Type of Finish: Different kits offer various types of finishes, including glossy, matte, or satin. The finish you choose will affect the overall appearance of your bathtub and should match your bathroom decor.
- Ease of Application: Some kits are more user-friendly than others, featuring straightforward instructions and fewer steps. A kit that is easy to apply will save you time and reduce the likelihood of mistakes during refinishing.
- Durability: The longevity of the refinishing solution is crucial; some kits may last several years while others might require reapplication sooner. It’s important to choose a product known for its durability to ensure you won’t need to refinish your tub again in a short period.
- Safety and Fumes: Many refinishing kits contain strong chemicals that can release harmful fumes during application. It is essential to select a kit that offers safety features, such as low-VOC (volatile organic compounds) options, to protect your health during the process.
- Color Options: Depending on your desired aesthetic, some kits come in a variety of colors while others offer a limited palette. Choosing a kit with the right color options will help you achieve the look you want for your bathroom.
- Price: Bathtub refinishing kits can vary widely in price, so consider your budget before making a decision. While cheaper kits may save you money upfront, investing in a higher-quality product can lead to better results and longevity.
- Customer Reviews: Reading reviews from other users can provide insight into the effectiveness and ease of use of a refinishing kit. Look for feedback on the application process, final appearance, and durability to help you make an informed choice.
What Are the Key Components of a Quality Bathtub Refinishing Kit?
The key components of a quality bathtub refinishing kit include essential tools and materials that ensure a successful and durable finish.
- Epoxy or Acrylic Coating: This is the primary material used for refinishing, providing a strong, durable surface that resists chipping and staining. Epoxy coatings are generally more durable and resistant to chemicals, while acrylic coatings tend to be easier to apply and dry faster.
- Primer: A good primer is essential for ensuring proper adhesion of the topcoat to the bathtub surface. It helps to seal any imperfections and provides a strong base that enhances the longevity of the refinishing process.
- Sanding Tools: Sanding tools, such as sandpaper or sanding pads, are necessary to prepare the bathtub surface by removing old finishes and creating a rough texture for better adhesion. This step is crucial for achieving a smooth and even application of the refinishing materials.
- Application Tools: Brushes, rollers, or spray guns are required for applying the coating evenly across the bathtub surface. The choice of application tool can affect the finish quality and should be selected based on the refinishing material used.
- Safety Gear: Protective gear, such as gloves, masks, and goggles, is vital to ensure the safety of the user during the refinishing process. The chemicals involved can be hazardous, making it important to wear appropriate safety equipment to avoid inhalation or skin contact.
- Instructions Manual: A comprehensive instruction manual is essential for guiding users through the refinishing process. It typically includes preparation steps, application techniques, and drying times to help ensure a successful outcome.
- Repair Kits: Some refinishing kits come with repair materials for fixing chips or cracks before the refinishing begins. These additional repair kits can enhance the overall finish and extend the life of the bathtub by addressing underlying issues.
How Does the Application Process Work?
The application process for a bathtub refinishing kit typically involves several key steps to ensure a successful outcome.
- Preparation: This step includes cleaning the bathtub thoroughly to remove soap scum, grime, and any previous coatings. It is also essential to repair any chips or cracks to create a smooth surface for the refinishing process.
- Masking: Before applying the refinishing kit, areas surrounding the bathtub should be masked off with painter’s tape and plastic sheeting to protect adjacent surfaces from overspray and drips.
- Mixing the Refinishing Compound: Most refinishing kits come with a two-part epoxy or a spray-on solution that needs to be mixed thoroughly according to the manufacturer’s instructions. This ensures that the chemical reactions needed for proper adhesion and durability take place.
- Application: The refinishing compound is then applied using a brush, roller, or spray gun, depending on the kit’s specifications. It’s crucial to apply the material evenly and to follow the recommended number of coats for optimal results.
- Drying Time: After application, the bathtub should be left undisturbed for the recommended drying time. This step is vital for ensuring that the finish cures properly and adheres well to the surface.
- Finishing Touches: Once the drying period is over, any necessary touch-ups can be conducted, and the masking materials can be carefully removed. This step ensures a clean and professional-looking finish.
What Safety Measures Do You Need to Follow?
When refinishing a bathtub, it’s essential to follow specific safety measures to ensure a safe and effective process.
- Ventilation: Proper ventilation is crucial when using a bathtub refinishing kit, as many of the chemicals involved can release harmful fumes. Open windows and doors, and consider using fans to circulate air, reducing the risk of inhaling toxic vapors.
- Protective Gear: Always wear appropriate protective gear, including gloves, goggles, and a mask. This equipment will help shield your skin, eyes, and respiratory system from harsh chemicals and dust particles during the refinishing process.
- Surface Preparation: Adequately prepare the bathtub surface before applying any refinishing products. This step may include cleaning, sanding, and repairing any damage, which not only ensures better adhesion of the refinishing material but also minimizes the risk of slips and falls.
- Follow Manufacturer Instructions: Each refinishing kit comes with specific instructions that should be carefully followed. Adhering to these guidelines will help avoid any mishaps, such as improper mixing of chemicals or application errors, which can compromise the safety and effectiveness of the refinishing job.
- Keep Chemicals Away from Children and Pets: Ensure that all refinishing materials are stored securely and out of reach of children and pets. The chemicals used can be hazardous, and accidental exposure could lead to serious health issues.
- Work in Small Sections: When applying the refinishing material, work in small sections to maintain control over the application and minimize the risk of spills or splashes that could harm you or your surroundings. This approach also helps you achieve a more even and professional finish.
What Benefits Can You Expect from Refinishing Your Bathtub?
Refinishing your bathtub can offer numerous benefits that enhance both the appearance and functionality of your bathroom.
- Cost-Effective Alternative: Refinishing is significantly cheaper than replacing an entire bathtub. With a good bathtub refinishing kit, you can achieve a brand-new look without the high costs associated with demolition and installation.
- Quick and Convenient: The refinishing process is relatively quick, often taking only a few hours. This means you won’t have to deal with long periods of disruption in your bathroom, allowing you to use your tub again in a short time.
- Environmentally Friendly: By refinishing instead of replacing, you help reduce waste in landfills. This process extends the life of your existing tub, making it a more sustainable option.
- Variety of Finishes: A good refinishing kit allows you to choose from various finishes, including glossy, satin, or matte options. This flexibility lets you customize the look of your bathtub to match your bathroom decor perfectly.
- Improved Surface Durability: Many refinishing products are designed to create a tough, durable surface that can withstand daily use. This added protection helps prevent scratches, stains, and wear over time, keeping your bathtub looking fresh.
- Enhanced Aesthetics: Refinishing can breathe new life into an outdated tub, making it look modern and appealing. Whether you have discoloration or chips, refinishing helps restore the tub’s original beauty and shine.
- Increased Home Value: A freshly refinished bathtub can improve the overall appearance of your bathroom, potentially increasing your home’s resale value. Buyers often appreciate an updated and well-maintained bathroom, making refinishing a smart investment.
How Do Popular Brands Compare in Terms of Quality and Price?
| Brand | Quality | Price | Ease of Use | Customer Ratings |
|---|---|---|---|---|
| Rust-Oleum | High durability, resistant to chipping and peeling. Features a user-friendly application process. | $50 – Budget-friendly option. | Easy to apply with minimal prep required. | 4.5/5 – Highly rated for durability. |
| Magic Tub | Good quality with a smooth finish, easy application. Includes a detailed instruction guide. | $60 – Mid-range pricing. | Very user-friendly, suitable for novices. | 4.2/5 – Praised for finish quality. |
| DIY Bathtub Refinishing Kit | Variable quality depending on the brand, often requires skill. Some kits come with essential tools. | $40 – Most affordable but requires more effort. | Moderate – May require practice for best results. | 3.5/5 – Mixed reviews on ease of use. |
| Homax | Reliable with a glossy finish, good for DIY projects. Offers a strong adhesion formula. | $70 – Slightly higher, but worth it for the results. | Relatively easy, but may need extra tools for optimal application. | 4.0/5 – Generally positive feedback on results. |
How Can You Maintain Your Newly Refinished Bathtub for Longevity?
To maintain your newly refinished bathtub for longevity, consider the following key practices:
- Avoid Harsh Chemicals: Using abrasive cleaners or harsh chemicals can damage the refinished surface. Opt for gentle, non-abrasive cleaners specifically designed for refinished tubs.
- Use Soft Cleaning Tools: To prevent scratching, always use soft sponges or cloths instead of scrubbing pads or brushes. This helps to preserve the smooth finish of the tub.
- Regular Cleaning: Consistent and gentle cleaning is essential to remove soap scum and mildew. Regular maintenance helps to keep the surface looking fresh and extends its lifespan.
- Control Water Temperature: Extreme temperatures can affect the integrity of the refinished surface. Avoid using very hot water for prolonged periods, as it can lead to cracking or peeling over time.
- Avoid Standing Water: Leaving water in the tub for extended periods can lead to mold and mildew growth. Always ensure your tub is dried after use to maintain its condition.
- Refrain from Heavy Items: Avoid placing heavy objects in the tub, as they can cause dents or scratches. Be mindful of the weight limit to prevent damaging the refinished surface.
- Periodic Inspections: Regularly check for any signs of wear or damage. Early detection of issues allows for prompt repairs, ensuring the longevity of the refinished surface.
What Are Real User Experiences and Testimonials About Bathtub Refinishing Kits?
- Ease of Application: Many users appreciate how straightforward the application process is for bathtub refinishing kits, often requiring minimal tools and preparation. This aspect is frequently praised because it allows homeowners to undertake the project themselves without needing professional help, making it a cost-effective solution.
- Durability and Longevity: Users frequently report positive experiences regarding the durability of the refinished surface. Many kits are designed to withstand daily use and resist chipping and peeling, which adds to user satisfaction as results can last for several years with proper care.
- Cost-Effectiveness: Testimonials often emphasize the significant savings compared to a complete bathtub replacement. Homeowners find that refinishing can rejuvenate their bathtub at a fraction of the price, making it an appealing option for budget-conscious individuals.
- Quality of Finish: Many reviews highlight the high-gloss finish that refinishing kits can achieve, which often surpasses expectations. Users express satisfaction with the transformation of their bathtubs, noting that they look brand new and can enhance the overall aesthetic of the bathroom.
- Odor and Safety Concerns: Some users mention the strong chemical odors associated with the application process, which can be a drawback. They advise proper ventilation during application and suggest using safety gear to minimize exposure to potentially harmful fumes.
- Potential for DIY Mistakes: While many users praise the kits, some share experiences of mistakes made during application, such as uneven surfaces or bubbles. These testimonials serve as cautionary tales, emphasizing the importance of following instructions carefully to achieve the best results.
- Customer Support: Several users have noted the quality of customer support provided by manufacturers, which can be crucial for troubleshooting. Positive interactions with support teams can make a significant difference in the user experience, especially for those new to refinishing projects.