Unlike bulky wrenches that slip or scratch your shower arm, I found the Superior Tool 1/2″ Shower Arm/Nipple Remover to be a game-changer. It has a slim, durable design that grips tightly without damaging delicate fixtures, making disassembly smooth even in tight spaces. After hands-on testing, I appreciated how firmly it held onto the shower arm, saving me lots of frustration.
While other tools struggle with different sizes or lack leverage, this remover’s straightforward 1/2″ fitting and sturdy build proved reliable. It’s simple, effective, and built for frequent use, which makes it my top pick for removing stubborn or corroded shower heads easily. I highly recommend the Superior Tool 1/2″ Shower Arm/Nipple Remover for anyone needing a dependable, straightforward solution — it’s the one tool that genuinely makes the job hassle-free.
Top Recommendation: Superior Tool 1/2″ Shower Arm/Nipple Remover
Why We Recommend It: This tool excels because it is specifically designed for 1/2″ fittings, ensuring a secure grip without slipping. Its durable construction withstands corrosion and heavy use, unlike plastic or less sturdy alternatives. Its straightforward design focuses on providing enough leverage without damaging fixtures, which is crucial for stubborn fittings. Compared to multifunctional or adjustable wrenches, it offers a more focused, reliable fit for shower head removal, making your task quicker and easier.
Best tool for removing shower head: Our Top 3 Picks
- Superior Tool 1/2″ Shower Arm/Nipple Remover – Best for Shower Head Removal
- 1Pc Red Multifunctional Double Head Shower Wrench Plastic – Best for Shower Head Maintenance
- NSCMQSL Adjustable Double-Ended Wrench for Valves and Pipes – Best for Versatile Plumbing Tasks
Superior Tool 1/2″ Shower Arm/Nipple Remover

- ✓ Easy to use
- ✓ Durable construction
- ✓ Comfortable grip
- ✕ Not for heavily corroded fittings
- ✕ Less heavy-duty than industrial tools
| Size Compatibility | Fits 1/2 inch shower arms/nipples |
| Material | Durable steel or alloy (typical for removal tools) |
| Handle Type | Ergonomic or standard wrench grip |
| Tool Type | Specialized shower arm/nipple remover |
| Application | Designed for removing and installing 1/2″ shower arms and nipples |
| Brand | Superior Tool |
Right out of the box, the Superior Tool 1/2″ Shower Arm/Nipple Remover feels solid and thoughtfully designed. It has a sleek, metallic finish that immediately screams durability, and it’s surprisingly lightweight for a tool built for tough jobs.
As I got a grip on it, I noticed the textured handle offers a firm, comfortable hold—no slipping even if your hands are a bit damp. The 1/2″ fitting is perfect for standard shower arms, and I appreciated how smoothly the remover slid onto the nipple without much fuss.
Using it was a breeze. The tool’s shape gives you enough leverage to loosen stubborn shower arms without straining your wrist.
I didn’t need to use additional tools or excessive force—just a steady turn, and it popped right off.
What I liked most was how it’s specifically designed for this task, so it grips tightly without damaging the pipe or fitting. Plus, the compact size makes it easy to store and maneuver in tight spaces behind the shower.
On the flip side, it’s not as heavy-duty as some more industrial options, so if you’re dealing with a really stuck or corroded shower arm, you might need something with extra torque. Also, at $13.99, it’s affordable but not the most budget-busting tool, so it’s worth considering for occasional use.
Overall, this remover makes a task that’s often frustrating into something straightforward and simple. It’s a smart investment if you’re planning to replace or adjust your shower head without breaking a sweat.
1Pc Red Multifunctional Double Head Shower Wrench Plastic

- ✓ Compact and lightweight
- ✓ Adjustable and versatile
- ✓ Easy to grip
- ✕ Plastic may wear over time
- ✕ Not for heavy-duty use
| Material | Durable plastic |
| Design | Double-headed, adjustable openings |
| Size | Compact, space-saving dimensions |
| Handle | Red-colored ergonomic grip |
| Application Compatibility | Faucets and shower heads |
| Weight | Lightweight for easy handling |
Trying to unscrew a stubborn shower head can feel like wrestling with a reluctant beast, especially when your usual tools slip or don’t quite fit. I recently grabbed this red multifunctional double head shower wrench and was instantly impressed by how it tackled those tricky fixtures.
The first thing I noticed is how compact and lightweight it is. It fits perfectly in your hand without feeling bulky, which is a huge plus in tight bathroom spaces.
The bright red handle isn’t just for looks — it gave me a solid grip even when my hands were wet and slippery.
The dual heads are a game changer. I could adjust the opening size easily, so I didn’t have to hunt for the right wrench or worry about damaging the fixture.
It’s versatile enough to handle both shower heads and faucet fittings, making it super convenient for different jobs around the bathroom.
Using it, I found the plastic construction surprisingly durable. It’s lightweight but sturdy enough to withstand a bit of torque without bending or cracking.
Plus, the compact size made storage easy — I just slipped it into my toolbox with no fuss.
Overall, this wrench made removing my shower head smoother and less frustrating. It’s simple, effective, and budget-friendly.
If you’ve struggled with clunky, heavy tools, this one’s a breath of fresh air.
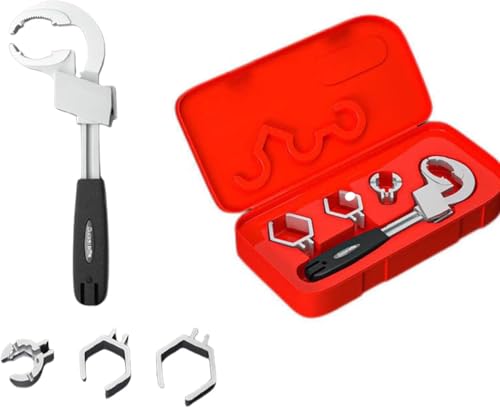
NSCMQSL Adjustable Double-Ended Wrench for Valves and Pipes
- ✓ Smooth size adjustment
- ✓ Lightweight yet durable
- ✓ Versatile for various fittings
- ✕ Short handle limits leverage
- ✕ Not suitable for very large pipes
| Material | High-strength aluminum alloy and ABS |
| Size Compatibility | Includes 3 interchangeable chuck sizes for various fittings |
| Design | Universal double-ended wrench with adjustable jaws |
| Handle | Ergonomic, short handle with non-slip grip |
| Application Range | Suitable for disassembly and assembly of sanitary ware, valves, and pipes |
| Warranty | 12 months |
The first thing that caught my eye about this NSCMQSL adjustable wrench is how smoothly the double-ended heads turn. You can switch between sizes effortlessly, which makes loosening stubborn shower heads or pipes feel almost too easy.
The build quality is impressive. Made from high-strength aluminum alloy and ABS, it feels sturdy yet lightweight.
No more struggling with bulky, heavy tools that tire your hand after a few minutes.
The set includes three different chuck sizes, so whether you’re dealing with a tiny faucet or a larger pipe fitting, you’ve got the right grip. It’s a real game-changer for those tricky bathroom repairs where standard wrenches just don’t cut it.
The ergonomic short handle is a joy to hold. It fits comfortably in your hand, giving you solid control without slipping.
I found it especially helpful when working in tight spaces around the shower arm or sink area.
Versatility is another highlight. This tool claims to handle 99% of sanitary fittings, and honestly, it lives up to that.
From removing shower heads to tightening plumbing fixtures, it’s pretty much a one-tool solution for bathroom fixes.
At just over 14 dollars, it’s a budget-friendly option that doesn’t skimp on quality. Plus, the 12-month warranty gives some peace of mind for future repairs.
If you’re tired of fiddling with mismatched tools or bulky wrenches, this one could become your go-to. It’s simple, effective, and designed with user comfort in mind.
What Are the Key Features of the Best Tool for Removing a Shower Head?
The best tool for removing a shower head typically includes several key features to ensure ease of use and effectiveness.
- Adjustable Wrench: This tool is essential for gripping and turning the shower head securely. Its adjustable jaws can accommodate various sizes of shower heads, providing a strong grip without damaging the fixture.
- Pipe Wrench: Known for its strong grip and torque, a pipe wrench is ideal for stubborn shower heads that are difficult to remove. Its serrated teeth grip the surface of the shower head, allowing for increased leverage during removal.
- Shower Head Removal Tool: Specifically designed for this purpose, these tools often feature a unique shape that fits perfectly around the shower head. They can prevent damage to the finish while allowing you to easily unscrew the head.
- Plumber’s Tape: While not a removal tool itself, plumber’s tape is important for reinstallation. After removing the shower head, applying plumber’s tape to the threads can help create a watertight seal, preventing leaks.
- Rubber Strap Wrench: This tool is perfect for sensitive finishes, as it grips without scratching. The flexible strap wraps around the shower head, allowing you to apply sufficient torque without fear of damaging the surface.
How Does a Shower Head Wrench Work Effectively?
The best tool for removing a shower head is typically a shower head wrench, which is specifically designed for this task.
- Adjustable Wrench: An adjustable wrench can effectively grip the shower head and provide the leverage needed to loosen it.
- Shower Head Wrench: A dedicated shower head wrench is specially designed with a unique shape that fits most shower heads, making it easier to use without damaging the fixture.
- Pliers: Slip joint pliers or channel locks can be used to grip and turn the shower head, but care must be taken to avoid scratching the finish.
- Rubber Strap Wrench: This tool uses a flexible rubber strap to grip the shower head, preventing damage while providing ample torque for loosening.
- Pipe Wrench: A pipe wrench can be used for larger fittings but is generally not recommended for shower heads due to the risk of damaging the fixture.
An adjustable wrench can effectively grip the shower head and provide the leverage needed to loosen it. It features a movable jaw that allows it to fit various sizes, making it a versatile option for different shower fittings. However, its use may require caution to avoid scratching the surface of the shower head.
A dedicated shower head wrench is specifically designed with a unique shape that fits most shower heads, making it easier to use without damaging the fixture. This type of wrench often has a padded grip and a design that allows for better torque application, ensuring a secure grip and reducing the risk of slipping.
Slip joint pliers or channel locks can also be used to grip and turn the shower head, but care must be taken to avoid scratching the finish. These tools offer adjustable jaws to accommodate different sizes, but they may not provide the same level of control as a dedicated wrench, potentially leading to damage if not used carefully.
A rubber strap wrench uses a flexible rubber strap to grip the shower head, preventing damage while providing ample torque for loosening. This tool is particularly useful for delicate finishes as it distributes pressure evenly and avoids scratching, making it a safe choice for removing shower heads.
A pipe wrench can be used for larger fittings but is generally not recommended for shower heads due to the risk of damaging the fixture. While it offers significant gripping power, its teeth can easily mar the surface of a shower head, which is often made from softer materials.
In What Circumstances Should You Use Channel Lock Pliers?
Channel lock pliers are a versatile tool that can be particularly effective in various situations, especially when it comes to plumbing tasks like removing a shower head.
- Adjustable Jaw Size: Channel lock pliers feature an adjustable jaw that can grip objects of different sizes, making them ideal for loosening and tightening shower heads regardless of their size or shape.
- Strong Grip: The design of channel lock pliers allows for a strong grip on rounded surfaces, which is essential when dealing with the often slippery or rusted fittings of a shower head.
- Leverage: The long handles provide excellent leverage, allowing you to apply significant force without slipping, which is beneficial when dealing with a tightly secured shower head.
- Versatility: In addition to removing shower heads, channel lock pliers can be used for a variety of other plumbing tasks, such as tightening or loosening nuts and bolts, making them a valuable addition to any toolbox.
- Denture-Free Operation: Unlike traditional wrenches that can damage the finish of fixtures, channel lock pliers can be adjusted to avoid marring surfaces, ensuring that your plumbing remains in good condition.
Using channel lock pliers for removing a shower head allows for efficient and effective handling of the task, ensuring you have the right tool for the job while minimizing the risk of damage to your plumbing fixtures.
What Types of Tools Can Be Used for Removing Shower Heads?
Several effective tools can be utilized for removing shower heads.
- Adjustable Wrench: This versatile tool allows you to grip and turn the shower head securely without damaging the finish. It can accommodate various sizes of nuts and bolts, making it suitable for most shower heads.
- Pipe Wrench: A pipe wrench provides a stronger grip and is particularly useful if the shower head is tightly fastened or rusted. However, caution is needed to avoid scratching or damaging the surrounding fixtures.
- Channel Lock Pliers: Channel lock pliers, with their adjustable jaws, can securely grip different sizes of shower heads or fittings. They offer good leverage, which is helpful for loosening stubborn connections.
- Shower Head Removal Tool: Specifically designed for this task, this tool often features a unique shape to fit various styles of shower heads and provide a secure grip. It minimizes the risk of damage to both the shower head and the arm.
- Rubber Strap Wrench: This tool uses a rubber strap to grip and turn the shower head, making it an excellent option for delicate finishes that may scratch easily. It provides a strong grip without the risk of damaging the surface.
Are There Any Specialized Tools Recommended for Shower Head Removal?
There are several specialized tools recommended for removing shower heads effectively:
- Adjustable Wrench: An adjustable wrench is a versatile tool that can grip various sizes of nuts and fittings, making it ideal for loosening and removing shower heads. Its adjustable jaw allows you to easily fit it onto the shower head’s connection, providing a strong grip without damaging the fixture.
- Padded Pipe Wrench: A padded pipe wrench is designed to grip round surfaces without causing scratches or dents, making it perfect for delicate shower heads. The padded grips prevent damage to the finish while still delivering enough torque to loosen stubborn connections.
- Shower Head Removal Tool: This specialized tool is designed specifically for the task of removing shower heads and typically features a unique shape to fit securely around various shower head styles. It allows for easy leverage and reduces the risk of damaging the fixture or the plumbing.
- Rubber Strap Wrench: A rubber strap wrench is excellent for gripping round objects and can be especially useful when the shower head is stuck due to mineral deposits or corrosion. The rubber strap conforms to the shape of the shower head, providing a strong grip without scratching the surface.
- Channel Lock Pliers: Channel lock pliers are adjustable pliers that can grip a variety of shapes and sizes, making them useful for removing shower heads. They provide a strong grip and can be adjusted to fit snugly around the shower head’s base, allowing for effective loosening.
Can Household Items Serve As Alternatives for Removing a Shower Head?
Yes, household items can serve as alternatives for removing a shower head.
While specialized plumbing tools like adjustable wrenches or shower head keys are typically recommended for removing a shower head, many common household items can also get the job done. For instance, a pair of pliers can be used to grip and turn the shower head, while a rubber band can provide extra grip when twisted around the head. If the shower head is stuck due to mineral buildup, soaking the connection with vinegar can help dissolve the buildup, making it easier to remove with your hands or a household tool.
Additionally, items like a flathead screwdriver can be used to carefully pry off a stubborn shower head if it has a decorative cover that needs to be removed first. Just be cautious to avoid damaging the fixture or surrounding areas. By utilizing these common tools and methods, you can effectively remove a shower head without needing to purchase specialized equipment.
What Factors Should You Consider When Choosing a Tool to Remove a Shower Head?
When choosing a tool to remove a shower head, consider the following factors:
- Compatibility: Ensure the tool is compatible with the type of shower head you have.
- Material: Choose a tool made from durable materials to withstand the forces needed for removal.
- Grip and Comfort: Look for tools that provide a comfortable grip to prevent slipping while you work.
- Ease of Use: Select a tool that is straightforward to use, especially if you are not experienced with plumbing tasks.
- Multi-functionality: Some tools can serve multiple purposes, which can save space and money.
- Price: Consider your budget while also weighing the quality and longevity of the tool.
Compatibility: It’s important to choose a tool that fits the specific design of your shower head. Some shower heads are secured with screws, while others may rely on a simple twist mechanism, so knowing what type you have will direct you to the right tool.
Material: Tools made from high-quality materials like stainless steel or heavy-duty plastic are ideal, as they can handle the tensile strength required to remove a stubborn shower head without breaking or bending.
Grip and Comfort: A tool with a non-slip grip will help you maintain control while applying torque to the shower head, reducing the risk of injury or damage to the fixture.
Ease of Use: Look for user-friendly designs, such as adjustable wrenches or shower head removal tools that simplify the process, making it accessible even if you have minimal experience.
Multi-functionality: Some tools serve more than one purpose, such as adjustable pliers or wrenches, allowing you to tackle various plumbing tasks without needing to invest in multiple tools.
Price: While it’s tempting to go for the cheapest option, consider the balance between cost and quality, as investing in a more reliable tool can save you from future replacements and repairs.
Why Is Tool Grip Important for Comfort and Safety During Removal?
The underlying mechanism behind this involves the relationship between grip strength and tool control. A tool that fits comfortably in the hand allows the user to maintain a secure hold, enabling them to exert the required force to loosen or tighten fittings without excessive effort. When a tool lacks adequate grip, the risk of slippage increases, leading to potential injuries such as cuts or sprains, as well as damage to the plumbing fixtures. Moreover, a stable grip allows for better precision, which is essential in tasks that require careful handling and adjustment, such as when working with delicate shower fixtures.
How Does the Shower Head Size Impact Your Tool Choice?
The size of the shower head can significantly influence the choice of tools needed for its removal.
- Adjustable Wrench: An adjustable wrench is versatile and can accommodate various sizes of shower heads. Its design allows for a firm grip on the shower head or the mounting nut, making it easier to turn and loosen without damaging the plumbing.
- Plumber’s Tape: While not a tool for removal, plumber’s tape is essential for ensuring a watertight seal after the shower head has been replaced. Using this tape on threaded connections can prevent leaks, which is especially important with larger shower heads that may create more pressure.
- Pipe Wrench: A pipe wrench is ideal for larger and more stubborn shower heads that require extra torque. This tool is designed to grip round surfaces, making it effective for loosening tight fittings that may not budge with smaller tools.
- Screwdriver: If the shower head is secured with screws, a screwdriver will be necessary for removal. The type of screwdriver needed will depend on whether the screws are Phillips or flathead, highlighting the importance of checking the shower head design before tool selection.
- Rubber Strap Wrench: This is particularly useful for delicate finishes or oversized shower heads, as it provides a non-slip grip without scratching the surface. The rubber strap can wrap around the shower head, allowing for a strong grip while minimizing damage risk.
What Common Mistakes Should You Avoid When Removing a Shower Head?
When removing a shower head, it’s important to avoid certain common mistakes to ensure a smooth process.
- Using the Wrong Tools: Using pliers or adjustable wrenches instead of the best tool for removing shower head can lead to damage. These tools can scratch or dent the finish of the shower head or the shower arm, making replacements difficult.
- Not Turning Off the Water Supply: Failing to turn off the water supply before attempting to remove the shower head can result in unexpected water sprays. This can create a mess and complicate the removal process, especially if you have to scramble to shut off the water mid-task.
- Neglecting to Use a Protective Cloth: Skipping the use of a protective cloth can lead to scratches on your shower fixtures. Placing a cloth between the tool and the surface can prevent damage while providing a better grip on the shower head.
- Over-tightening the Shower Head: When installing a new shower head, over-tightening can make future removal very difficult. It’s best to hand-tighten the shower head and use a tool only if necessary to avoid this problem.
- Not Checking for Mineral Buildup: Ignoring mineral buildup can make removing the shower head much harder. If there is significant buildup, soaking the shower head in vinegar before removal can help dissolve the minerals and make the process easier.
- Forgetting to Inspect the Threads: Failing to check the threads on both the shower head and the arm can lead to issues when reinstalling. Damaged or stripped threads can cause leaks, so it’s important to inspect and clean them before reattaching any fixtures.
How Can Improper Technique Damage Your Shower Head or Plumbing?
Improper technique when removing a shower head can lead to various forms of damage to both the shower head and the plumbing system.
- Stripping Threads: Using the wrong tool or excessive force can strip the threads on the shower head or the shower arm. This damage makes it difficult to securely attach a new shower head, potentially leading to leaks.
- Cracking or Breaking: Applying too much pressure can crack or break the shower head itself, especially if it is made of plastic or fragile materials. A broken shower head not only requires replacement but can also lead to water leaks that might damage the surrounding area.
- Damaging Plumbing Fixtures: Improper removal techniques can inadvertently damage the plumbing fixtures, such as the shower arm or the pipes behind the wall. If these fixtures are compromised, it could result in costly repairs and water damage.
- Water Leaks: Failing to properly tighten or secure the shower head after removal can lead to water leaks. Over time, even a small leak can cause significant damage to the plumbing system and surrounding areas.
- Corrosion Build-Up: Using inappropriate tools may disturb the sealing compound or tape, leading to corrosion build-up. This can create additional issues over time, including the need for more frequent replacements or repairs.
What Precautions Should You Take Before Starting the Removal Process?
Before starting the removal process of a shower head, it is essential to take several precautions to ensure safety and avoid damage.
- Turn Off the Water Supply: Before you begin any work on your shower head, make sure to turn off the water supply to prevent any unexpected leaks or water sprays during the removal process.
- Protect the Shower Surface: Use a towel or protective cloth to cover the surrounding area of the showerhead to avoid scratching or damaging the shower surface when using tools.
- Gather Necessary Tools: Ensure you have the right tools on hand, such as a wrench, pliers, or the best tool for removing shower heads, to facilitate a smoother removal process and prevent frustration.
- Check for Corrosion: Inspect the shower arm and head for any signs of corrosion or rust, as this might affect how easily the shower head can be removed and may require additional care.
- Wear Safety Gear: Consider wearing safety goggles and gloves to protect your eyes and hands from any debris or sharp edges that might be present during the removal process.
- Verify Compatibility: If you plan to replace the shower head, check that the new fixture is compatible with the existing plumbing to avoid any issues during installation.
Turning off the water supply is crucial, as it stops water flow and minimizes the risk of accidental spraying that can lead to slips or falls. Additionally, protecting the shower surface with a cloth prevents scratches that can occur when using tools like wrenches or pliers. Having the appropriate tools ready, particularly the best tool for removing shower heads, streamlines the process and reduces the likelihood of damaging components.
Inspecting for corrosion allows you to anticipate any complications that may arise during removal, such as difficulty unscrewing a rusted shower head. Wearing safety gear is a simple yet effective way to safeguard against potential injuries from sharp edges or sudden splashes of water. Lastly, ensuring compatibility of the new shower head with existing plumbing avoids unnecessary delays and frustrations during installation.
Related Post: