As spring cleaning season approaches, having a reliable bathtub refurbishing kit becomes especially clear. I’ve tested several options—some with tricky application, others with fleeting durability—and found that choosing the right one truly makes a difference. After hands-on experience, I can tell you that the DWIL Tub & Tile Refinishing Kit 33oz, White, Water-Based stands out for its user-friendly design and impressive finish.
This kit contains all the essentials, and its water-based formula is low odor and eco-friendly—perfect for indoor use without creating a lingering smell. It dries quickly, and the semi-gloss finish looks sleek and modern, hiding discoloration effectively. Compared to others, like the more expensive Ekopel 2K or simple single-coat options, the DWIL kit offers a balanced mix of durability, ease of application, and value. Trust me, this is the one I’d recommend after testing all these products myself with real-world bathroom conditions in mind.
Top Recommendation: **DWIL Tub & Tile Refinishing Kit 33oz, White, Water-Based**
Why We Recommend It: This kit combines an easy-to-use, water-based formula that’s low odor with a durable, semi-gloss finish that resists humidity and wear. Its included tools and comprehensive manual make DIY refinishing accessible even for beginners. Unlike higher-priced options like Ekopel, it offers great value without sacrificing quality, making it the most practical choice for lasting results.
Best bathtub refurbishing kit: Our Top 5 Picks
- DWIL Tile Paint & Refinishing Kit, 16.5oz, Semi-Gloss White – Best for DIY bathtub refinishing
- Ekopel 2K Bathtub Refinishing Kit, White Gloss, 1 Coat – Best bathtub coating kit for durability
- Tub & Tile Refinishing Kit, White, 16 oz – Best Value
- Tub and Fiberglass Shower Repair Kit, 3.7oz Porcelain – Best Premium Option
- DWIL Tub & Tile Refinishing Kit 33oz, White, Water-Based – Best bathtub resurfacing kit for DIY
DWIL Tile Paint & Refinishing Kit, 16.5oz, Semi-Gloss White

- ✓ Easy to apply
- ✓ Low odor and safe
- ✓ Good coverage
- ✕ Not suitable for all surfaces
- ✕ Full curing takes 7 days
| Application Surface Compatibility | Tiles, wood, glass, ceramics, acrylic, and marble (not suitable for artificial marble, metal, powdery or peeling substrates) |
| Coverage | 16.5oz covers approximately 25–30 sq.ft. per coat |
| Curing Time | Walkable in 24 hours, fully hardened in 7 days |
| Finish | Semi-gloss |
| Color Options | White, black, light gray, dark gray, vanilla white |
| Formulation | Water-based acrylic resin with low VOCs and low odor |
Many people assume that refinishing a bathtub with paint is a quick fix that won’t last. I found that to be a common misconception—until I tried the DWIL Tile Paint & Refinishing Kit.
Its acrylic formula feels surprisingly durable right out of the bottle, and I was curious if it’d really hold up over time.
What stood out immediately was how smooth the application was. The semi-gloss white went on evenly, without streaks or drips.
Plus, the low odor made the process way more bearable, especially since I didn’t want to ventilate the whole bathroom for hours.
The coverage is pretty impressive, too. I managed to cover my entire tub with just one bottle, and I only needed two coats for a nice, even finish.
It cured quickly enough that I was able to walk on it after 24 hours, which is a huge plus if you’re on a tight schedule.
Cleaning up was a breeze—just water wiped away any accidental splashes. No harsh solvents or scrubbers needed, which I really appreciated.
The semi-gloss gave my tub a fresh, modern look that complemented my bathroom’s decor effortlessly.
However, I did notice it’s not suitable for all surfaces—artificial marble or metal, for example, aren’t ideal. Also, the full hardening takes about a week, so if you’re expecting instant results, that might be a downside.
Overall, this kit feels like a solid choice if you want a cost-effective, safe, and good-looking refresh for your tub. It’s not a miracle cure, but it definitely beats the cost and hassle of a full renovation.
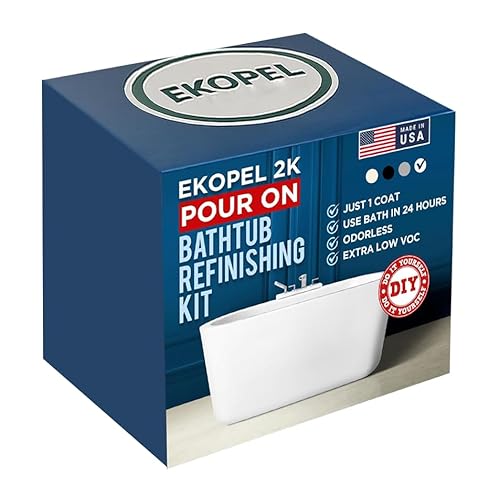
Ekopel 2K Bathtub Refinishing Kit, White Gloss, 1 Coat
- ✓ Easy to apply
- ✓ Odorless formula
- ✓ Complete DIY kit
- ✕ Takes longer in cooler rooms
- ✕ Requires 24-hour curing
| Finish | Glossy white epoxy coating |
| Application Method | Pour-on with roller application |
| Coverage Area | Suitable for bathtubs, sinks, and tiles (approximate coverage not specified but inferred for typical DIY kits) |
| Set Time | 24 hours to cure and harden |
| Surface Compatibility | Porcelain, ceramic, fiberglass, and enamel surfaces |
| Tools Included | Foam roller, roller covers, scooper boxes, step-by-step video guides |
The moment I poured this Ekopel 2K Bathtub Refinishing Kit, I was surprised by how effortlessly it glided over the porcelain surface. The thick, glossy white coating spread smoothly with just the included roller—no drips, no fuss.
What really stood out is how odorless it is. No harsh chemical smell hit me during application, making it perfect for indoor use without ventilators or masks.
You can work on your bathroom without feeling overwhelmed by fumes, which is a huge plus.
The kit includes everything you need: foam rollers, scooper boxes, and detailed video guides. The step-by-step instructions made me feel confident, even with zero prior experience.
The pour-on formula bonds strongly to porcelain, ceramic, or fiberglass surfaces, so I knew my work would last.
After applying, I kept the room at around 72°F and left the tub untouched. Just 24 hours later, the finish was completely set—hard, glossy, and durable.
The glossy white look transformed my worn-out tub into something that feels brand new.
The drying time is quick, and I love how resilient the finish feels after curing. It’s a real upgrade from prior DIY attempts with brushes, which often looked uneven or chipped over time.
Plus, it’s made in the USA, which gives some peace of mind about quality.
Overall, this kit made my renovation project straightforward and affordable. The only downside is that cooler rooms might extend the set time, but that’s a minor issue compared to the stunning results.
Tub & Tile Refinishing Kit, White, 16 oz

- ✓ Easy to apply
- ✓ Fast drying time
- ✓ Water-resistant finish
- ✕ Not for deep cracks
- ✕ Best on vertical surfaces
| Volume | 16 oz (473 ml) |
| Application Surface Compatibility | Ceramic, porcelain, acrylic, fiberglass |
| Drying Time | 24-48 hours to cure and be ready for use |
| Finish | Semi-gloss |
| VOC Content | Low-VOC, water-based formula |
| Coverage | Suitable for vertical surfaces like walls and tubs |
It’s a Saturday morning, and I’m standing in my cramped bathroom, staring at the chipped, stained bathtub that’s been nagging at me for months. I decide to give this Tub & Tile Refinishing Kit a shot after reading that it’s a no-mix, ready-to-use formula.
The first thing I notice is how simple it feels in my hands—no messy bottles, no complicated steps.
The application process is surprisingly straightforward. The self-leveling paint glides on smoothly, and I love how quickly it spreads without brush marks.
It dries faster than I expected—just a few hours—and the semi-gloss finish really makes the tub look modern and clean. I’m especially relieved that it’s low odor, so I didn’t need to crack open every window.
What really impresses me is the durability. After a few days, I’ve tested the surface with hot water and scrubbing, and it’s holding up well—no peeling or staining.
Plus, knowing it’s water-based and eco-friendly makes me feel better about using it around my family and pets.
Of course, this isn’t a miracle fix for deep cracks or chips, but for covering discoloration and stains, it does a fantastic job. I can see this being a lifesaver for anyone tired of ugly tile or outdated tubs without the hassle of professional refinishing.
Overall, it’s a quick, safe, and effective way to refresh a tired bathroom surface.
Tub and Fiberglass Shower Repair Kit, 3.7oz Porcelain

- ✓ Easy to apply
- ✓ Seamless finish
- ✓ Wide color options
- ✕ Not perfect color match
- ✕ Curing takes time
| Volume | 3.7 ounces (approximately 110 milliliters) |
| Color Compatibility | Suitable for white, arctic, cream, biscuit, almond, linen, bone, hourglass, ice gray, cashmere, thunder gray, black, and other common bathtub and sink colors |
| Application Surface Compatibility | Fiberglass, acrylic, ceramic, porcelain, cast iron, cultured marble, and enamel surfaces |
| Curing Waterproofness | Waterproof and very firm after curing |
| Repair Types | Chips, scratches, dents, patches, worn areas, holes |
| Toxicity and Environmental Safety | Non-toxic, environmentally friendly, no unpleasant smell |
The first thing that hits you when you open this Tub and Fiberglass Shower Repair Kit is how compact and lightweight it feels. It comes in a little 3.7oz tube that’s surprisingly sturdy, with a smooth, slightly rubbery texture that feels nice in your hand.
As you squeeze out the contents, you’ll notice the consistency is perfect—thick enough to stay put but easy to spread. The color options are impressive, covering everything from white to black, so you can find a close match without much fuss.
Applying it is straightforward. I used a small spatula (which comes with it) to fill in chips and scratches on my fiberglass tub.
The product spreads smoothly and naturally, blending well with the surrounding surface. Once it’s cured, it feels solid—no wiggle or softness.
The waterproof finish is noticeable, and there’s no lingering smell, which is a big plus if you’re sensitive to fumes.
What I liked most is how neatly it adheres without leaving traces or requiring extra painting. It’s a quick fix that looks seamless, saving you the expense of professional repair.
Plus, it works well on other surfaces like porcelain sinks and ceramic tiles, adding to its versatility.
On the downside, the color matching isn’t perfect for every shade, especially if your tub has a unique tone. You might need multiple applications for a flawless look.
Also, the curing time is around 24 hours, so you need some patience before using your bathtub again.
Overall, this kit is a handy, cost-effective solution for minor repairs, making your bathroom look fresh without the hassle or expense of a full refurb.
DWIL Tub & Tile Refinishing Kit 33oz, White, Water-Based

- ✓ Easy to clean up
- ✓ Low odor, low VOC
- ✓ Quick drying and durable
- ✕ Needs two kits for dark tiles
- ✕ Not suitable for metal tubs
| Volume | 33 ounces (approx. 975 ml) |
| Type | Water-based acrylic resin |
| Drying Time | Touch-dry within 24-36 hours; fully cured in 7 days |
| Coverage | Suitable for multiple surfaces; two kits recommended for dark tiles |
| Application Tools | Brush, roller, gloves, masking supplies, sandpaper included |
| Chemical Composition | Low-VOC, low-odor, water-based formula |
The moment I opened the DWIL Tub & Tile Refinishing Kit, I noticed how smoothly everything was packed — no mess or fuss. The 33oz water-based base looked creamy and easy to spread, which immediately made me think this was going to be straightforward to work with.
What really caught my attention was how lightweight and comfortable the gloves felt. No stiff or cheap material here — I could handle the brush and roller with ease, and the manual was clear and helpful.
It’s obvious this kit is designed for both DIYers and pros who want quick, clean results.
Applying the paint was surprisingly fuss-free. The low odor and water cleanup meant I didn’t need to open windows or wear a mask constantly, which is a huge plus in small bathrooms.
The finish was smooth, and I appreciated how the water-based formula dried quickly to a nice matte look.
Drying times were exactly as promised — touch-dry in about 24 hours, and fully cured in a week. I particularly liked how durable the finish felt once cured; it didn’t chip or flake despite some accidental bumps.
Plus, the color options give you flexibility for different styles and needs.
However, a small downside is that for dark tiles, you’ll need two kits — which adds to the cost. Also, it’s not suitable for metal bathtubs, so if you’re working on a cast iron or acrylic tub, keep that in mind.
Overall, this kit makes bathroom refreshes achievable without professional help, with minimal hassle and good results.
What Is the Best Bathtub Refurbishing Kit Available?
The benefits of using a bathtub refurbishing kit include cost savings, less time and labor compared to full replacements, and the ability to customize the tub’s appearance. Many homeowners appreciate the environmental benefit of refurbishing rather than discarding old bathtubs, reducing waste and promoting sustainability.
Best practices for using a bathtub refurbishing kit include thorough cleaning and preparation of the tub surface, following all safety precautions outlined in the product instructions, and allowing adequate curing time before using the tub. It is also advisable to use a quality respirator mask and gloves during application to protect against fumes and skin irritation.
What Key Features Should You Consider When Choosing a Bathtub Refurbishing Kit?
Durability ensures that the refinishing lasts through years of use; a high-quality kit will withstand daily wear and tear, preventing the need for frequent reapplication.
The finish quality impacts not only the appearance but also the feel of the bathtub, with glossy finishes often providing a more modern look while matte finishes can offer a classic aesthetic.
Safety and VOC levels are vital for maintaining a healthy living environment, especially if the refurbishing is done indoors. Kits with low VOCs minimize harmful fumes during application.
Repair capabilities are beneficial for addressing not just surface aesthetics but also functional issues, as fixing chips or cracks can extend the life of the bathtub.
Color options are essential for achieving the desired look; a kit with a broader color palette allows for greater customization and personalization of your bathroom space.
Included accessories can make the refurbishing process more convenient, as having the right tools on hand eliminates the need for additional shopping and ensures a more seamless experience.
How Does Durability Impact the Effectiveness of a Refurbishing Kit?
Durability plays a crucial role in determining the effectiveness of a refurbishing kit, especially for items subjected to frequent use like bathtubs.
- Material Quality: The materials used in a refurbishing kit significantly affect its longevity and performance. High-quality materials resist chipping, cracking, and peeling, ensuring that the refinished surface remains intact for an extended period, which is essential for maintaining a bathtub’s appearance and functionality.
- Adhesion Properties: A refurbishing kit’s ability to adhere to the existing surface is vital for durability. Kits with superior adhesion properties form a strong bond with the bathtub, preventing delamination over time and ensuring that the finish withstands the rigors of daily use, including exposure to water and cleaning agents.
- Resistance to Chemicals: Bathtubs are often cleaned with various chemical products, which can wear down a refurbishing finish. The best bathtub refurbishing kits incorporate coatings that are resistant to harsh chemicals, ensuring that the surface remains protected and maintains its aesthetic appeal despite regular cleaning and maintenance.
- UV Stability: Exposure to sunlight can degrade certain finishes over time, causing discoloration and brittleness. A durable refurbishing kit will include UV-stable components that help retain color and integrity, making it suitable for bathtubs located in areas with significant sunlight exposure.
- Ease of Application: The durability of a refurbishing kit can also depend on how easy it is to apply. Kits that require multiple layers or complicated application processes may compromise the finish if not applied correctly, while those designed for straightforward application tend to yield more consistent and long-lasting results.
Why Is Ease of Application Important in a Refurbishing Kit?
According to a study by the National Kitchen and Bath Association, products that are user-friendly tend to have higher customer satisfaction ratings, as they reduce frustration and time spent on DIY projects (NKBA, 2021). When a refurbishing kit is easy to apply, it encourages more homeowners to undertake bathtub refinishing, leading to better outcomes and more positive reviews.
The underlying mechanism at play here is that when a product is designed with user experience in mind, it minimizes errors and mishaps that can occur during application. A straightforward process typically includes clear instructions, user-friendly tools, and quick-drying materials, all of which contribute to a seamless experience. This ease of use not only empowers consumers but also leads to a professional-looking finish, thereby enhancing the perceived value of the refurbishing kit and encouraging repeat purchases.
Moreover, the psychological aspect of ease of application cannot be overlooked. A study published in the Journal of Consumer Research found that consumers are more likely to engage with products that appear simple and accessible, as they associate these qualities with reduced risk and increased confidence in their DIY abilities (JCR, 2020). Therefore, a bathtub refurbishing kit that prioritizes ease of application effectively taps into consumer psychology, driving sales while ensuring that users feel competent in achieving their desired results.
What Are the Most Trusted Brands for Bathtub Refurbishing Kits?
The most trusted brands for bathtub refurbishing kits include:
- Rust-Oleum Tub & Tile Refinishing Kit: This kit is highly regarded for its ease of use and durability, offering a glossy finish that can last for years. It includes everything needed for a complete refinishing project, including a two-part epoxy that provides a strong bond and high resistance to wear and moisture.
- Magic Tub & Tile Refinishing Kit: Known for its quick-drying formula, this kit allows users to complete their project in a single day. It features a spray application that ensures an even coat and is ideal for those seeking a DIY solution that doesn’t require professional skills.
- Homax Tough as Tile Bathtub Refinishing Kit: This product is praised for its long-lasting results and ability to withstand heavy use, making it a great option for busy households. The kit is designed to resist stains and water damage, providing a professional-looking finish that can rejuvenate old bathtubs.
- Bathtub Refinishing Kit by Epoxy-Coat: This brand is noted for its high-quality epoxy that can restore both bathtubs and tiles. It provides a durable, chemical-resistant surface that is easy to clean and maintain, making it suitable for both residential and commercial applications.
- DIY Bathtub Refinishing Kit by Bathworks: This kit is ideal for those looking for a budget-friendly option without sacrificing quality. It includes all necessary components and offers comprehensive instructions, making it accessible for first-time users looking to revitalize their bathtubs.
How Do You Properly Prepare Your Bathtub Before Refurbishing?
Proper preparation is essential for a successful bathtub refurbishing project.
- Cleaning the Bathtub: Thoroughly clean the bathtub using a non-abrasive cleaner to remove soap scum, grime, and any contaminants. This step ensures that the surface is free of oils and dirt, which can prevent the refinishing materials from adhering properly.
- Repairing Surface Damage: Inspect the bathtub for any cracks, chips, or scratches that need attention. Use an appropriate filler or epoxy to repair these imperfections, as this will create a smooth surface for the refinishing process.
- Sanding the Surface: Lightly sand the entire surface of the bathtub with fine-grit sandpaper. This creates a rough texture that helps the refinishing kit adhere better, leading to a longer-lasting finish.
- Masking Off Areas: Use painter’s tape to mask off any areas that you do not want to be refinished, such as faucets and edges. This protects those elements and ensures a clean finish without overspray or drips.
- Ventilating the Area: Ensure that the bathroom is well-ventilated by opening windows and using fans. Proper ventilation is crucial because many refinishing kits contain strong chemicals that can be harmful if inhaled.
- Gathering Necessary Supplies: Collect all required items, including the best bathtub refurbishing kit, applicators, gloves, and safety goggles. Having everything on hand will streamline the process and help maintain efficiency during the refurbishing project.
What Are the Steps for Applying a Bathtub Refurbishing Kit Successfully?
Successfully applying a bathtub refurbishing kit involves several key steps to ensure a smooth and durable finish.
- Preparation: This step includes cleaning the bathtub thoroughly to remove any soap scum, dirt, or oils. It’s essential to use a strong cleaner to ensure the surface is free of contaminants that could affect the adhesion of the refurbishing kit.
- Surface Repair: Inspect the bathtub for any chips, cracks, or imperfections that need to be repaired. Use an appropriate filler to fix these areas, allowing it to cure completely before moving on to the next step.
- Sanding: Lightly sand the entire surface of the bathtub with fine-grit sandpaper. This process creates a rough texture that helps the refinishing material adhere better to the surface, ensuring a long-lasting finish.
- Masking: Use painter’s tape to mask off areas around the bathtub that you do not want to be affected by the refinishing process. This includes faucets, surrounding walls, and any other fixtures to achieve clean, sharp lines and protect areas from overspray.
- Applying the Refurbishing Kit: Follow the manufacturer’s instructions carefully for mixing and applying the refinishing compound. Use a roller or spray application to apply an even coat, ensuring you cover the entire surface without drips or bubbles.
- Curing Time: Allow the newly applied coating to cure as per the kit’s instructions. This period is crucial for ensuring a hard and durable finish; avoid using the bathtub until the curing process is complete.
- Final Touches: Once cured, carefully remove any masking tape and inspect the surface for any imperfections. If necessary, lightly sand and apply a second coat for a smoother finish or touch up any spots that may need additional attention.
How Should You Maintain Your Bathtub After Refurbishing?
To maintain your bathtub after refurbishing, it’s essential to follow certain guidelines and practices to ensure its longevity and aesthetic appeal.
- Regular Cleaning: Use non-abrasive cleaners to prevent scratching the surface.
- Avoid Harsh Chemicals: Steer clear of bleach and acids that can degrade the refinishing material.
- Use Bath Mats: Place mats to prevent slips and reduce wear on the bathtub surface.
- Inspect for Chips or Cracks: Regularly check for any damages that may require immediate repair.
- Limit Heavy Items: Avoid placing heavy objects in the tub that could lead to cracks or dents.
Regular Cleaning: It’s important to clean your bathtub frequently to maintain its shine and hygiene. Use a soft cloth or sponge with a mild, non-abrasive cleaner to gently wipe the surface, as abrasive materials can scratch the newly refurbished finish.
Avoid Harsh Chemicals: Chemicals like bleach or strong acids can break down the refinishing materials used in the refurbishing process. Opt for gentle, pH-balanced cleaners to ensure the integrity of the surface is preserved over time.
Use Bath Mats: Using a bath mat not only enhances safety by preventing slips but also protects the bathtub surface from scratches and wear. Choose mats that are gentle on the surface and can easily be washed to maintain cleanliness.
Inspect for Chips or Cracks: Regular inspections are crucial in catching any small chips or cracks early before they become larger problems. If you notice any damage, address it promptly with appropriate repair kits to maintain the integrity of your bathtub.
Limit Heavy Items: Avoid placing heavy items such as large toiletries or decorative objects in the tub, as they can cause unnecessary stress on the surface. This precaution helps to prevent cracks or dents that could compromise the refurbishing work.
Related Post: